
"The pallet sign project is an absolute must! It’s perfect for personalizing a party or your home."
Materials
Tools
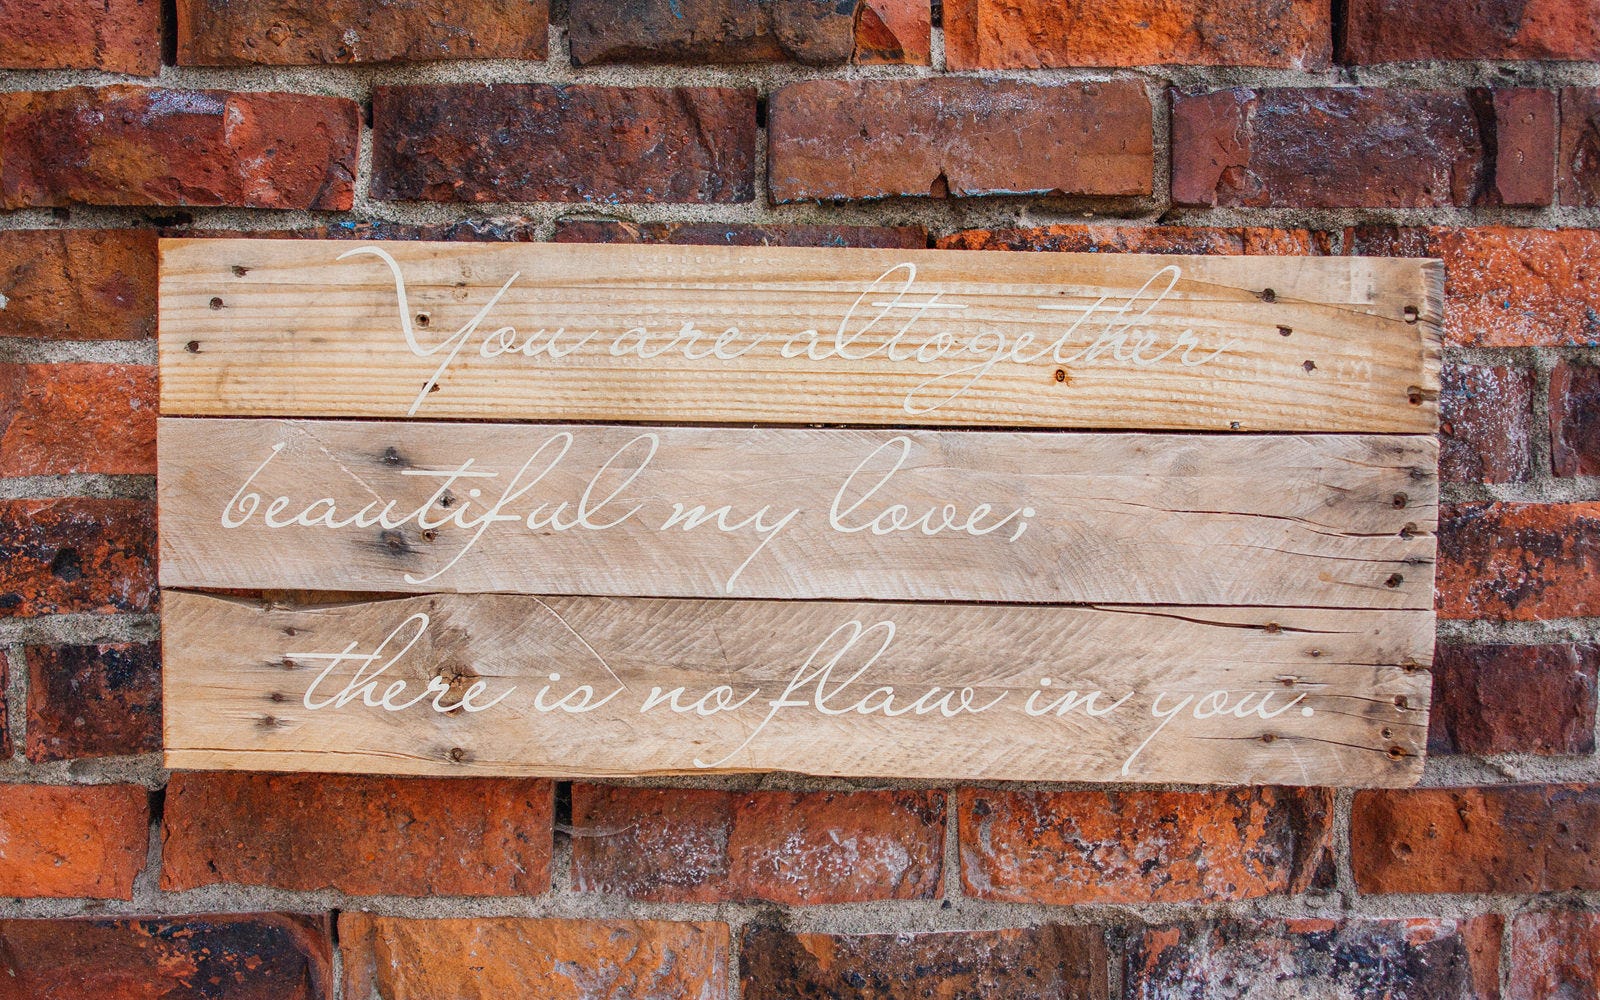
I’m making this pallet sign for my sister’s wedding. It’s beautiful, simple, and doesn’t leave a hole in your wallet! I mean, free wood may require a little extra manual labor, but it’s totally worth it. And isn’t the hard work what makes the final product feel so good anyways?
Let's get started!

Step 1: Purchase vinyl lettering
First order your vinyl letters. Before you decide on the phrase and the font you need to decide where you’re purchasing them. I ordered the words for our sign from Fruitful Vine Creations. This is a fantastic little family-owned company that I highly recommend. They are extremely helpful and very costumer service oriented. I needed the letters sooner than their regular production and shipping time, and they graciously rushed the order for me! Everything is customized and made to order. The letters for our sign came to about $30 with shipping. Keep in mind that the total cost of the project then came out to about $35. The beauty of free wood!
Step 2: Disassemble pallet
Disassemble the pallet: this step requires patience and perseverance! Using a crowbar carefully pry the top boards of the pallet away from the frame (these boards are generally in better condition than the ones on the bottom of the pallet). To avoid breaking the board, move back and forth between the three places where it’s nailed down prying up a little at a time.
This is a good time to conjure up any memories of high school physics, and remember that a crow bar is a simple machine and (like more complex machines) is designed to lighten the load of work for us. Thus this isn’t a contest to see who’s stronger, you or the pallet; that will only end in a very sore back.
Trust me, I know from experience! I’ve found that most of the time I spend with the crow bar is used in trying to get a good hold between the pallet boards; because once there’s leverage it’s actually pretty easy. My solution to this problem is to utilize a wide chisel and a hammer. With a couple strokes of the hammer you can wedge the chisel in between the boards and the frame and create space for the crow bar to do it’s magic. You can also use this technique with a small pry bar, or even with the crow bar itself though the length makes it a little awkward.
Of course, if your sign is small enough you can skip all of this manual labor and use the circular saw to cut the boards out in five minutes. For our sign I pried off three boards and cut out two smaller segments for the cross beams in the back.
Step 3: Lay out lettering
Once you have enough wood for your sign you can lay out the letters. The gaps between my boards were pretty significant and the font fairly delicate, so I was hesitant to cross over from board to board with the vinyl. Because of this I ended up cutting out the letters from their preexisting format to fit each line on the boards individually. When you have your letters lined up you can cut the boards to your desired length. This is really just an eyeballing. Be mindful of split ends and nail remnants when you’re sawing, as these can fly up when they’re cut from the rest of the board. It seems that every pallet has a number of nails that have been cut or broken off at the surface of the board, but are still embedded in there. Whatever you do don’t run into these with your chop saw!

Step 4: Cut back supports
Next cut the back supports. Measure across your sign so that your tape measure is perpendicular to the length of the boards. Cut two pieces a hair shorter than your measurement and line up on the back side of the boards. Pre-drill the cross beams, two to three holes over each top board. Again be looking out for those nail stubs. This may mean that you can’t line up the boards evenly. Personally, this was a painful realization. Just remember that they’ll be on the back and no one will ever know!
Before you put in the screws double check that everything is lined up exactly how you want it to be. Apply plenty of pressure so that the screws pull the boards together instead of pushing them apart.

Step 5: Attach hangers
If you have plans to hang this sign the next step is to attach the brass ring hangers. Position them hanging over the inside edge of the back cross beams so that they’re facing each other. With the same bit you used before pre drill through the hole, and then secure with a screw. Tie sturdy string or picture hanging wire between the two hangers. We used some nylon twine we had on hand because of its sturdiness, but wire would probably be best!


Step 6: Stain ends
This step is optional: we ended up with one end of the sign being the original board ends from the pallet, and the other end freshly cut by us for the sign. Thus we had one end that was darkened from time and the other end that was lighter than the rest of the wood. So we brought in some stain. Use a dark colored stain, grayer is best and apply it to the very end of the board. If it gets on the top it will seep across, so be careful. If it does bleed you can clean it up with some sanding. If you don’t like the idea of sanding you might be able to get a similar look with charcoal, or good old-fashioned dirt. Otherwise you can just leave the edge as is.

Step 7: Sand sign
Next flip your sign over and begin sanding. We used a fine/medium sanding sponge. I love these sponges for flat surfaces because they’re so easy to use. The good grip means that I have to put forth less effort and generally enjoy the process more. Be careful how much you sand. The goal is to smooth out any roughness and remove any surface dirt so that the letters can easily stick to the boards, but we don’t want to sand it enough to remove the natural weathered tones of the wood. This is why we employed a finer sanding sponge.

Step 8: Clean sign
After you’ve sanded grab your brush or broom and vigorously brush off the wood. This will help clean it up. Run over it with your hands until you feel that all the dust and dirt have been removed.

Step 9: Apply lettering
Now comes time for the vinyl letters. Following the directions accompanying your letters lay them out as desired and tape in place along the top edge. Bend back against the tape and remove the backing from the letters. Carefully lay the letters back down and smooth down with the applicator tool or with a credit card. The wood is a little tricky because unlike a wall it isn’t flat. It’s full of little divots and ridges.
Run the applicator tool perpendicular to the grain of the wood to ensure that the letters attach to all of these variations in the wood. Remove the tape and slowly, gently, remove the top layer from the letters. Use the applicator tool to press down the letters as you go. I found that because of the changing surface of the wood it was beneficial to use my fingernail along an especially difficult tail of a letter in place of the applicator tool.
Position the rest of your letters and attach them to the boards. Your sign is now done and ready to be hung up!


Now that you have your customized wedding sign, how about building this wooden wedding arch or these mix-and-match cake stands?