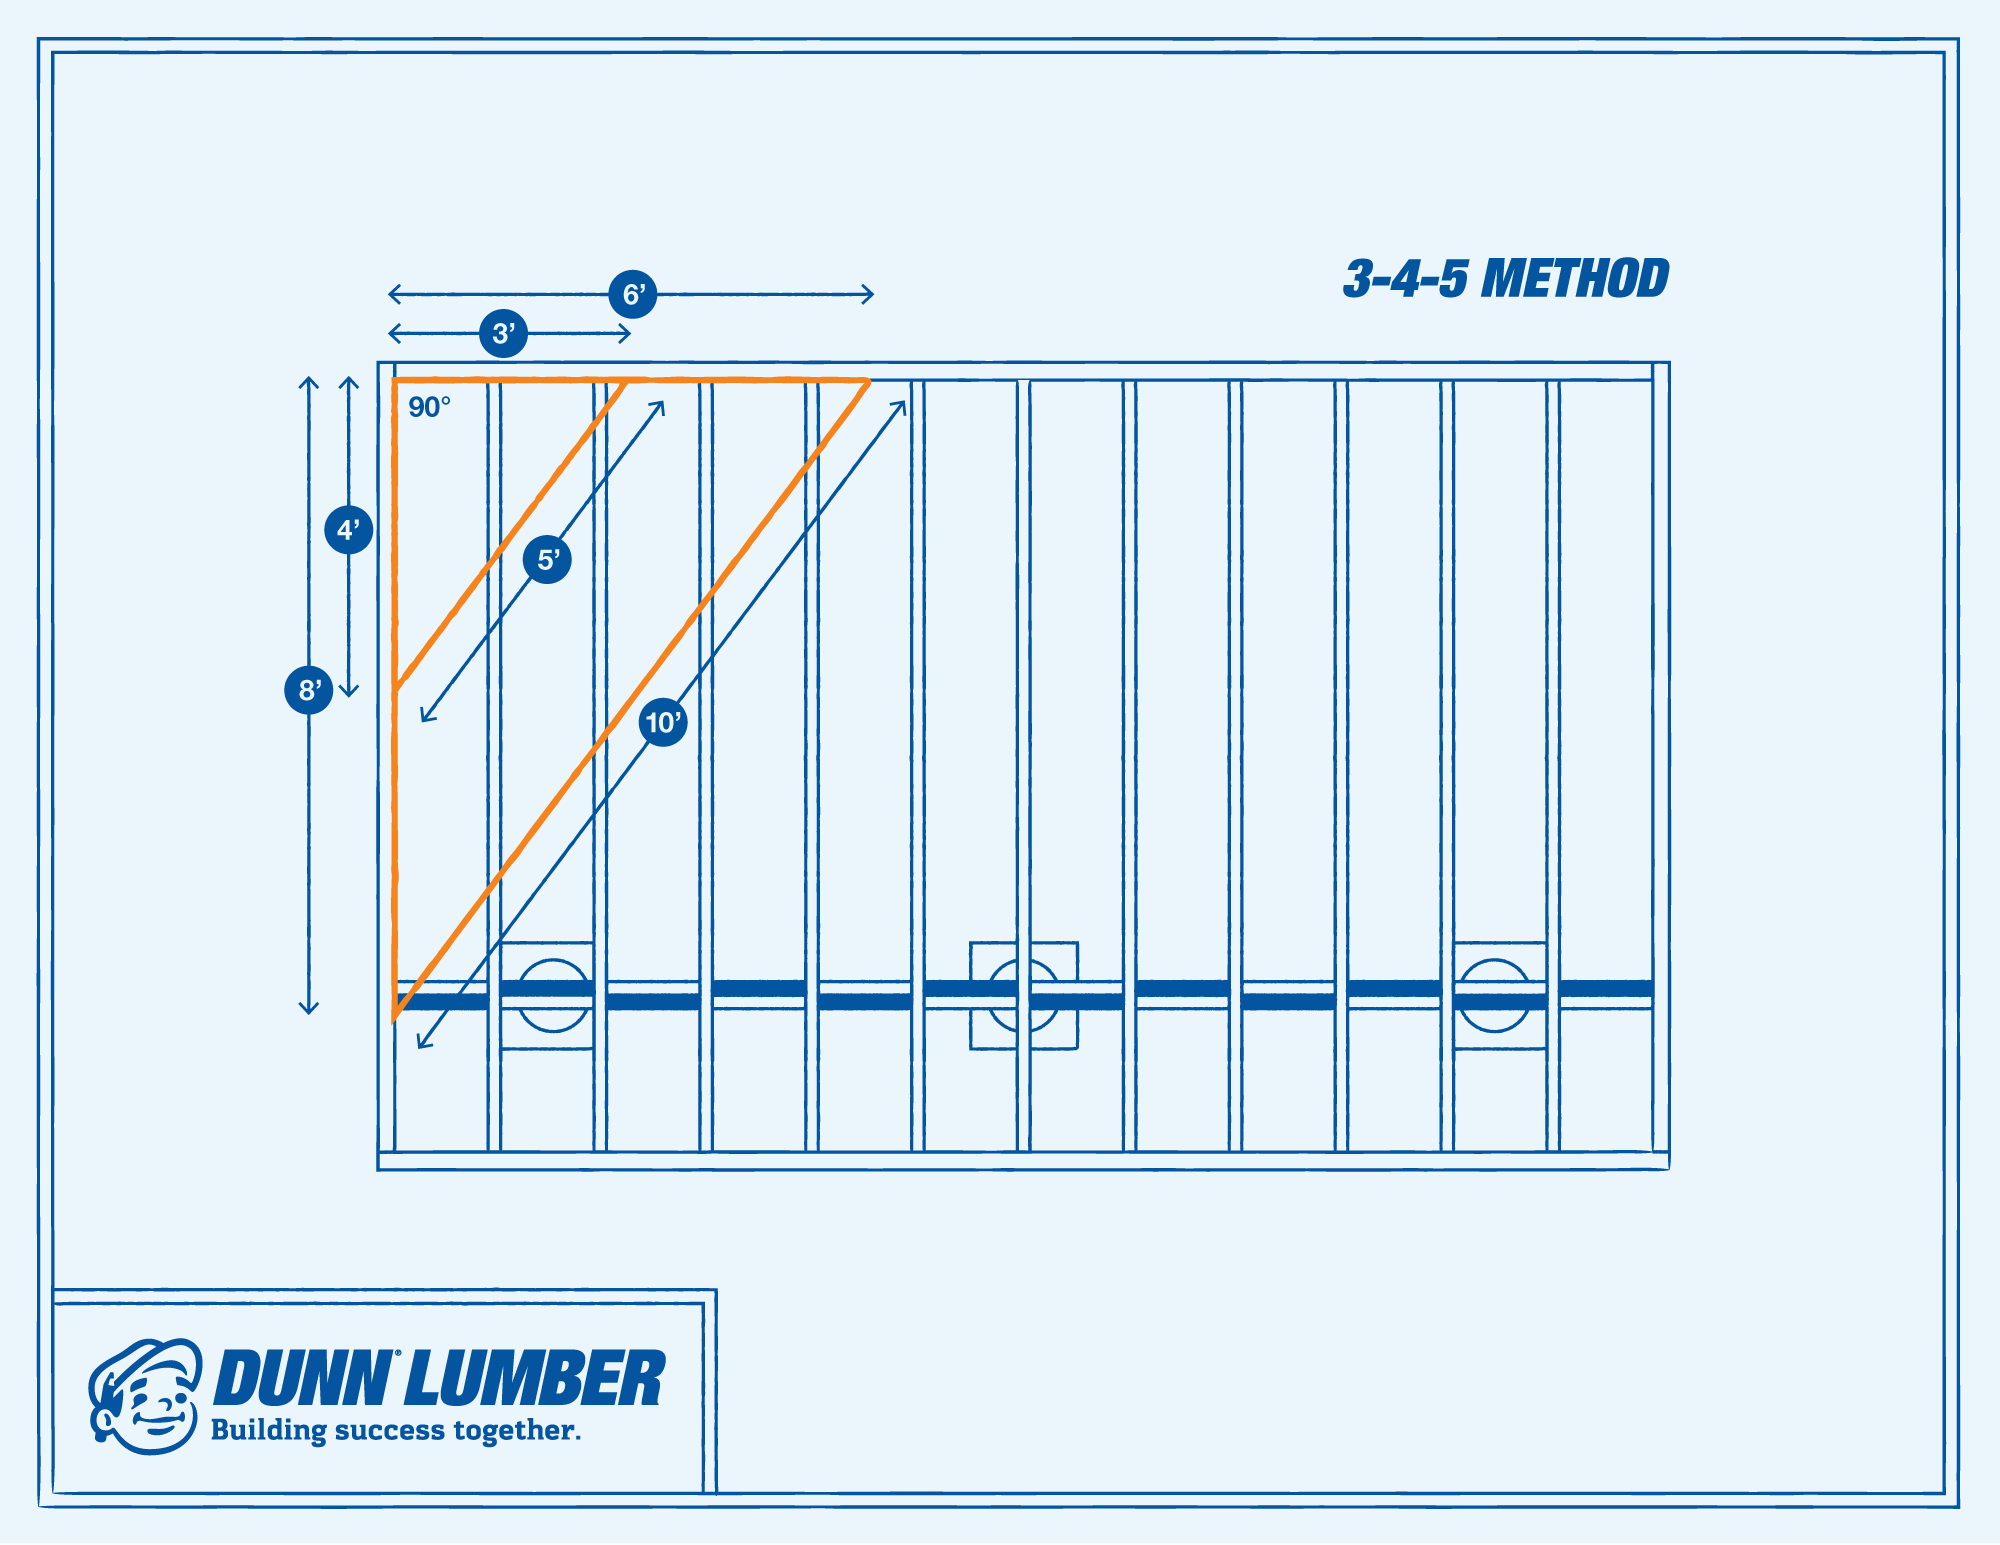
The 3-4-5 method is a method you can use to square up the framework of your deck. Each number represents a length of a side of a right triangle. When the sides measure up accordingly, you'll have a perfect 90-degree angle.
It's important to note that the 3-4-5 values can represent any unit of measurement. You can also scale the ratio up or down to fit your space. (For example, if you're framing an 8' x 12' deck, you might want to increase from 3-4-5 to 6-8-10 or 12-16-20.)
Note: This method works best with two people.
Step 1: Attach end joist to rim joist
Attach one end joist (outside joist) to the end of the ledger, making sure the top of the joist is flush with the top of the ledger.
Step 2: Level end joist with temporary bracing
Level the joist and attach a temporary 2x leg and footing to hold it in place.

Step 3: Mark ledger and end joist
Find the inside corner where the end joist and ledger meet. From there, measure three (3) feet (or equivalent ratio) out on the ledger and make a mark. From the same inside corner, measure four (4) feet (or equivalent ratio) out on the end joist and make a mark. Mark the ledger and end joist accurately on the top edge of each board.
Step 4: Attach sway brace to ledger
Using a piece of 2x material as a temporary sway brace, cut an approximate 53-degree angle on one end. Lay the cut end on top of the ledger and run the other end “long” over the top of the end joist. Position the sway brace about six (6) inches inside your marks on the ledger and end joist. Attach the end on the ledger with two (2) temporary wood screws.
Step 5: Attach sway brace to end joist
While one person holds the end of the tape measure on the mark on the ledger, have a second person pull the tape out to five (5) feet (or equivalent ratio), then adjust the end joist as needed until the mark on the end joist lines up with the five-foot mark on the tape measure.
Attach the temporary 2x sway brace to the top of the end joist with one (1) wood screw (partially driven) to hold the joist in place.
Step 6: Check for level and measurement accuracy
Recheck the end joist for level and the 3-4-5 measurements for accuracy. Adjust the temporary 2x leg bracing if needed. Finish driving the first wood screw holding the 2x sway brace to the end joist and add a second screw.