
"LifeTime Wood Treatment is simple to apply with a brush, roller, or garden sprayer in nearly any weather."
Materials
For more on how to build DIY fences, visit our tutorials on How to Set a Fence Post, How to Build a Vertical Fence, and How to Build a Horizontal Fence.
If you’re like me, you prefer low-maintenance solutions. LifeTime Wood Treatment Non-Toxic Stain is a unique wood-coating product that’s applied once and requires no maintenance.
LifeTime Wood Treatment is suitable for all outdoor wood. It never needs recoating or scraping, and it won’t fade or wear—making it a great solution for wood in the Pacific Northwest. The treatment gives wood a silver to dark brown patina, which weathering will only increase the beauty of. And the application is easy too—it’s simple to apply with a brush, roller, or garden sprayer in nearly any weather. Note that this product should not be applied if it's raining. (It's best to wait on your application if rain is about to occur, but it's fine if it rains a few hours after you've applied LifeTime Wood Treatment.)
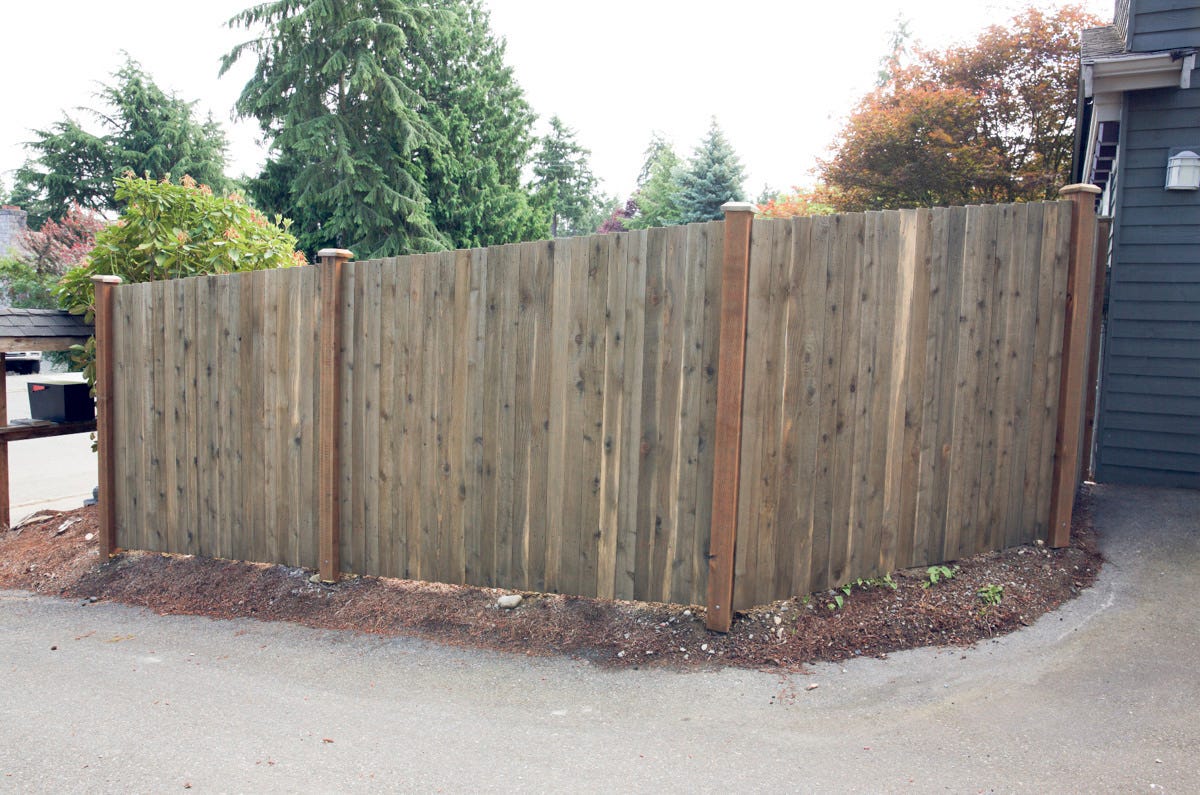
Today, we’re treating a section of new fence made from pressure-treated posts, cedar rails, and cedar fence boards. This type of lumber lasts well on its own and generally turns gray as UV rays from the sun fade the lumber. LifeTime Wood Treatment will give the wood an even patina sooner, and will help the wood last twice as long as untreated lumber. Application-wise, we chose the spray method because it’s quick, efficient, and easy.


Step 1: Mix LifeTime Wood Treatment
Once you've gathered your tools and materials, it's time to start mixing. LifeTime Wood Treatment is a combination of naturally occurring plant and mineral substances that’s packaged dry—all you have to do is add the package to the correct amount of water in a bucket. Note that this product is made in Canada, and the proportion of water is measured in imperial gallons (or five quarts to the gallon). With a stir stick or something similar, stir the product well for a few minutes. Using warm water will speed up the process of dissolving the dry ingredients, but some of the particles may never dissolve—that’s normal.
Step 2: Strain the Mixture Into Your Sprayer
If you’re applying LifeTime Wood Treatment by roller or brush, you can skip this step, but because we’re using a sprayer and not all of the particles may dissolve fully into the water, it’s important to strain the mixture as you pour it from the bucket into the sprayer. Otherwise some particles could clog your sprayer. We used a cone-shaped paint strainer. They’re inexpensive, so we doubled them up to make sure it was strained well.
Step 3: Spray on the Treatment
Pump up your garden sprayer and apply LifeTime Wood Treatment to all sides, ends, and edges of the lumber you’re treating. Spraying LifeTime Wood Treatment onto your fence is easy, and you don’t have to be overly precise—just apply evenly and thoroughly.
Step 4: Use a Paintbrush Where Necessary
Use a paintbrush to apply LifeTime Wood Treatment to areas that are hard to reach with the sprayer. Brushing the treatment onto the tops and ends of the fence boards assures they’re well-treated.
That’s it! Now all you have to do is let the wood dry. Our fence was newly built from fresh lumber, and it developed a nice colored patina virtually right away. Older lumber can be treated with LifeTime Wood Treatment, too—the treatment will work fine, but may not develop to the same color as it would on new wood.
We love the way our fence turned out and love even more that we can leave it alone and never need to refinish it to keep the fence looking great.

