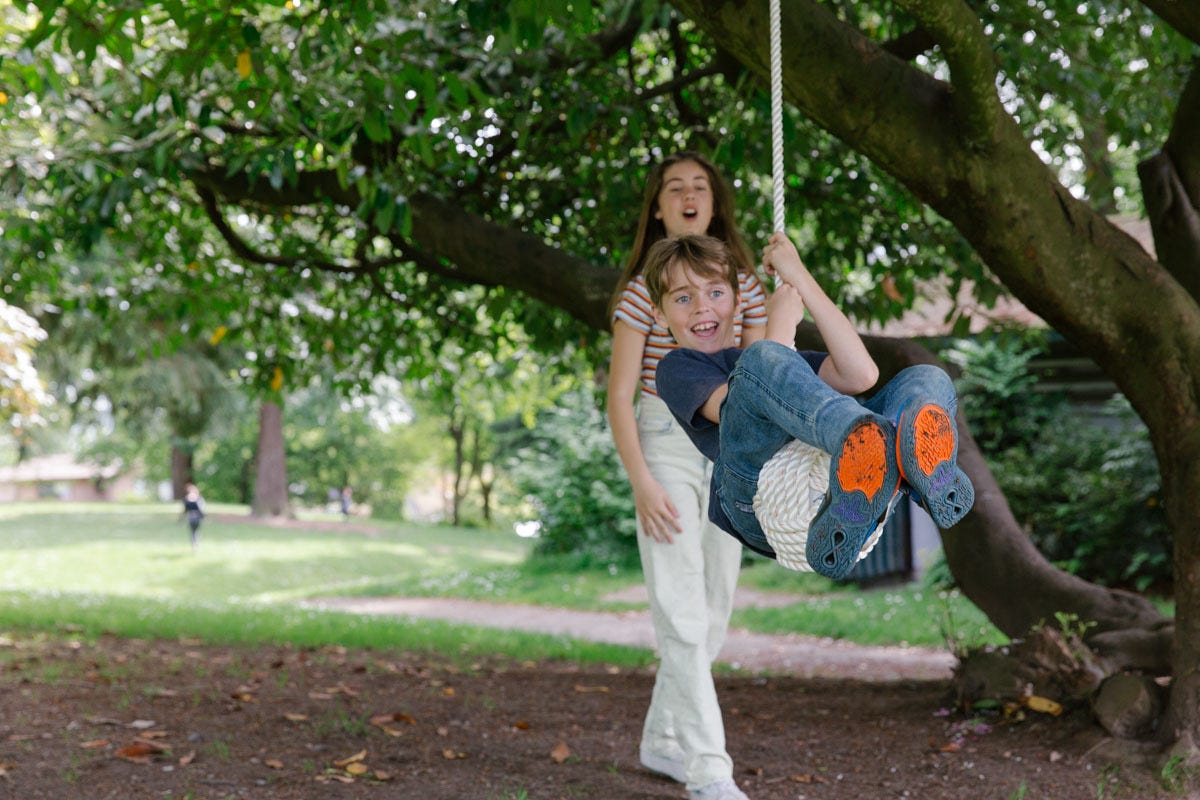

"This simple seven-step DIY rope swing brings everyone's favorite playground attraction to your own backyard."
Materials
Tools
It’s the time of year when parks are packed and you have to wait your turn at the jungle gym or on the swingset—but if you’re lucky enough to have a big tree in your yard, then you’re just a few steps away from having a swing that’s all yours.
This rope swing uses basic materials to create a giant monkey’s fist (or monkey paw) knot, which serves as the seat to this DIY swing. Grab your materials and let’s get swinging.
Step 1: Gather materials
This rope swing is made by wrapping the rope around a ball, which functions as the seat. You can adjust the amount of rope to fit the tree or hanging apparatus where you plan to hang your swing.
For the seat, you’ll need to select a ball. We went for a styrofoam ball with a 6” diameter, but you can use any ball you’d like. The larger the ball the more rope you’ll need. As for the rope, we used 40’ of ¾” thick rope, 30’ for the knot and 10’ for the tail where the swing will hang.
Step 2: Make a jig
To keep the ball from rolling around on you while you work, make a simple jig. Make an “X” using two pieces of scrap lumber and screw them together at the center. Then, holding the ball in the center, mark where the vertical rods should sit—just outside the ball on each leg of the cross
Mount the rods in the wood by drilling holes where you’ve marked. Spin the rods in, going through the bottom of the hole far enough to allow space to add a washer and nut to hold the rod in place. Put another washer and nut on the top side of each rod. Don’t worry if they look loose or sloppy—no need to perfect this step!
Step 3: Wrap first section
Now you’re going to use the jig to wrap the ball in a series of alternating “bundles.”
Start by taping one end of the rope to the ball.
Place the ball in the center of the jig so that the rods form a square in front of you and the taped rope is protruding on the left side of the jig.
Moving clockwise, wrap the rope around the outside of the rods five times; on the sixth, wrap only halfway around, pulling the rope horizontally through the center of the jig, so that it touches the bottom two rods of the square.
Step 4: Wrap second section
Now, thread the rope around the outside of your first bundle and under the ball (don’t thread under the jig). This is the first wrap of your second bundle, which should run perpendicular to the first bundle through the horizontal center of your rod formation.
Complete five full wraps in this fashion. On the sixth wrap, thread the rope halfway, through the two rods at the top of the square.
Step 5: Wrap third section
For this next “bundle” of ropes, you’re going to thread the rope under the two existing bundles, so that it’s closest to the ball. Complete six full wraps in this fashion.
Step 6: Tighten rope
Find where you taped the end of the rope to the ball, and tie a piece of twine to the rope a few inches from the tape. Remove the jig and place your rope bundle on a work surface.
Locating the twine, begin to slowly pull to remove some of the slack in the rope, moving along the rope loop by loop until you get to the loose end of the rope. Don’t pull too much—you want to make incremental adjustments and take a few passes over the entire length of rope.
The slack in the rope will cause the loops to flop around a bit; as you tighten, ensure that each loop lays flat next to the others in its bundle.
As it gets tighter it gets more challenging to tighten, but you’ll be surprised how much slack you can continue to remove if you take the time to finesse the ropes.
Continue this tightening process until there’s no slack left and you have a knot that feels very snug.
Finally, remove the twine.

Step 7: Mount rope swing
We started with a 40’ length of ¾” rope and after tying the knot around a 6” ball and tightening it, we have a 10’ tail. To mount the swing, we tied a loop at the end of the rope and then used a carabiner from our friends at SuperAnchor to secure the swing to a sturdy limb.
And there you have it—an outdoor swing.
And just like that, you're ready to swing into summer! For more outdoor DIY projects and inspiration, check out our favorite DIY yard games and this DIY camp kitchen box.