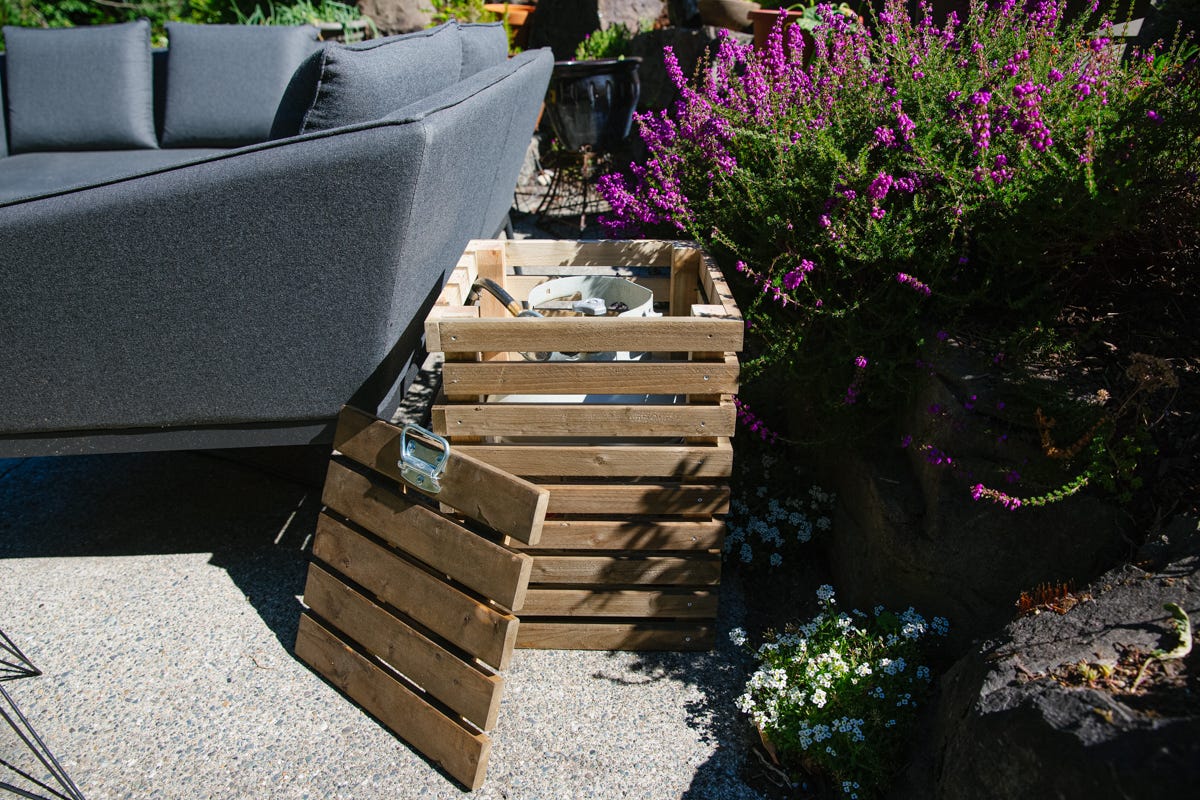

"This propane tank cover is a beginner-friendly project that's perfect for tackling on a sunny Saturday afternoon."
Materials
With summer here, a lot of us are outdoors and using fire pits, pizza ovens, or other propane-fueled devices. This project creates a simple slip-over box to visually screen a propane tank while maintaining easy access to the valve, or main shut-off. Since lumber prices have been high, we’ve used inexpensive lumber efficiently with little waste in this project. (At the time of writing this, lumber prices are well below $50 for all project materials.)
This is a great project for beginners and only takes about an hour to put together. Let’s get into it!
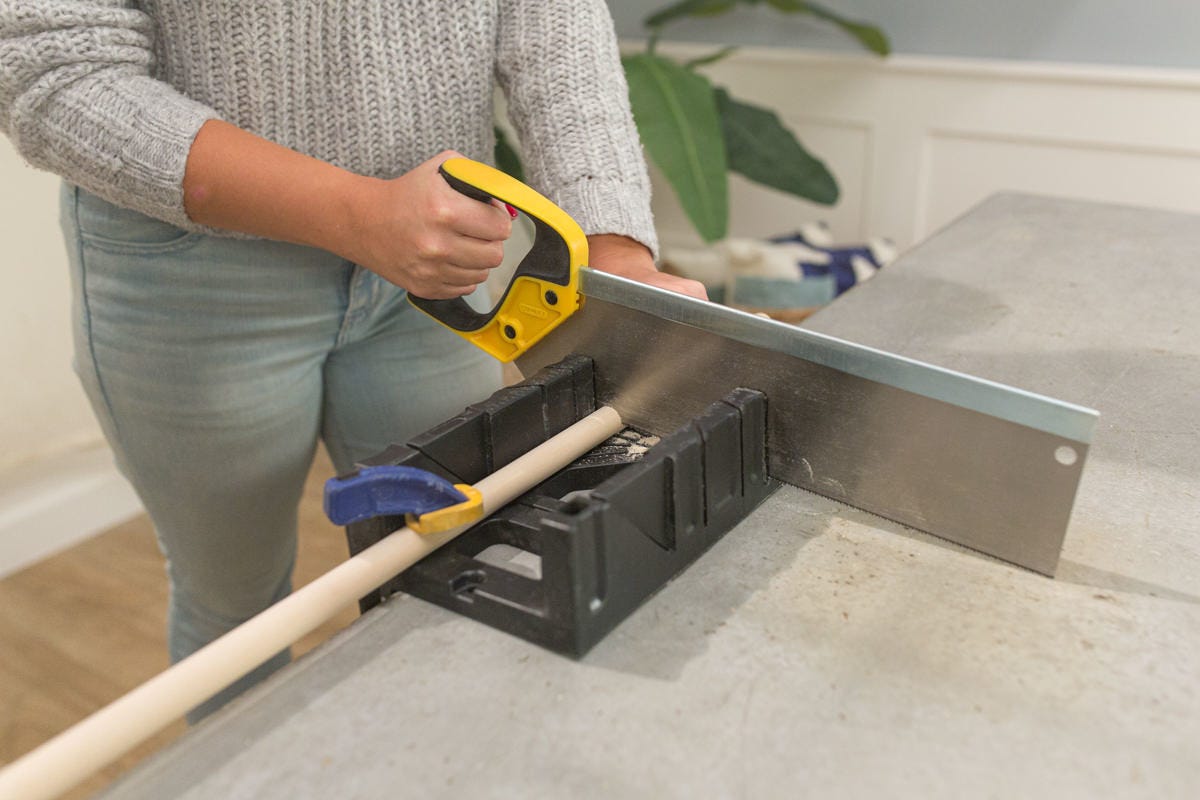
Step 1: Cut lumber
The guide below is for cutting lumber to fit around a standard 20-pound propane tank—assuming that’s what you have, use the cutting diagram below to guide you.
Cut your two-by-two into four pieces, each measuring 18 ¾” long (these will be the upright pieces). Next, cut your five one-by-twos into 13 ½” pieces, which should give you a total of 35 pieces. These will form the horizontal slats. Hold off on cutting your one-by-three for now; we’ll cut that later on in the project to make the lid.
Step 2: Sand
Once your pieces are all cut to size (minus the one-by-three piece), take a sanding sponge and smooth out the surfaces of each piece, making sure to sand off any splinters.
Step 3: Mark for pre-drilling
I’ve had my share of split boards in DIY projects, so when I’m placing a screw near the end of a board I find it’s best to pre-drill a hole for the screw. This isn’t absolutely necessary, but it gives you a little extra insurance against splits and splinters. Pre-drilling on this project also allows you to place the screws in exact spots, reducing the chances of two screws colliding when sunk into the same upright piece.
We’ll be using #8 screws so we used a 7/64” drill bit for the holes. Measure in ¾” from one end of a 13 ½” long one-by two. Make a mark just above the middle of the board (about ⅝” away from one long edge).
On the other end of the same board, measure in 1 ½” from the end and make a mark just below the center line. The goal here is to have one mark ¾” in on one end just above the center and one mark 1 ½” in from the other end just below the horizontal center of the board. Be as precise as possible — this board will become your template for the other 35 boards.
Step 4: Pre-drill holes
Once the marks from the step above are established, drill a hole at each end of the board using a 7/64” drill bit. Now, set this pre-drilled board on top of two other boards and square up the edges so they’re perfectly stacked.
Drill through the top board (the one you already drilled) into and through the boards below (our drill bit was long enough to drill through two new boards). Repeat to drill all 35 one-by-twos.
Step 5: Assemble first side of box frame
Lay two of the 18 ¾” two-by-twos on a flat surface with two of the 35 one-by-twos (the slats) on top: one at the top and the other at the bottom. Line up the slat so it overhangs the two-by-two by ¾” on the right side (the end that overhangs is the one with the hole set back farther).
The two holes should seem like they’re in the middle of the upright below. Take time to square up the edges and corners and attach the one-by-twos to the two-by-twos in each of the four corners. We used 1 ⅝” long screws and picked white-headed ones so they wouldn’t show as much.
Step 6: Assemble second side of box frame
This step is almost the same as the previous step, except the overhang of the slat is on the left side instead of the right. Fasten two one-by-two slats onto the top and bottom of the two-by-two uprights with the overhangs on the left.
Step 7: Join two sides
Now — paying attention to the way the slats will overlap the uprights — connect the two rectangular sides you already have with four more slats. Drive screws in partially to pre-set them before tightening. Now you have a rectangular box and are ready to add more slats.
Step 8: Add remaining slats to three sides
Working one side at a time, attach seven more slats to each side. To ensure even spacing, use a ¾” spacer between each slat (a piece of one-by-two works great). Start at the top of one side of the box; place the spacer below the top slat and position a new slat below the spacer. Square it up and screw it into place.
Now repeat: spacer, new slat screwed into place, spacer, another slat, and so on. When you move to the other sides of the box, use the same method, but pay attention to the slats on the adjacent side so the new slats on the side line up with the previous ones.
Step 9: Add slats to fourth side
Repeat the same process as above to fill up the last side with slats, but omit the next-to-the-top slat. This side will have a missing slat between the top-most slat and the ones below it. This gap allows the propane hose and regulator to enter the box. Screw the remaining six slats in place matching them to the adjacent sides.
Step 10: Cut lid
Now for the lid — a simple construction that sits on top of the box. Measure the outside dimensions of the top of the box (this should be 14” by 14”). Using the one-by-three piece of lumber, cut five pieces 14” long and two pieces 13” long. Working on a flat surface, lay out the five 14” pieces parallel to one another making a 14” x 14” square (you should have about ⅜” of gap between each board).
If there’s a “nice” side to your 14” pieces, put the nice side down against your work surface. Once square and even, lay the two 13” pieces perpendicular on top about 2 ⅜” in from the ends of the 14” pieces. Screw down through the two 13” pieces into the five 14” pieces below using two 1-¼” long screws at each end and one screw for the center boards.
Step 11: Finish (optional)
You can now paint, varnish, or stain your box to your liking. We chose to simply coat ours in Lifetime Wood Treatment.
A tip for finishing: Add temporary screws to both the top and bottom of two-by-two uprights to elevate it while you apply coats. These act like feet and allow you to flip the box over, exposing all the board edges as you apply your finish.
Step 12: Add handle to lid (optional)
The lid you made is lightweight and easily removed. To make it even easier to remove, you can loop a piece of rope through the slats of the lid, or add a chest handle like we did here.
For more outdoor living project inspiration, check out our DIY midcentury modern pergola and this tutorial for updating your patio furniture with Rust-Oleum's ReColor treatment.