
"I love the way that hexagon shelves look on a wall whether it's a cluster, several lined up in a row, or just one. They dress up a room, adding style while still maintaining simplicity. And because they're shelving units they can be both decorative and organizational. The best of both wo"
Materials
Step 1
Begin by gathering the materials you'll need and deciding what size you want your hexagons to be. There is a world of inspiration for this on Pinterest. We went with cute and small: 1x4 boards with six inch sides for the hexagons.

Step 2
Once you've decided on your size, you're going to make your cuts. Set your miter saw to 30° and cut both ends so that your piece makes a trapezoid where one side is shorter and one side is longer. We measured ours so that the longer side of each piece was six inches.
Pro tip: Before you go forward do a dry fit, make sure that all the pieces will fit together, and make any alterations necessary.
Step 3
When you've made your cuts, begin sanding. With a 150 grit piece of sandpaper, smooth out any roughness around the cuts. If you want a really smooth finish on your wood you can go over the whole thing with 220 grit, but we didn't find this necessary.

Step 4
Following the directions on the can, stain the pieces to the desired color. We applied two coats of Varathane in the color Provincial. Be sure to stir or shake the can before you apply the stain, and don't forget to wipe it down afterwards!


Step 5
After the stain has dried you can begin constructing your shelf. Squeeze a thin bead of glue onto the end of one of the cuts and fit against another of the pieces. This next part is a little tricky because of the angle of the joints. This is a good time to bring in an extra pair of hands, or we recommend gluing three of the pieces together (and then the other three) and letting them dry before you proceed.


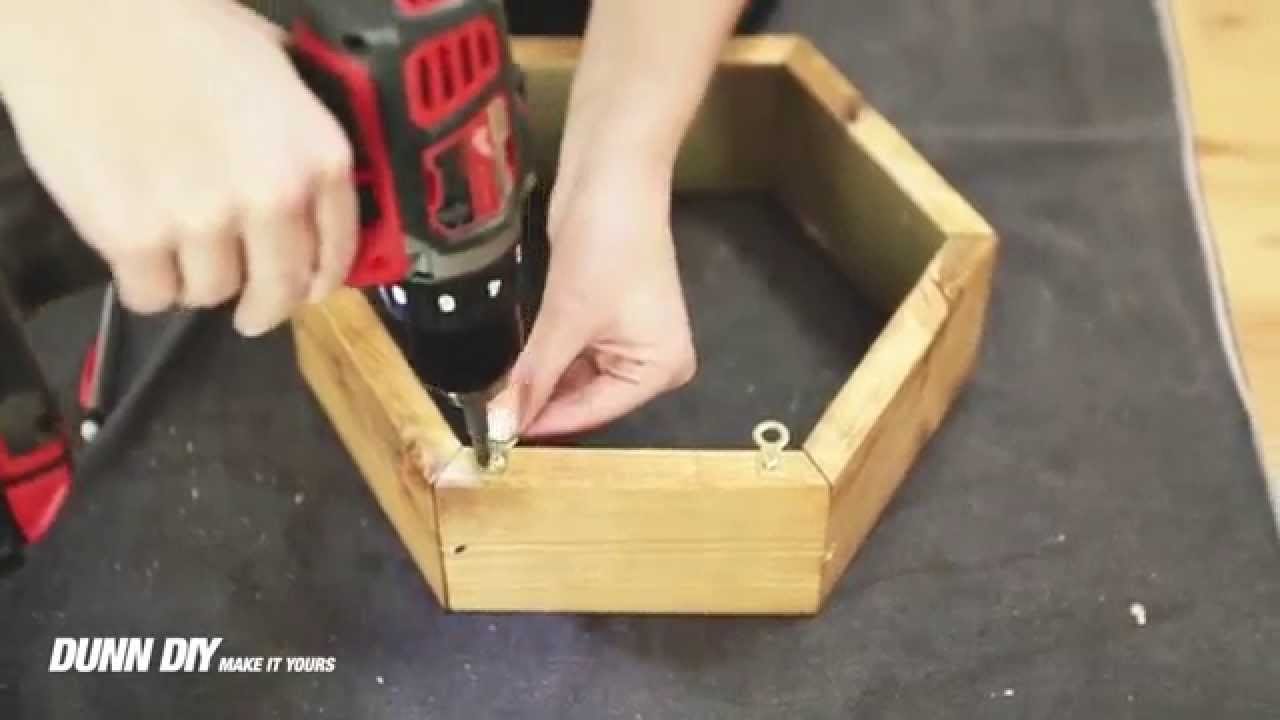
Step 6
With the drill bit, drill the holes for the screws. We pre-drilled for two screws on either side of the bottom piece for extra support, and one screw through the rest of the joints. Normally we recommend doing all the pre-drilling first before securing screws, but this one is significantly easier if you fasten each screw before drilling the next hole. The holes you'll be drilling are angled. The best way to do this is to start out at a 90° angle and then turn the drill after you've made an indent. This will help prevent the drill from slipping. Be very careful to drill straight into the end of the secondary piece to avoid breaking through. Connect the rest of the pieces.
If you glued the two halves separately connect them now with wood glue and fasten them with screws. You do not need to wait for the glue to dry this time.

Step 7
This next step is optional: After the stain has fully dried (approximately 24 hrs), it's time to spray paint. Lay out a piece of plastic outside, and tape off the part of the shelf you don't want painted. We cut off a section of the plastic and taped it to the outside of the hexagon. Apply as many coats as needed and allow to dry before removing the tape.


Step 8
The final step is mounting. We used a couple ring hangers attached to the back of the shelf to fix it to the wall. Drill a small hole in the back of the shelf using the hanger as a guide, and secure the hanger in place with the screw provided. The hanger can either stick out above the shelf or hang down below the shelf. You can then use screws to mount it to the wall. If you're unsure about the best way to do this you can always talk to a Dunn Lumber employee.

Your honeycomb shelf is all done! Now it's time to get creative. Have fun!
