
"My entryway is very small and narrow with room for absolutely nothing, yet somehow always ends up becoming home to all the random junk in my house. I think one of the best ways to keep this space clean would be to actually utilize it for what it’s supposed to be: an entryway (not a garage sale)!"
I love moments of discovering new and creative ways to utilize your space and organize your home—moments of looking outside the box and making your space work for you. Unfortunately, sometimes when I discover new techniques, they don’t always apply to my specific space. Sometimes, space-saving methods require more room than I actually have. Isn’t that just annoying? But recently, I was in a furniture store and walked by one of the narrowest tables I’ve ever seen, and I thought, “Now that’s something that I could use!”
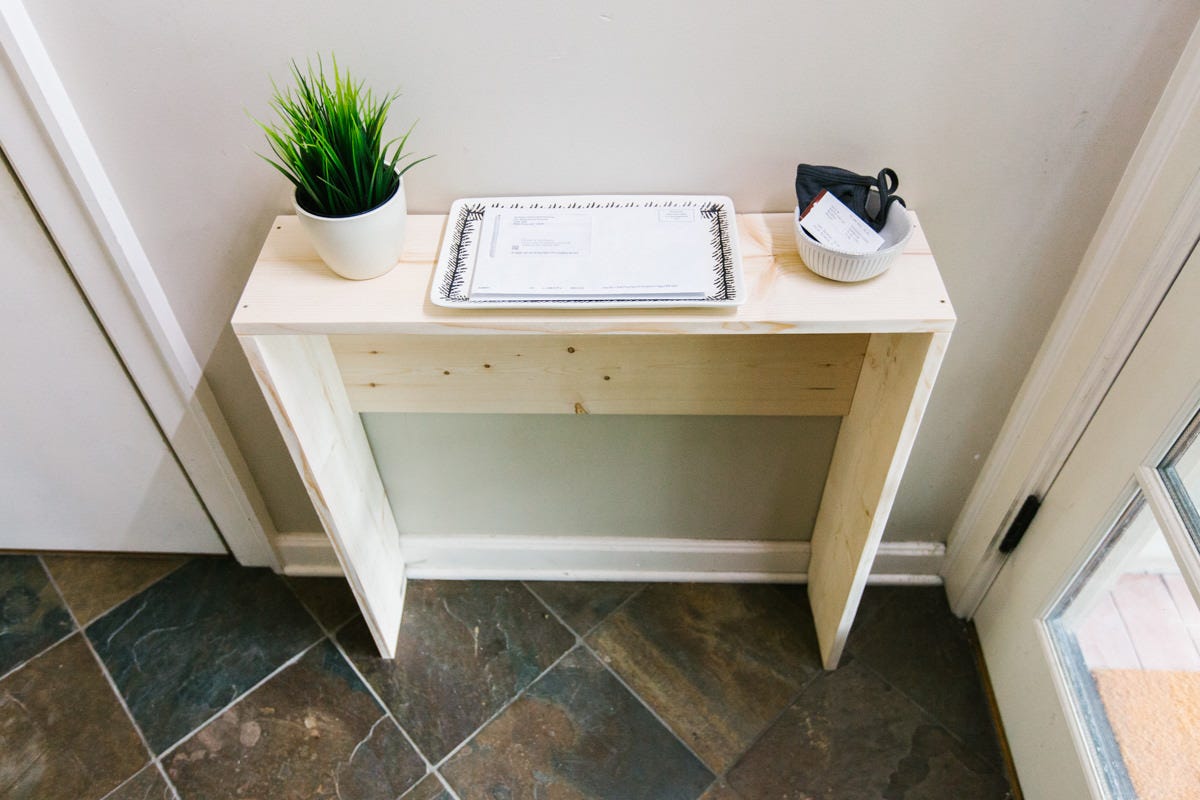
My entryway is very small and narrow with room for absolutely nothing, yet somehow always ends up becoming home to all the random junk in my house. I think one of the best ways to keep this space clean would be to actually utilize it for what it’s supposed to be: an entryway (not a garage sale)! I love the idea of working with the limited space by creating a narrow entryway table to store keys, wallets, mail, and various other items that are always making their way in or out of my house.
This simple project was made out of a couple of one-by-eight boards, but I think I could have gotten away with one-by-six boards and still had enough tabletop area. Assess your space to determine the width, length, and height that’s best for your table. Now let’s get to it!
Step 1: Cut one-by-eight boards to length
Cut one piece to 29” for the tabletop. Cut two pieces to 29 ¼” for the table legs. And cut one piece to 27 ½” for the horizontal support piece.


Step 2: Cut notches for moulding
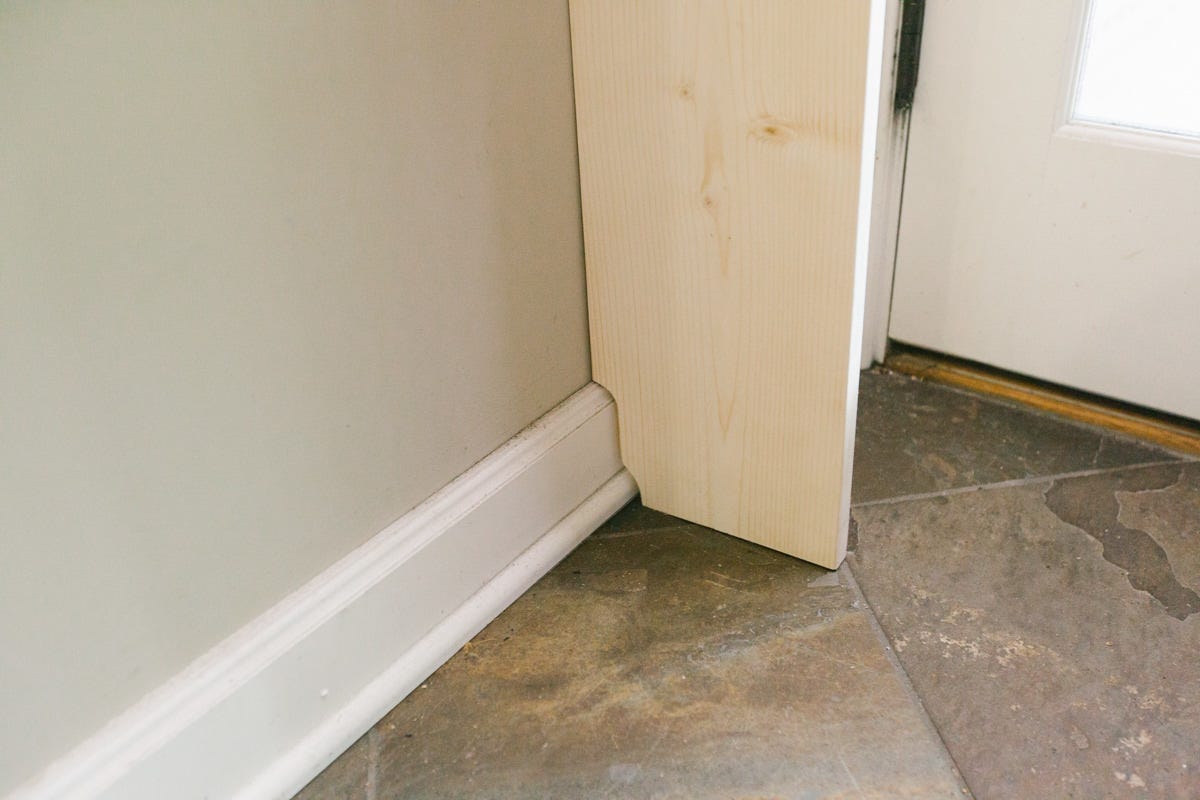
Something that drives me crazy about pushing tables up against a wall is the gap between the wall and the table’s edge that's created by moulding at the bottom of the wall. And especially with a table so narrow, that gap feels significant. Since we’re trying to utilize our small space in the best way possible, I decided to remedy this so that the table sits right up against the wall. It takes up less space, and you’re less likely to drop your keys in the gap.
Measure the baseboard moulding in your home to get an idea of the size of notches you’ll need to cut. Draw an outline on the bottom back edge of the table legs (the 29 ¼” lengths). Cut out the shape with a coping saw or a jigsaw. Make sure that the notches fit around the baseboard before moving on to the next step.


Step 3: Sand
Now that all the cutting is done, it’s time to sand. You can use a fine/medium sanding sponge or a power sander with 100 to 150-grit sandpaper. Whenever I'm building furniture I opt for the power sander to give an extra smooth finish.


Step 4: Assemble your table
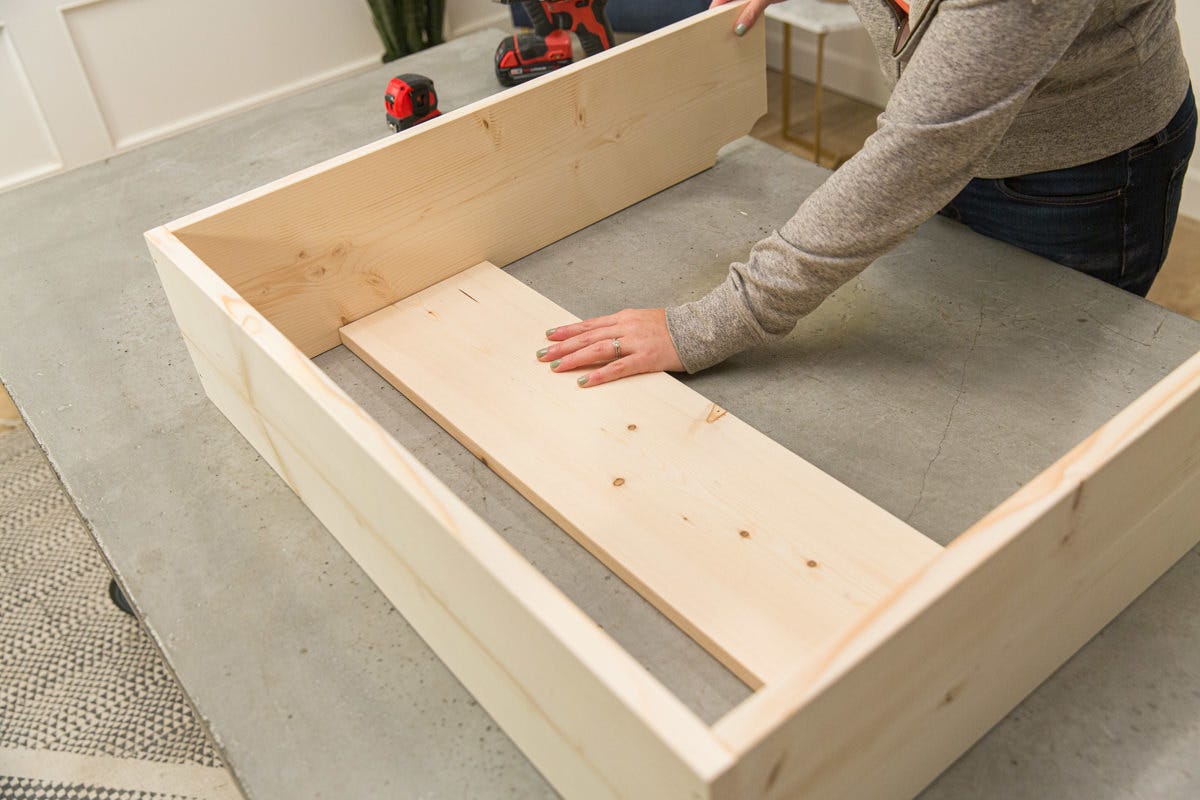
Pre-drill through each end of the tabletop piece (29”). Get a screw started in each hole, then line up the tabletop end with the top of one of the table legs. Drive the screws into the table leg to secure the pieces together. We used 1 ⅝” finish head screws.
Once both legs are secured to the top, lay the table on its back (with the notches in the legs facing down). Measure down from the top of each leg and mark at 5”. Line up the horizontal support piece in between the legs with the top at each mark. Pre-drill through the legs into the ends of the support piece and secure with screws.


Step 5: Apply finish
I always highly recommend a clear finish for any piece that’s going in your home. The clear finish not only protects the wood from dirt, stains, and watermarks—it also gives you a smooth surface for dusting that the bare wood won’t on its own.
If you like, you can first add a stain to the wood. I personally like the look of raw wood and it works with the aesthetics of my home. If you’re staining first, make sure that you allow as much time as necessary for the stain to fully dry before moving onto the finish.
Because the wood is so light, I picked a water-based polyurethane finish because this will prevent the wood from yellowing. If you like that more golden look, you can opt for an oil-based finish. Follow the directions on the can, and make sure that you apply the minimum amount of coats recommended. Sanding before the final coat (or between each coat, if that’s recommended) will help create that smooth professional finish that will make your DIY project a lasting piece in your home.


For more projects designed to organize your living space, check out how to make a blanket ladder, how to make a DIY buffet table, and how to make a shoe storage bench.