
"I don’t think DIY is always about ease or about being cost-effective, as much as it’s about taking joy in building something, and then appreciating it in your home and enjoying the pride and satisfaction of having made it with your own hands."
Materials

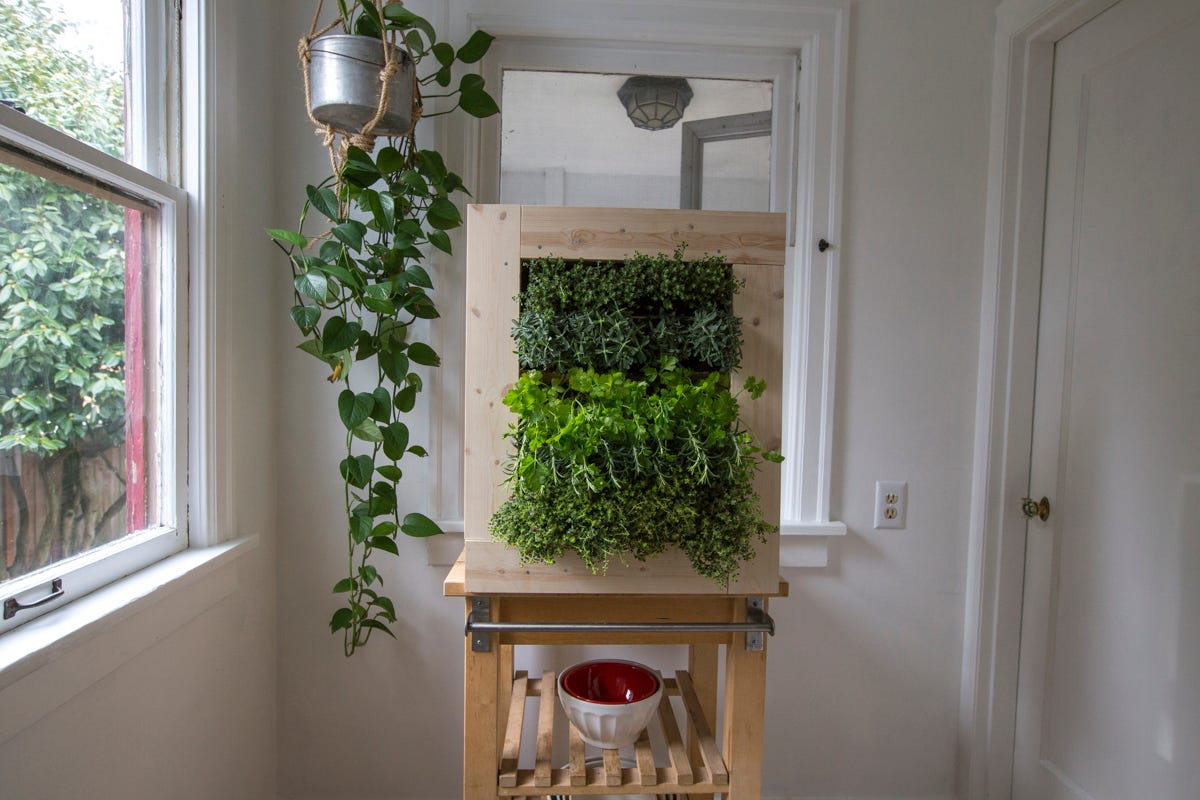
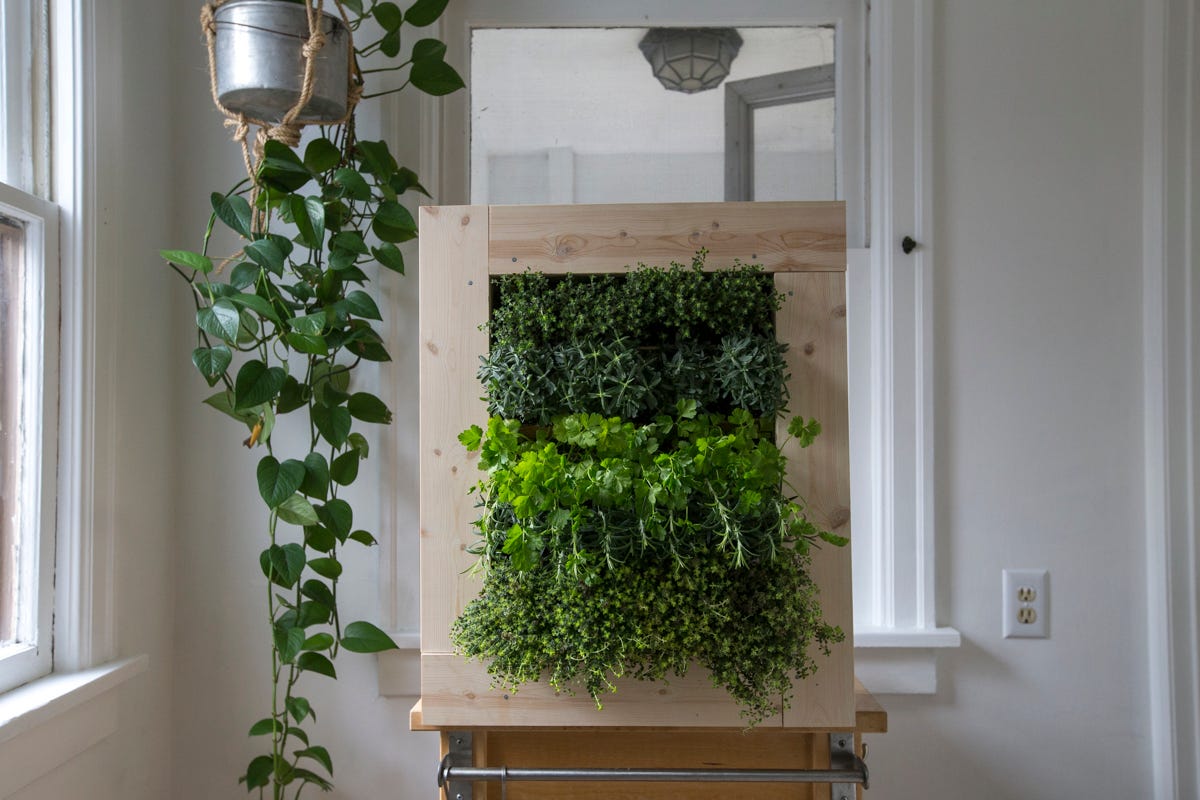
This idea came from a Williams Sonoma® photo my mom emailed me a few months ago. I’d seen a lot of these wall planters around with succulents in them, but theirs was the first I’d seen with herbs.
I like that it’s decorative and beautiful, but it also has a function. I always think the things in your home should be beautiful, but beauty is pretty pointless if none of it is functional. Having something like this is like having your own little garden hanging on your wall. How great is that?
Our construction turned out differently from the original. It’s always different when you DIY something versus when it’s ordered from a company. There’s no plastic or metal pieces in this; it’s 100% wood. If you buy a planter like this pre-made, it will likely be lined or have or plastic or metal on the interior, because water won’t hurt those materials over time.
There’s something special about making something with your own hands. You don't get the same feeling when you go to the store and buy something. I don’t think DIY is always about ease or cost-effectiveness as much as it’s about taking joy in building something, appreciating it in your home, and enjoying the pride of having made it with your own hands. It’s about empowerment; you build something like this and hang it on your wall and you feel so accomplished. Sure, it often is cheaper; there are those moments when you build something and it’s significantly cheaper or it’s super easy, and that’s its own excitement. But there’s something outside of that: Sometimes it’s just for the love of doing it.
We'll be featuring this project along with several others at the Northwest Flower and Garden Show. Buy your tickets here and come visit the Dunn DIY team February 22-26, 2017 at the Washington State Convention Center. We'll be in booth #707 located in the south hall.
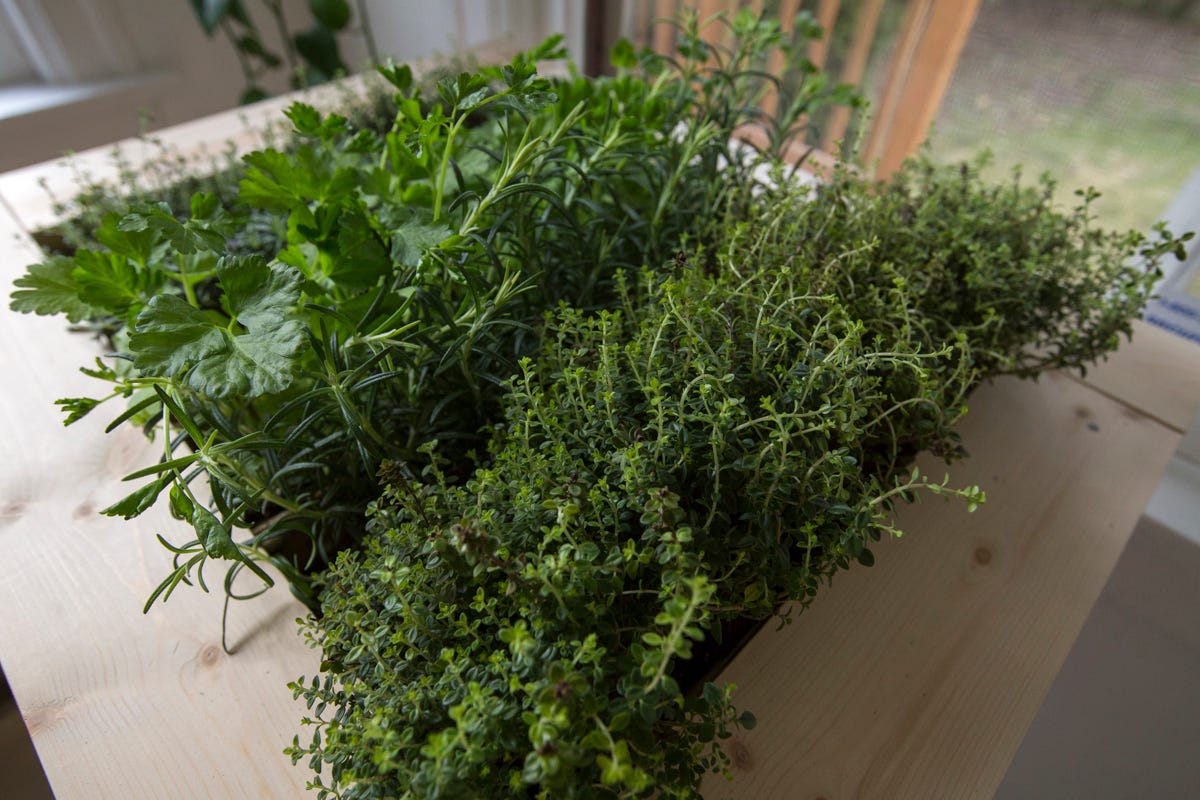
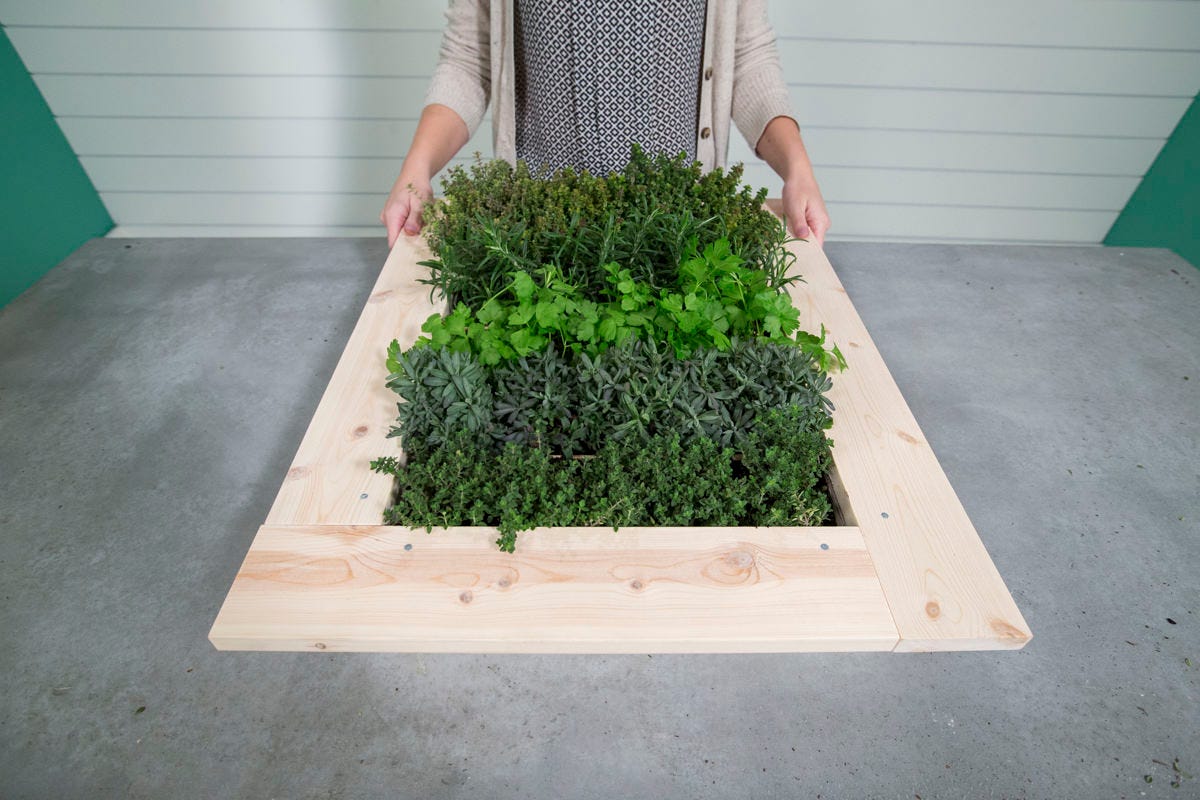
Step 1: Selecting the Plants
We headed over to Swansons Nursery to choose our herbs. Like Dunn Lumber, Swansons is a local Seattle business. They also provide expert advice on how to grow a garden in the Pacific Northwest. They've got tons of useful resources, like this Herb Care Guide. Here are the plants we chose for our herb garden:
- English Wedgewood Thyme
- Flat Italian Parsley
- Lavandula Dicote Superior (English Lavender)
- Rosemary Madalene HIll Hardy
- Lemon Thyme

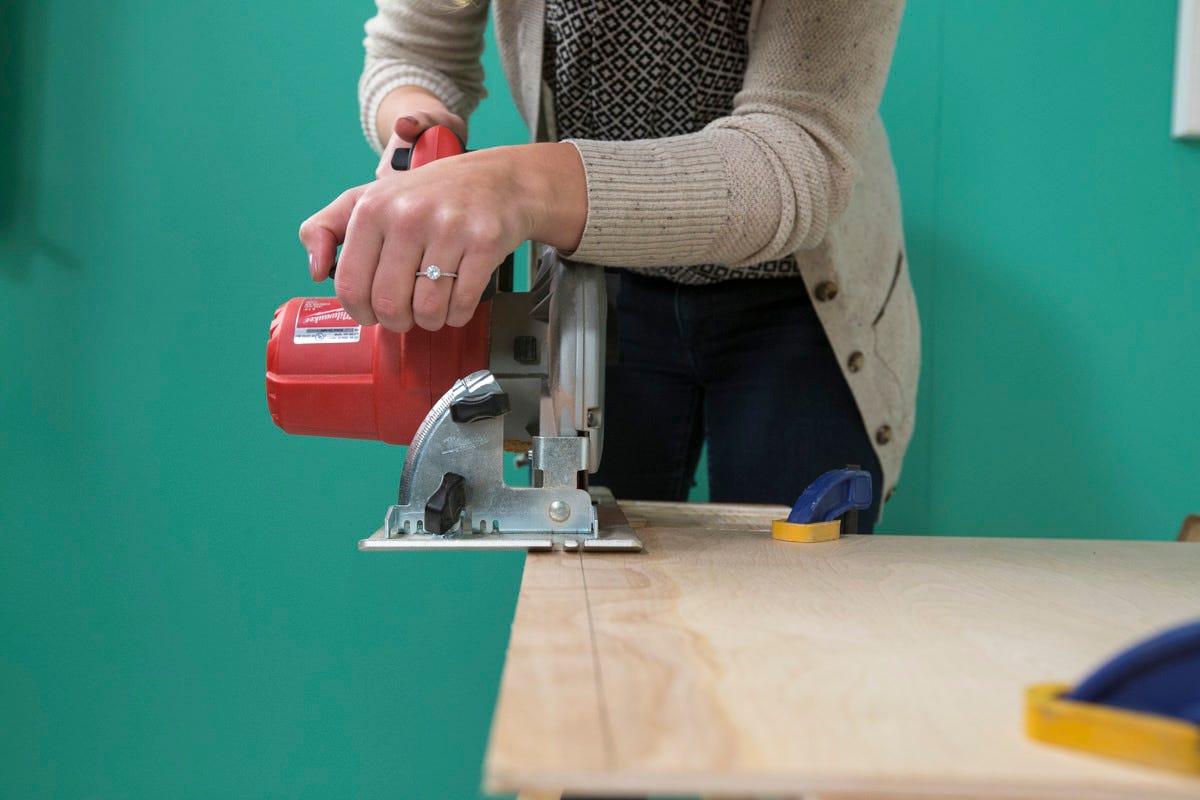
Step 2: Cut Lumber
We used white wood framing lumber. It’s pretty inexpensive, and we really like the look of the pale wood. Later we’ll finish it with a whitewash, so the light wood really lends itself to that.
- With a circular saw or chop saw, cut the 2” x 4” into two 14” pieces and two 23” pieces. Cut the 1” x 4” into two 17 ½” and two 22" pieces.
- With a circular saw, cut the ¼” plywood into one 17” x 23” piece, and five 14” x 3 ¾” pieces.
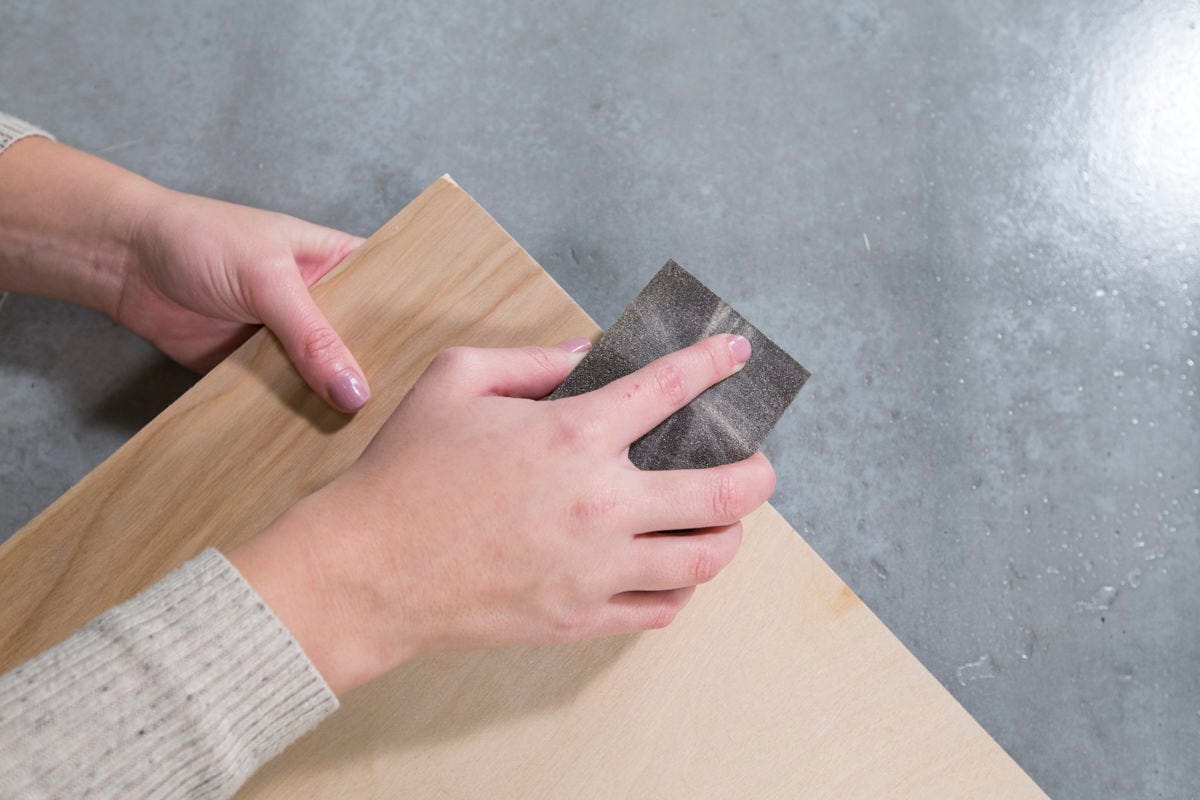
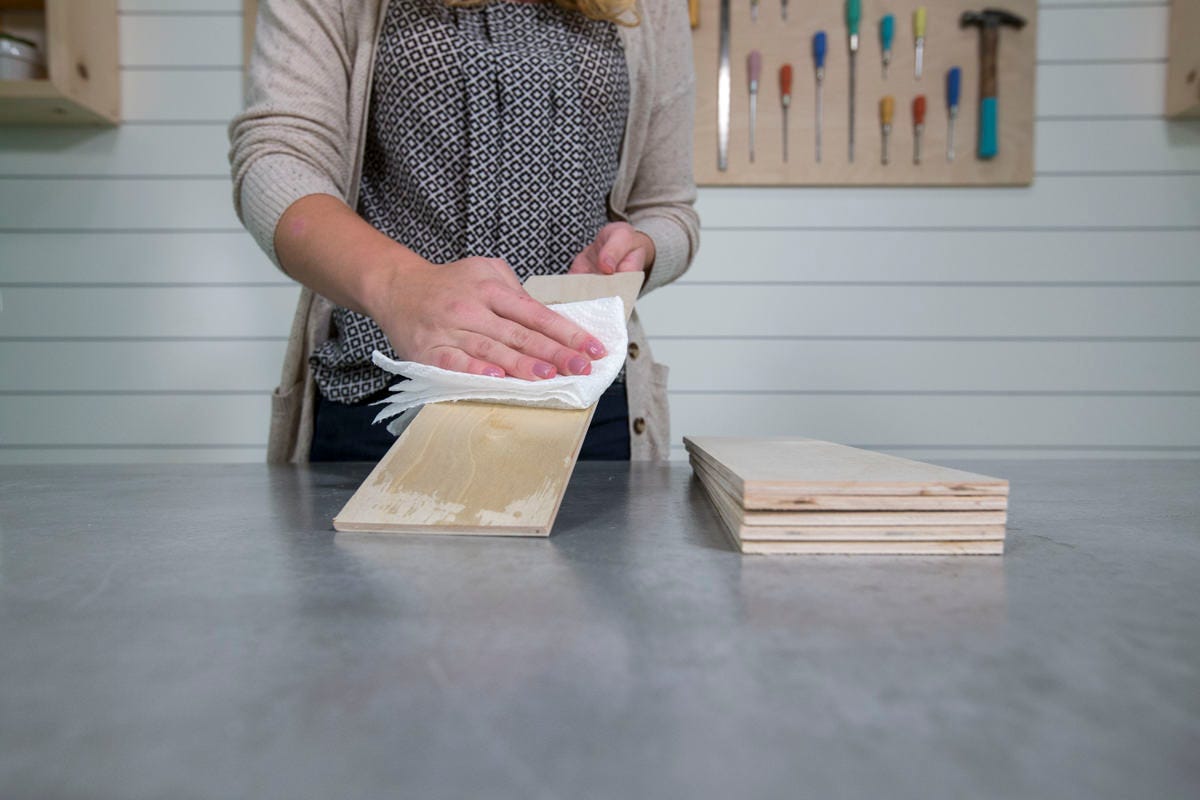
Step 3: Lightly Sand Rough Edges
I used a fine-medium sanding sponge to smooth out the ends of the cuts. I like the sanding sponge for a job like this because it’s simply and quick for light sanding, but you can also use 150-grit sandpaper.
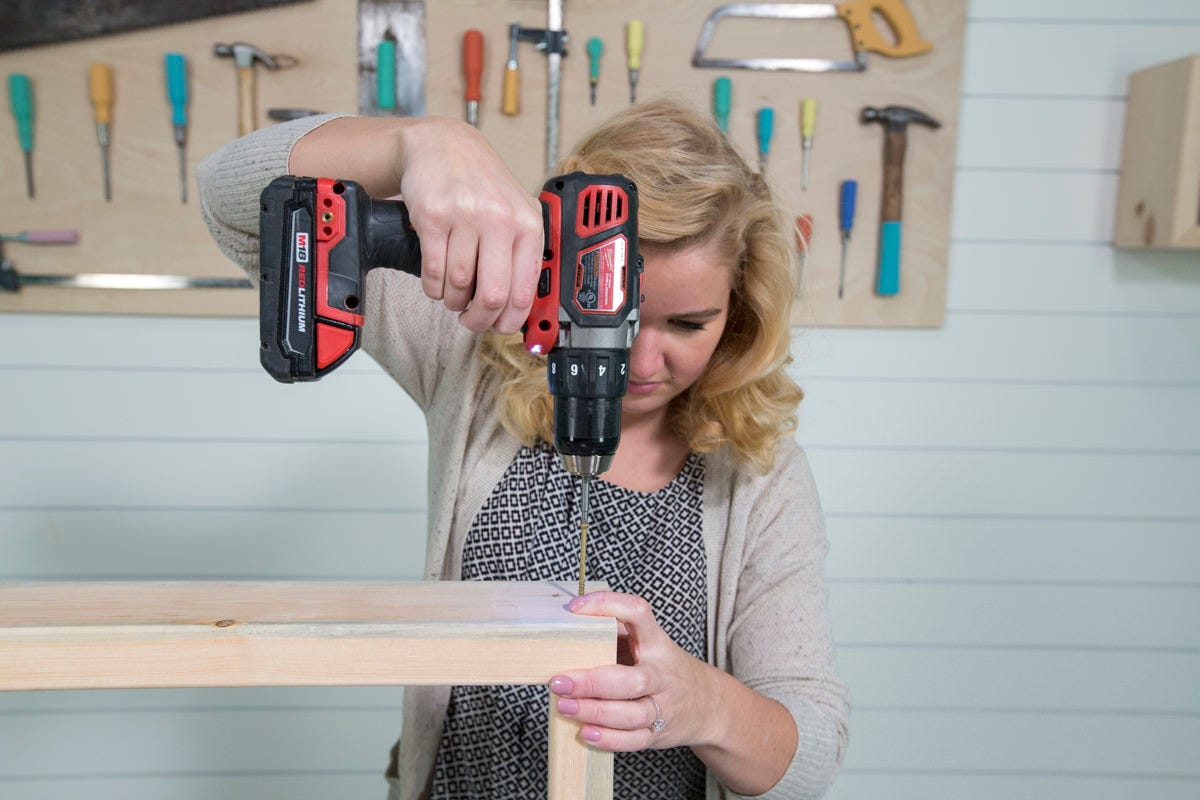
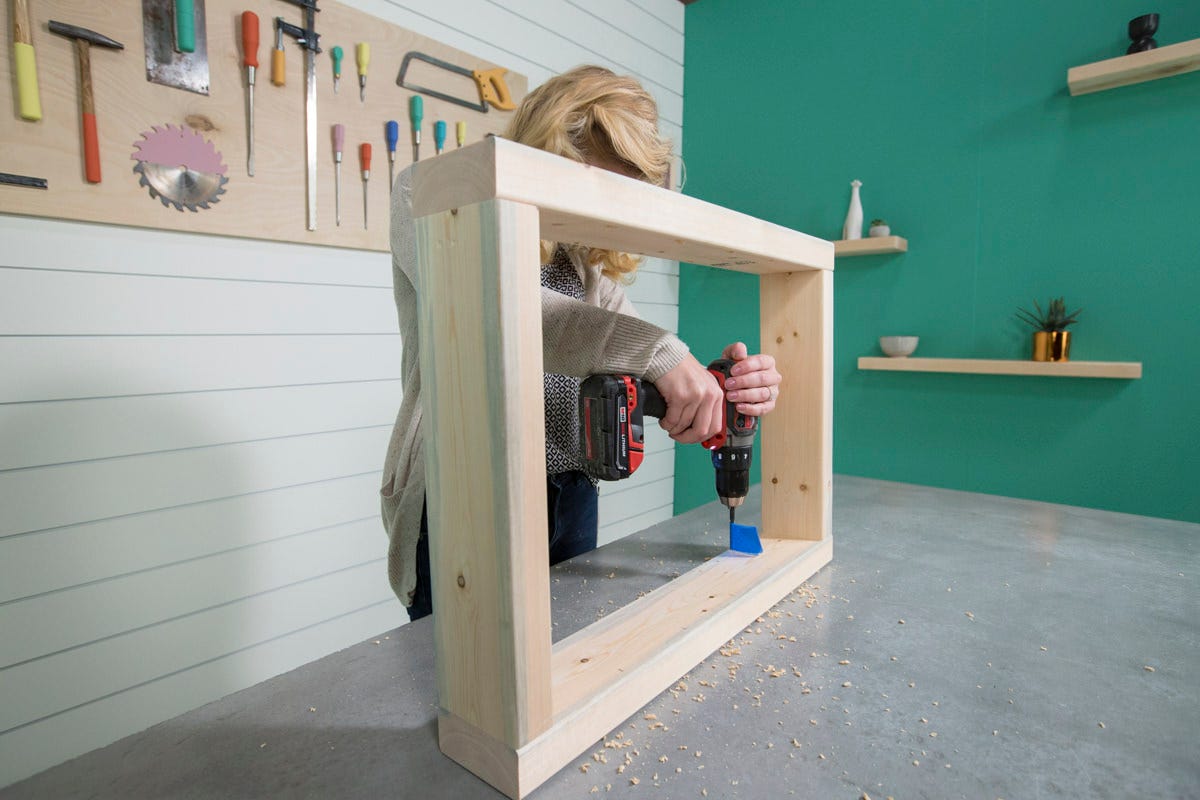
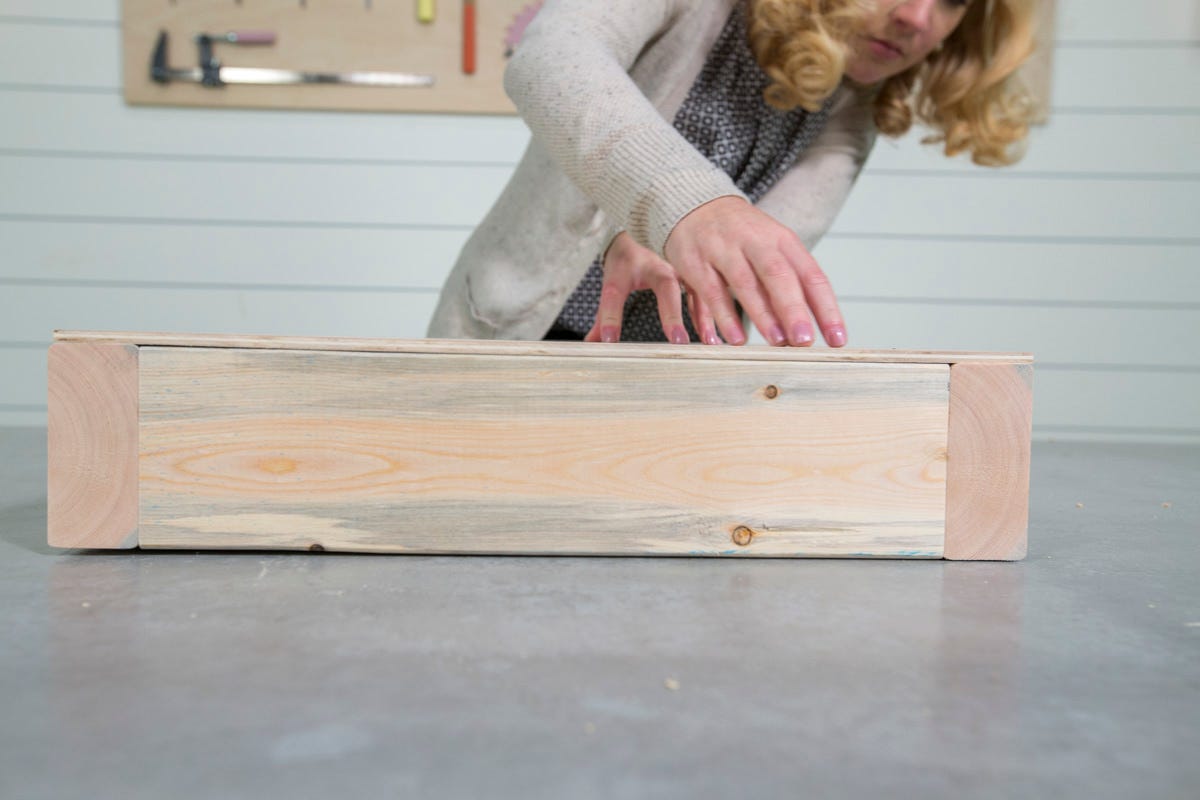
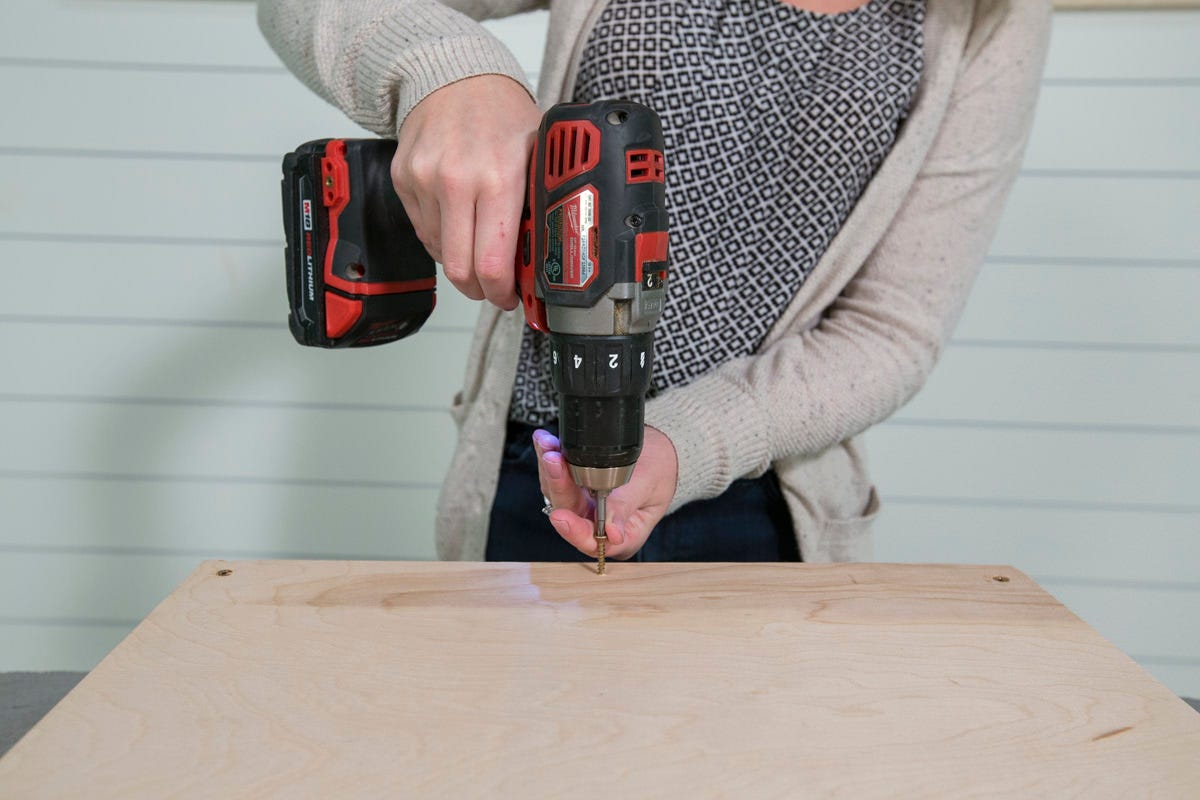
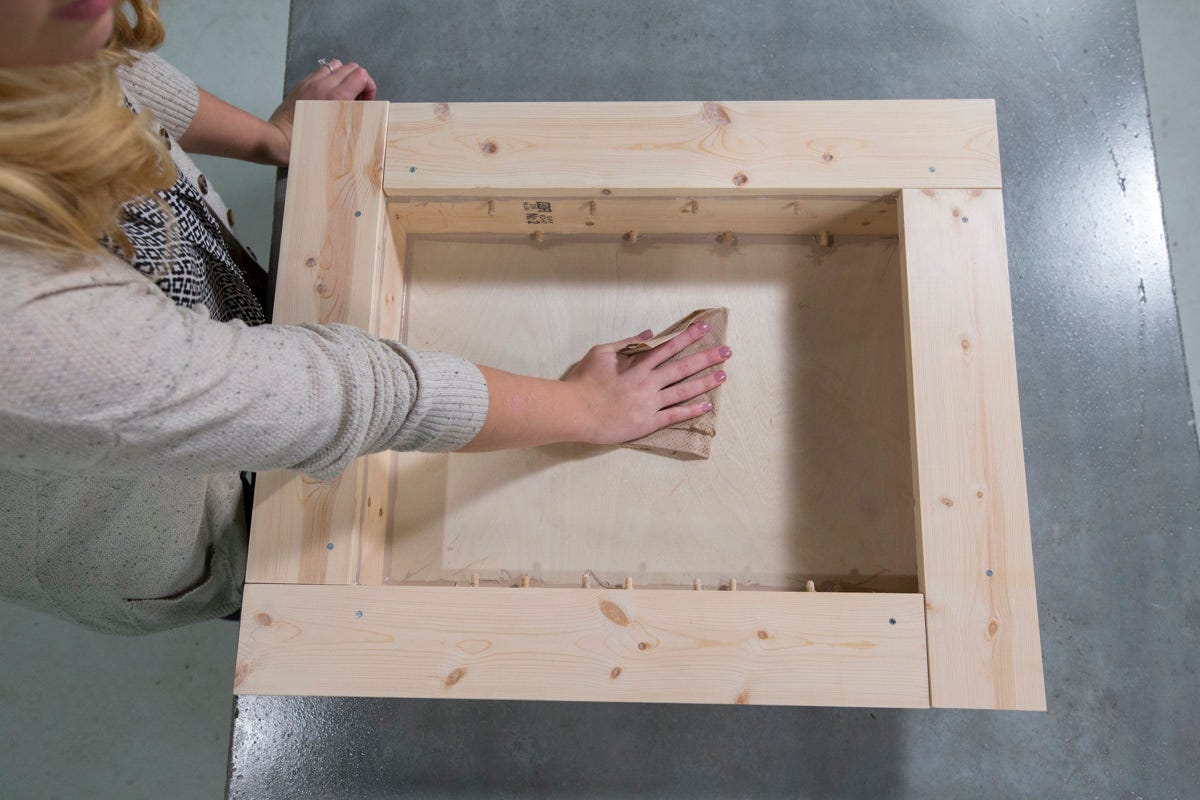
Step 4: Build the Box
Take the 2” x 4” pieces and create a rectangular box secured with 3” screws and wood glue.
If you’ve seen some of our other projects, you might notice that I didn’t pre-drill any of these holes. I didn’t forget! When I already have a rustic picture in my head, if the wood starts to split a little, it’s not going to ruin the perfection for me. So when something is a risk I’m willing to take, I take it! When something can be easy, you have to just let it be easy—otherwise you’ll give up on DIY. The wood is thick enough that I don’t think it was a problem for me. I built the prototype and didn’t have any problems, and then I built the real thing and didn’t have any problems—so you shouldn’t either.
I used waterproof wood glue because we’re putting dirt in the box and eventually watering the plants, so I wanted all the seams to be secure.
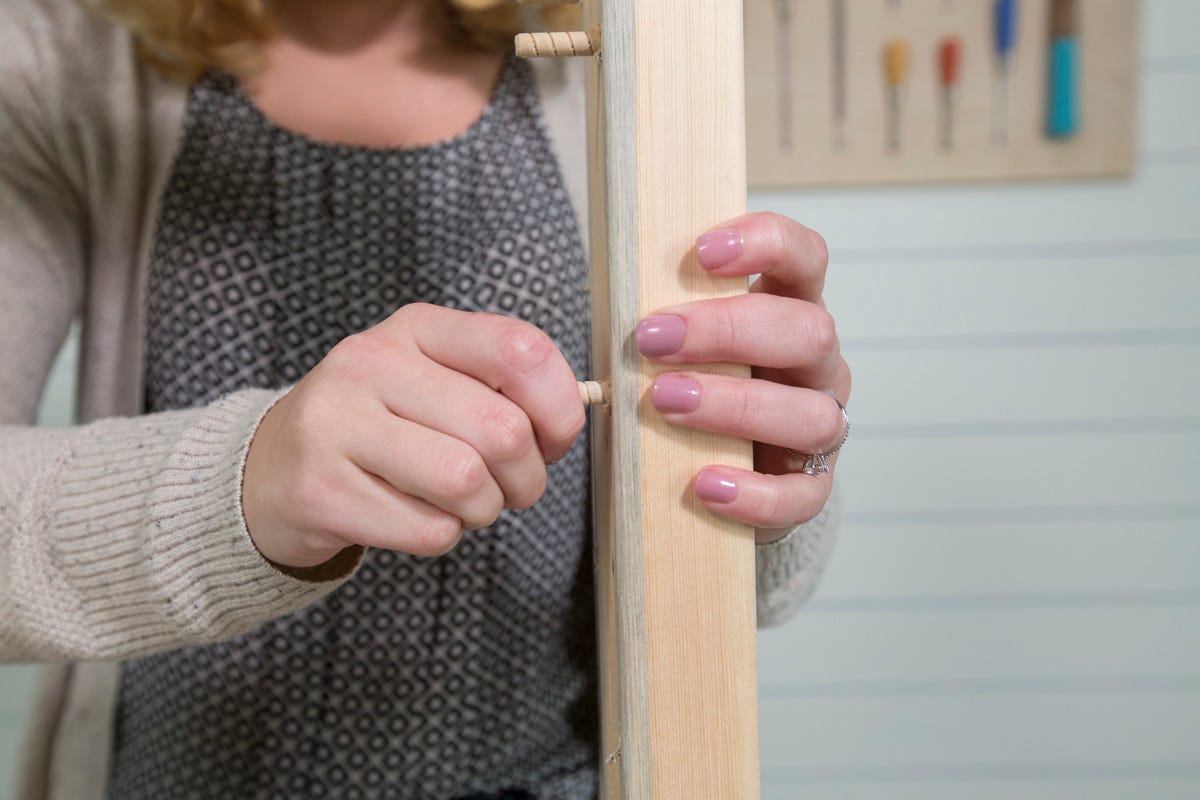
Step 5: Mark for the Dowel Holes
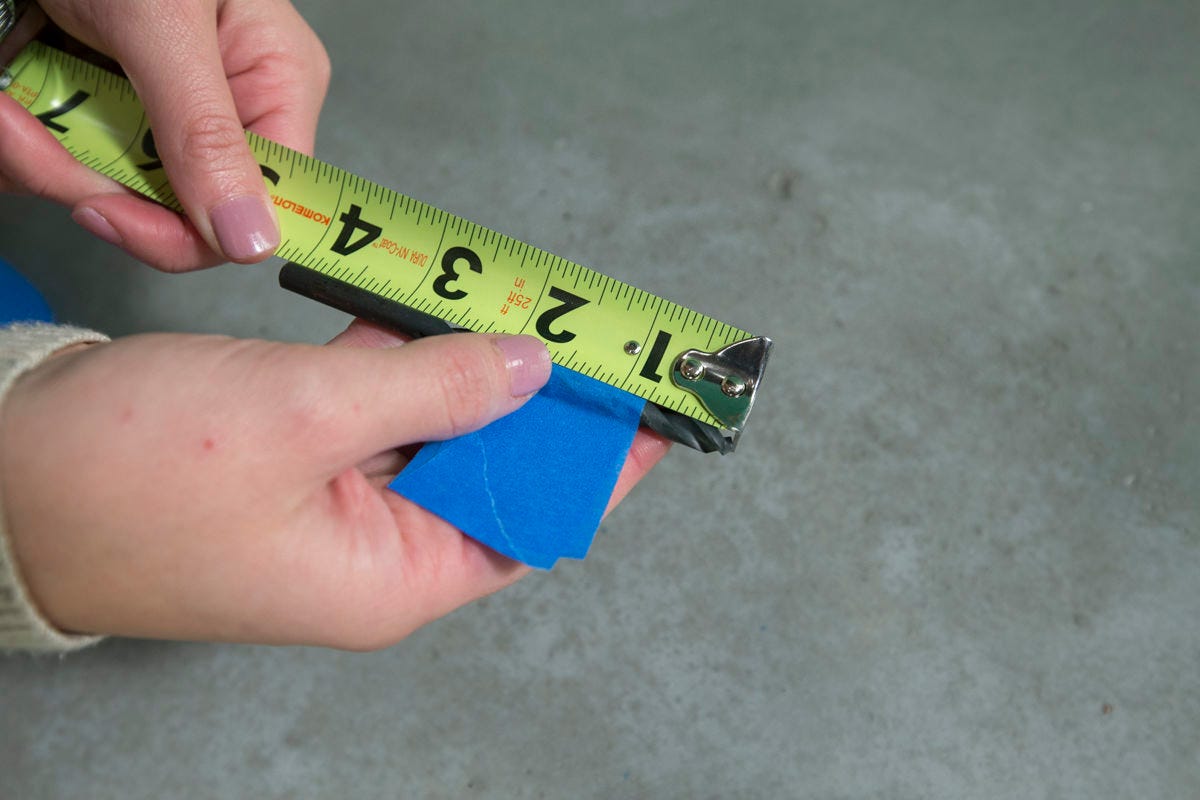
Stand the box on its end and measure down the inside of either wall from top to bottom. Mark the side of the wall closest to you at 3 ¾”, 7 ½”, 11 ¼”, 15”, and at 18 ¾”. Along the back side of the wall (the side farthest from you), measure from top to bottom and mark at 5 ¼”, 9”, 12 ¾”, and 16 ½”. Repeat on the opposite wall of the box. These are the marks for the dowel pins that will hold the shelves.

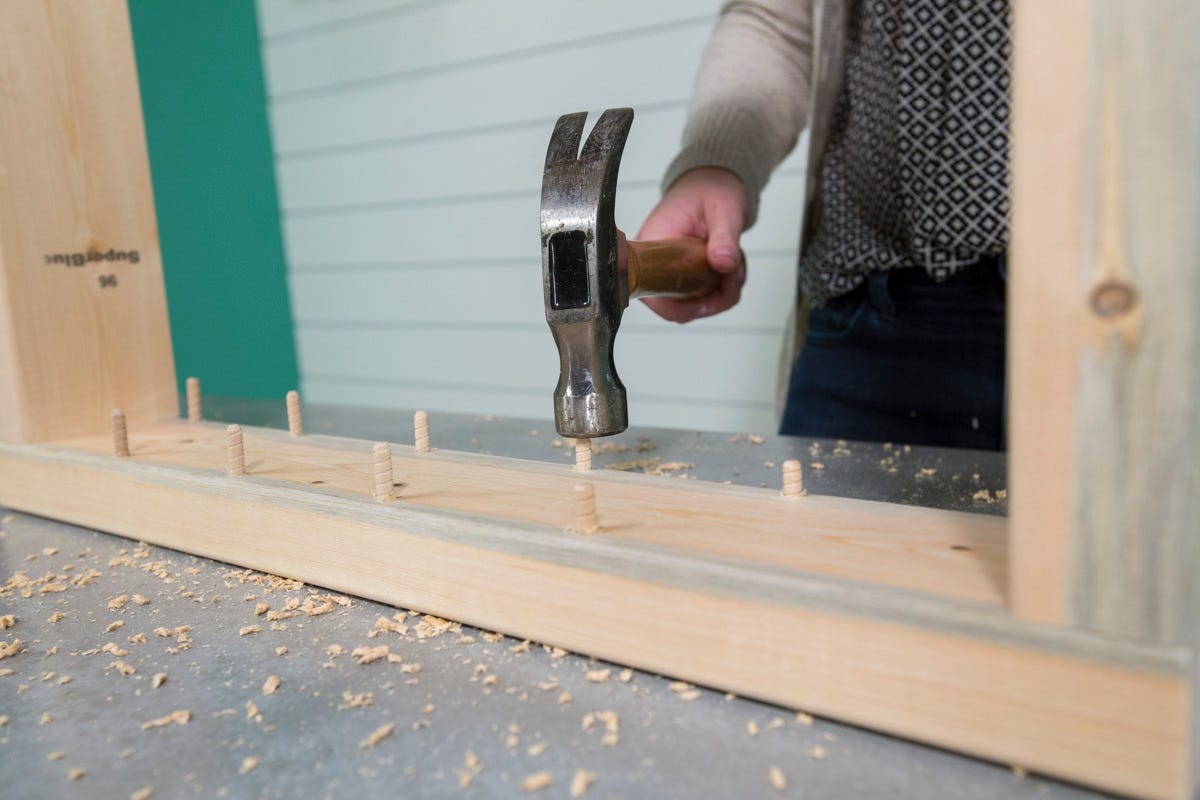
Step 6: Drill the Dowel Holes
With a ¼” drill bit taped off at ¾”. carefully drill below each mark on the walls of the box so that the top of the hole is in line with the pencil mark you made. The marks are where the shelf itself is going to sit, and all the shelves are angled. You’re drilling below those marks because that’s where the dowel pin that’s holding the shelf needs to be inserted. Insert the ¼” x 1 ¼” dowel pins into the holes. Use the end of a screwdriver or a small hammer to fit them in snugly.
Step 7: Attach the Backing
Up until this point, the front of the box has been facing you. The face is based on the marks you’ve just made. (The front of the box is the side of the wall that has the 3 ¾”, 15”, etc. The back was the one with the 5 ¼”, 16 ½”, etc.) That matters because the shelves sit at an angle, and they’re angled up to keep the dirt inside the box and not on the kitchen floor.
Lay down the box so that the face is downward and you’re looking at the back. Attach the ¼” plywood back with wood glue and 1” screws. If it starts to split you can pre-drill, but if it doesn’t, don’t worry about it!

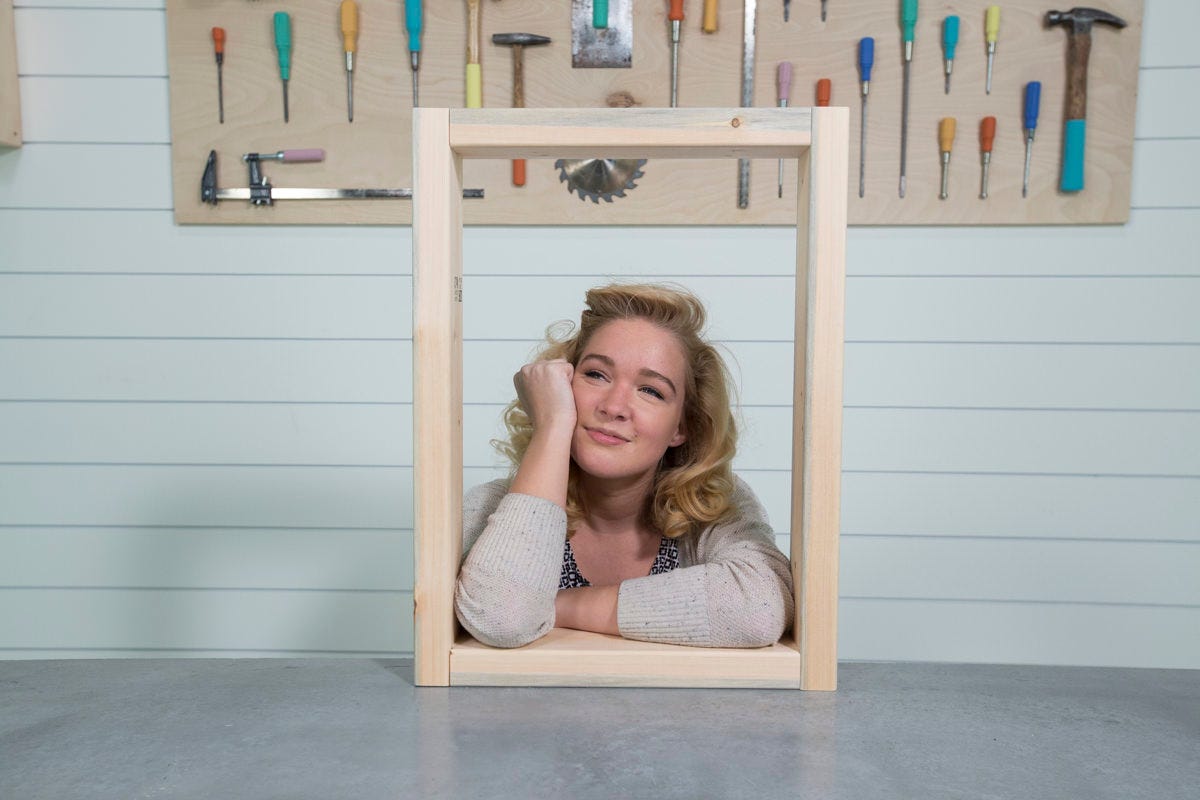
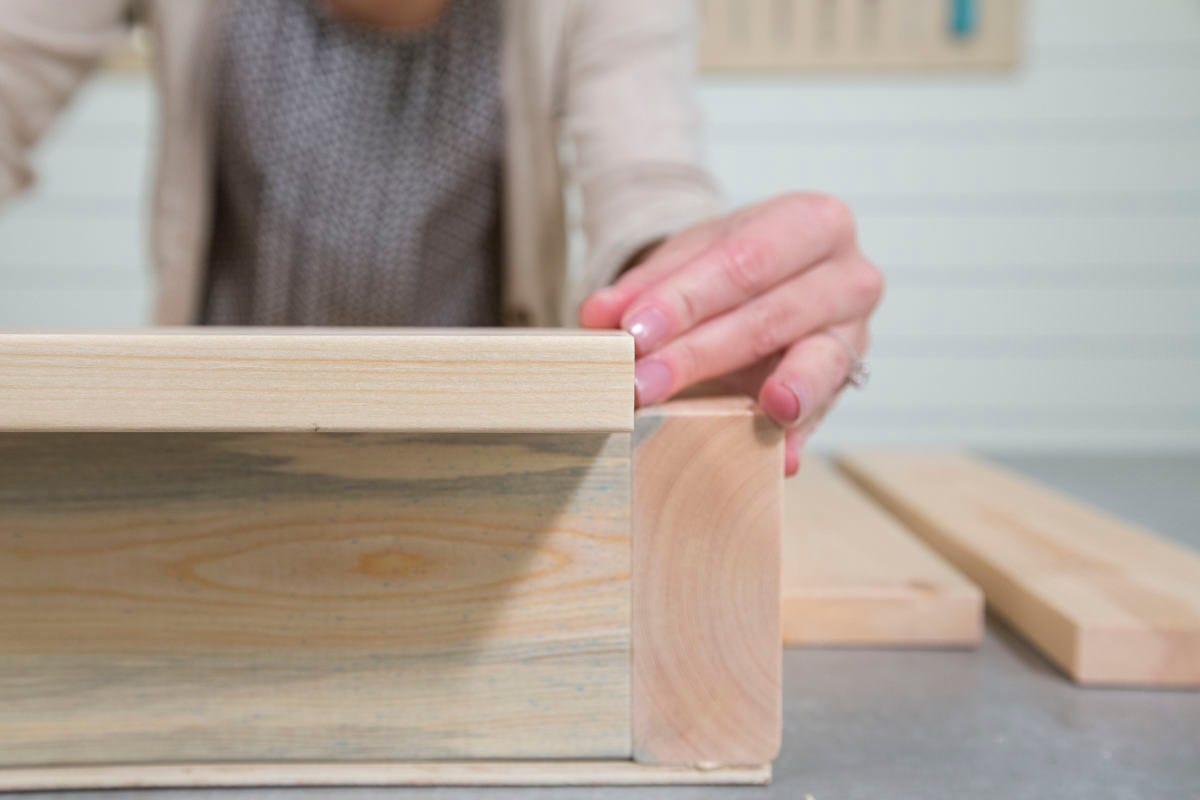
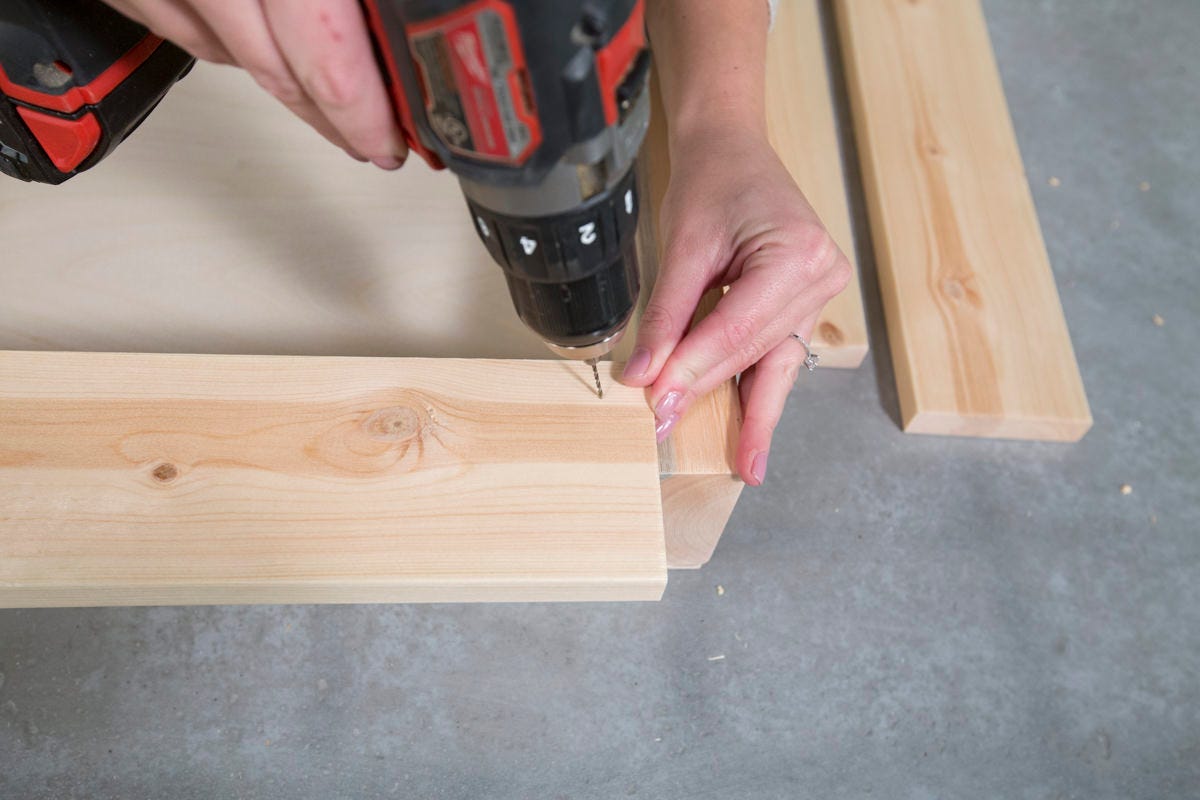
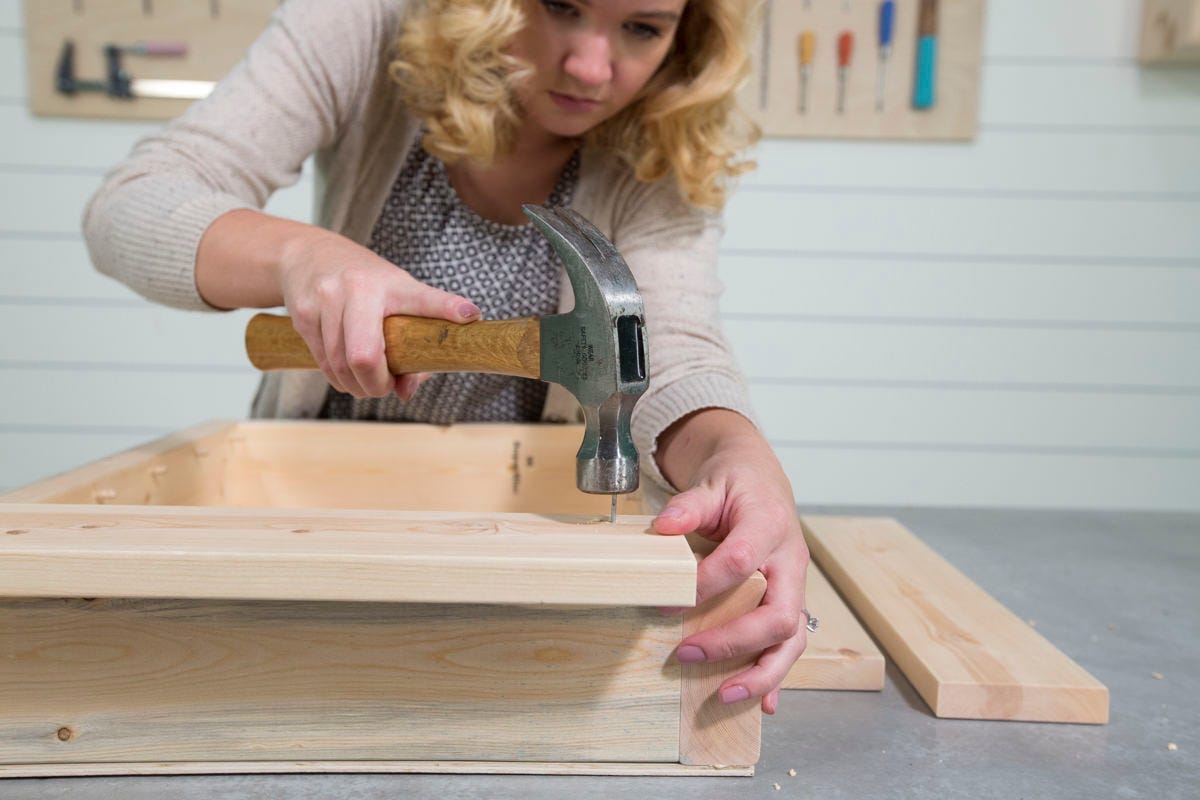
Step 8: Attach the Frame
Start at the top with the 17 ½” piece of 1” x 4”. Line it up with the right end and the inside edge of the top 2”x 4”. Pre-drill (this time it’s pretty necessary; pre-drilling with nails prevents splitting) and hammer in nails, or attach with screws. The nails have a little harder time getting in than a screw, so I pre-drilled for the nails, too. It makes it a lot easier to get the nail nailed in straight. If you’re challenged with a hammer—which I still am, because I don’t use one enough—it just makes it really easy! The key with pre-drilling for a nail is just that you make sure you use a drill bit that’s smaller than the nail so it’s still snug in the wood and you’re not just inserting it.
Use glue for added security. Add the two frame sides, lining them up with the inside edge of the box and outside ends of the top piece.
When you get to the bottom piece, it will be a little different. The inside of the frame won’t line up with the bottom of the box. You haven’t messed it up; it’s supposed to be like that! Because the shelves are at an angle, if you don’t do this with the frame there will be a 1.5 inch gap below the bottom shelf where you’ll just see empty space. The frame is designed to cover up that by starting where the plants are.
Line up the bottom piece with the two side frame pieces and secure it in place like the others.
Step 9: Decide How to Hang Your Frame
Did you know the wood studs in a wall behind the plasterboard are usually 16” from center to center? Well now you do. And for that reason, we intentionally chose to make our planter’s vertical sides about 16” apart. It’s always better to hang something heavy in a way where one fastens to the studs and not just the plasterboard, so we designed the planter to more easily hang that way.There are many ways you might mount your herb planter to a wall. Of course the main thing to remember is to mount it securely. Err on the side of overkill rather than risk your planter crashing to the floor and taking parts of your wall with it!
Options for hanging the herb planter on a wall.
- One out-of-the-ordinary method is to use Hanger Bolts. Hanger Bolts are a double-ended combination bolt/screw. This option looks like two sturdy bolt ends sticking out of your wall. Then, you drill holes on the backside of the planter which slip over the bolts like a cylinder would slip over a post. For this method you'll need to locate a stud in your wall, pre-drill a hole just smaller than the screw threads on the Hanger Bolt and screw it well into the stud leaving the threaded portion sticking out.You can screw the Hanger Bolt into the wall using vise-grip pliers, or by threading a nut onto the bolt threads and using a wrench on the nut. For hanging this planter you would install two of these at the same level – threaded into adjacent studs. Next, drill holes in the back of the planter to line up with the Hanger Bolts sticking out of the wall. These holes should be slightly larger than the bolts so the planter will slip over them. Hanger Bolts come in a variety of lengths and thicknesses. We would choose the ¼-inch by 4” size for this project.
- Another way to mount your herb planter to the wall is with picture hanging wire. Secure some ring hangers to the backside of the herb planter. Install sturdy picture hangers onto the wall where there is a stud to anchor into securely. Use picture wire to make loops which will connect the picture hanger on the wall to the ring hangers nailed to the back of the planter. Twist the picture wire ends several times to secure them and keep it from slipping.
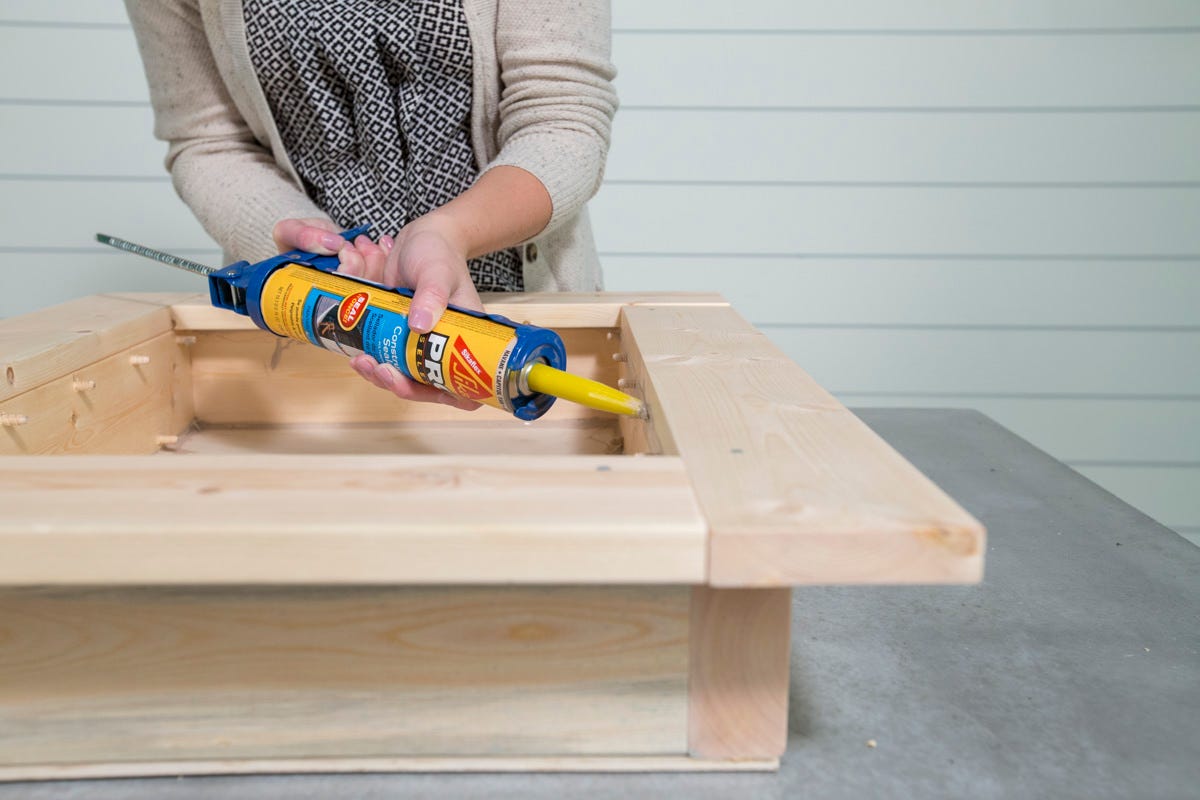
Step 10: Caulk
Using a polyurethane caulk like Sikaflex, caulk all the inside seams of the box. Allow the caulk to fully dry for 24 hours.
This step keeps the box water-tight, so that when you water the plants you don’t end up with water covering your floor. I had never caulked anything before, so this was a new experience for me. Because I’ve never done it before it’s something we haven’t covered on Dunn DIY, so here’s a YouTube video I watched that was very helpful. For me, this was a great way to practice my caulking skills, because all of it is going to get covered up, so making it look pretty isn’t that important.
(It was at this point that I realized I hadn’t done things in the best order. I had already put the dowel pins in to support the shelves, but they are so close to the seams of the box that it made caulking really difficult. If I’d done it over again, I would have drilled the holes and left the dowel pins out until after I caulked.)
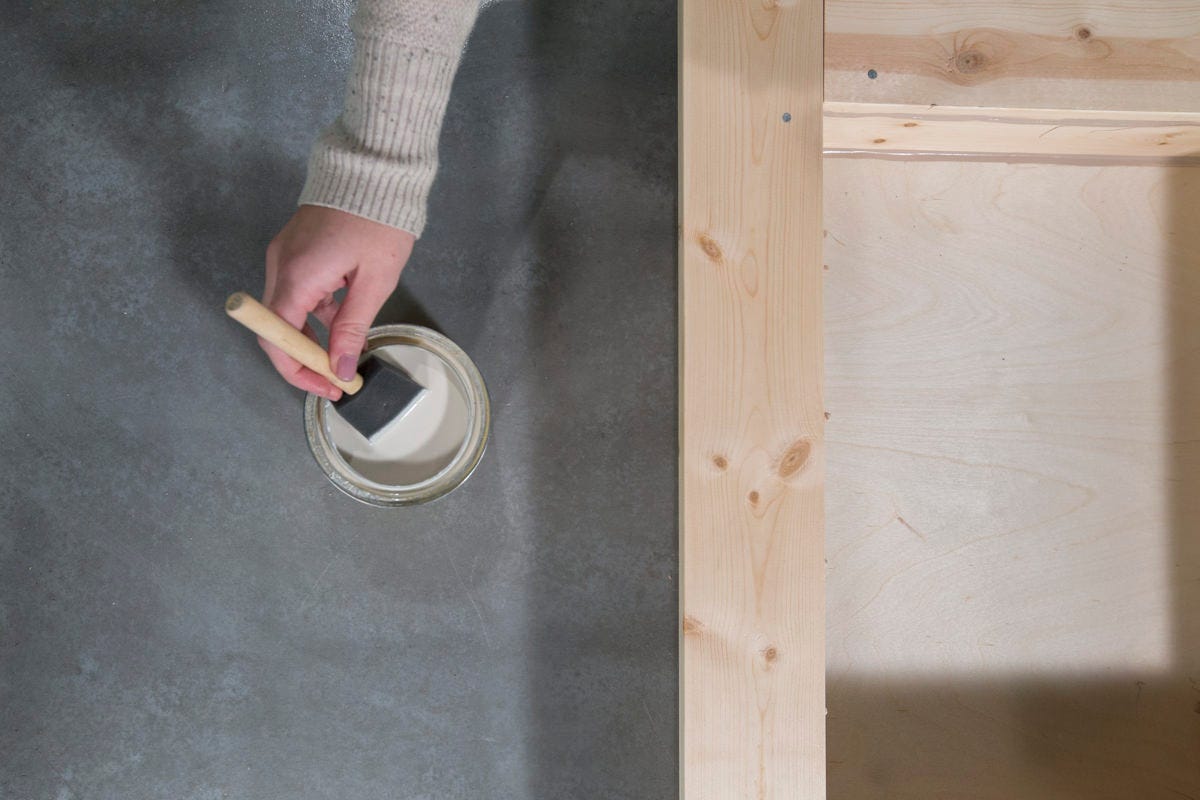
Step 11: Stain
While the caulk is drying, apply wood stain to the picture frame front and to the outside of the box. (We used Minwax stain in the color Pickled Oak, which is a really pretty whitewash color.) I tend to go for color extremes: I want really dark or really light, and I don’t want that golden-yellow in between.
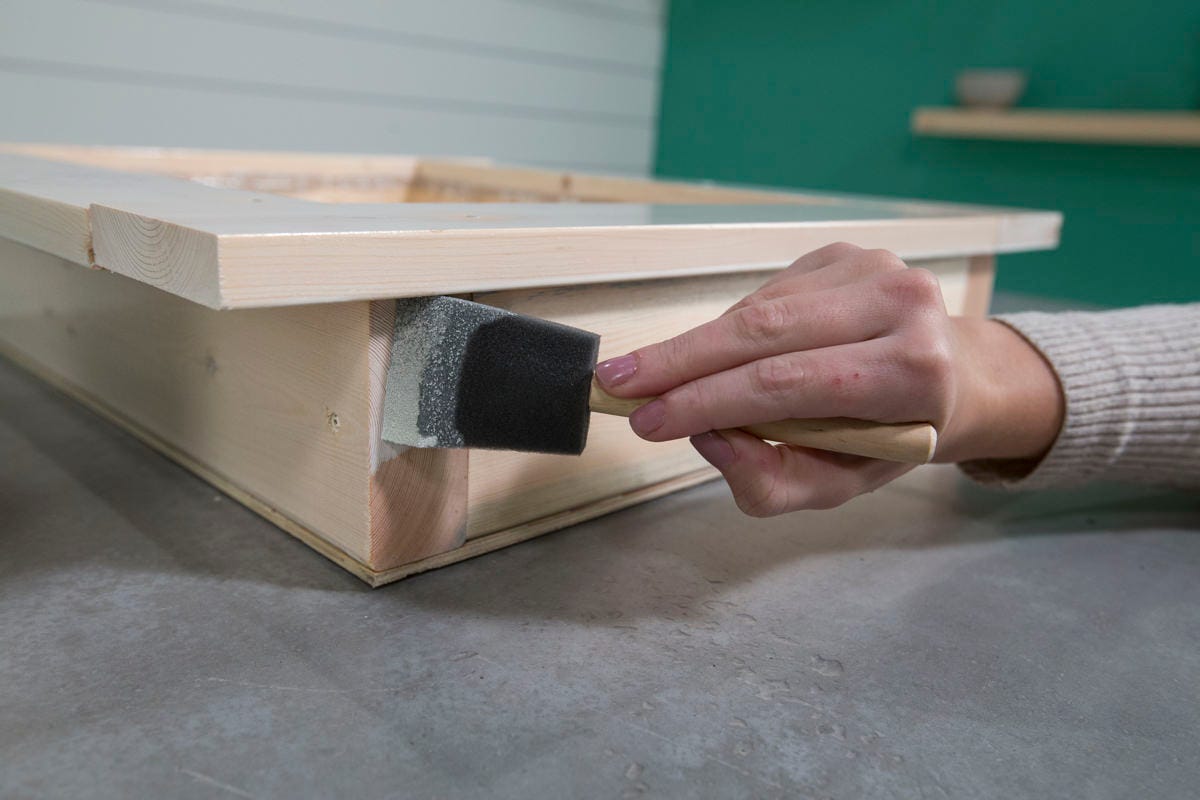
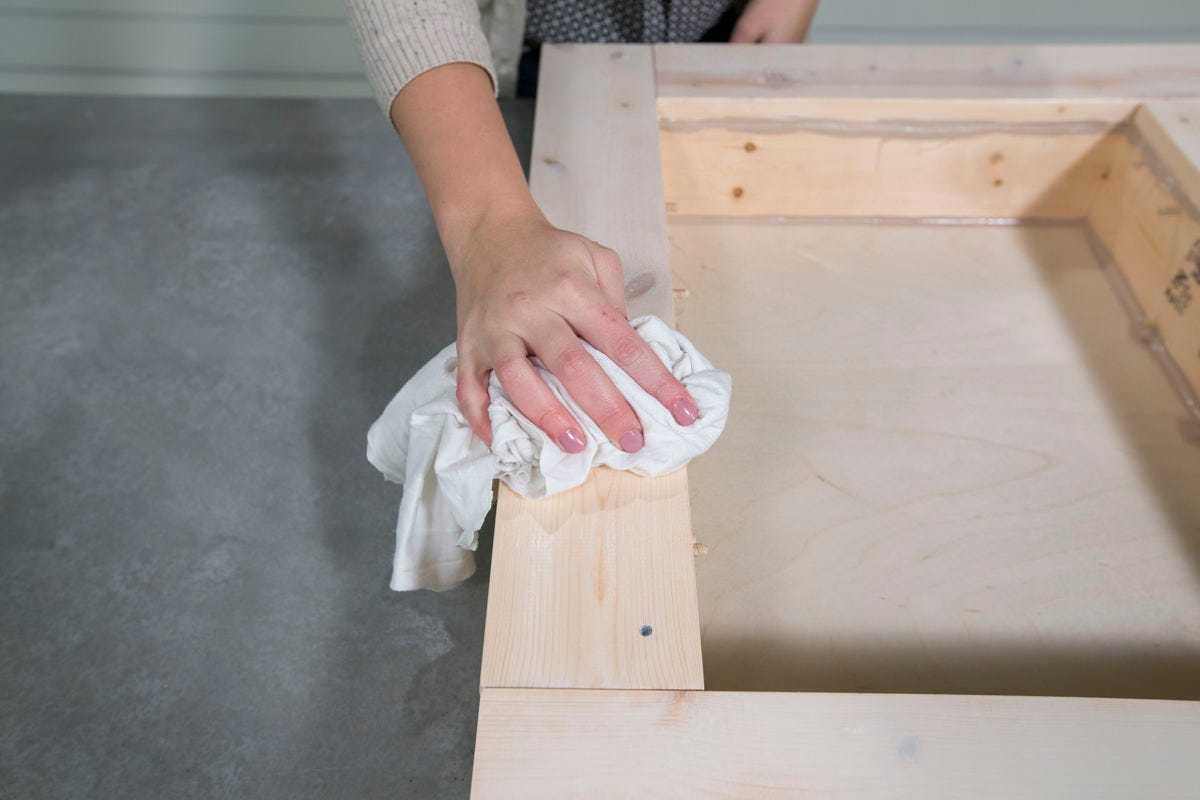
Step 12: Oil the Wood
After the caulk is completely dry, rub mineral oil into the wood on the inside of the frame and onto the 3¾” x 14” shelves with a rag. This is an edible, non-toxic solution for helping the wood last longer. (You definitely want something nontoxic right next to your herbs.) Mineral oil is often used for protecting cutting boards or wooden kitchen utensils, so it’s a way to protect the inside of the box while keeping it all food-friendly.
Step 13: Add a Watering Mat
I forgot a step here! I bought a watering mat off Amazon. A watering mat is a piece of felt-like material you put under plants to absorb excess water and then re-administer it to the plant as the plant needs it, reducing the need for watering. Because it’s a wall planter, you have to take it off the wall and water it and let it rest horizontally before you put it back on. Having a watering mat reduces the number of times you'll need to do this. If you want to use a mat, put it in against the plywood backboard before you insert the shelves.)
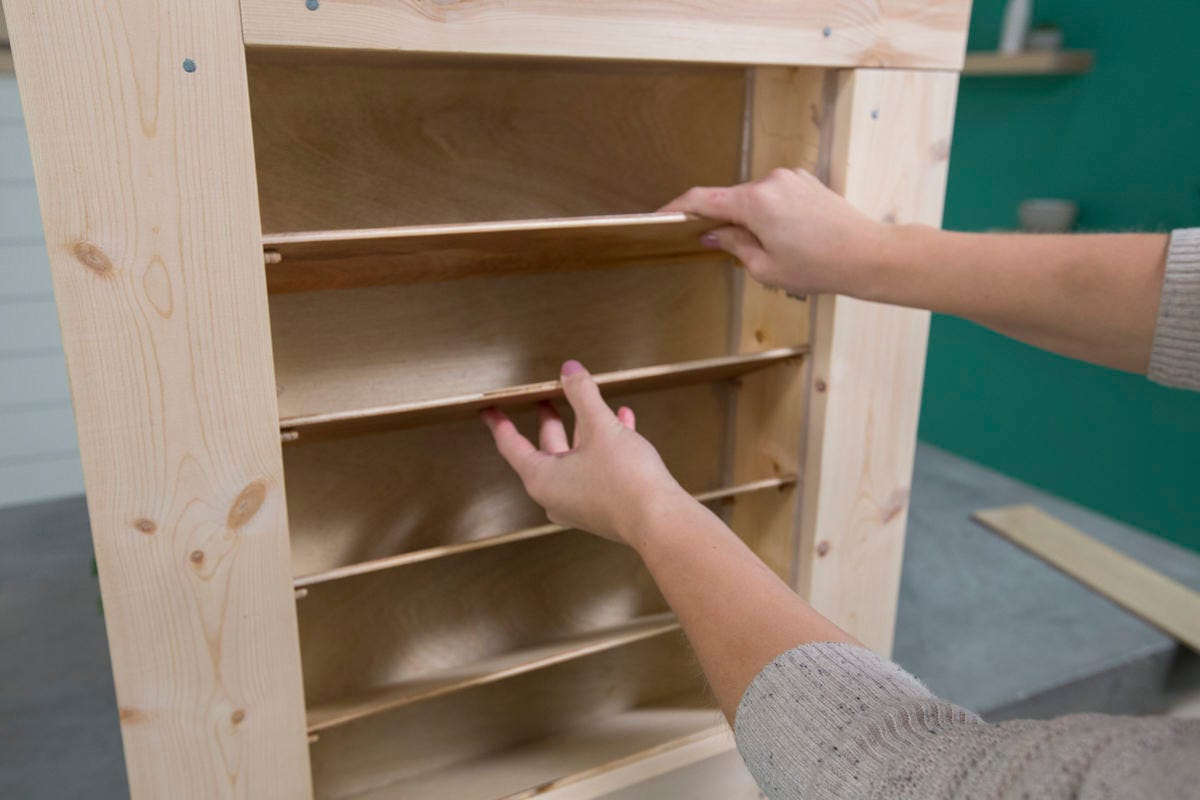
Step 14:Add the Slats
Wait until everything is fully dry before moving onto this step. Once you’re ready to proceed, slide in the shelves so they sit on the dowel pins. They’ll be loose, but once the dirt and plants are in it will keep the shelves in place.
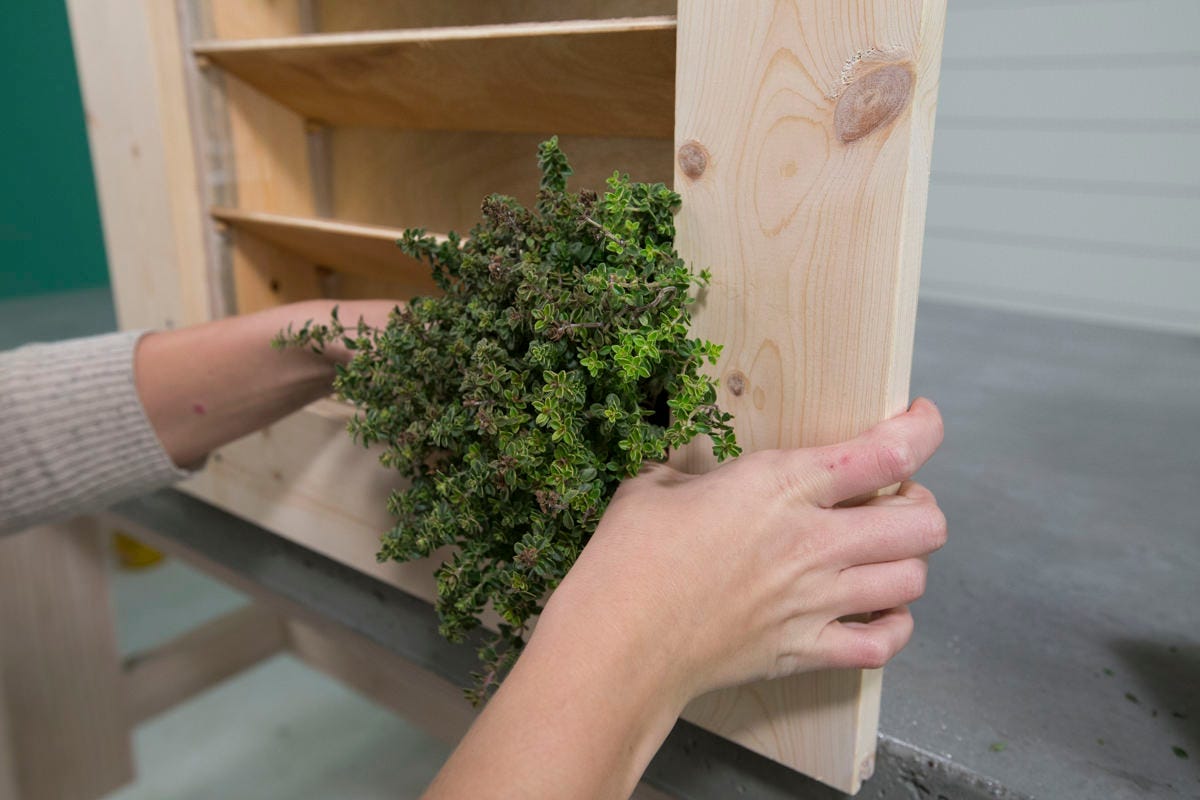
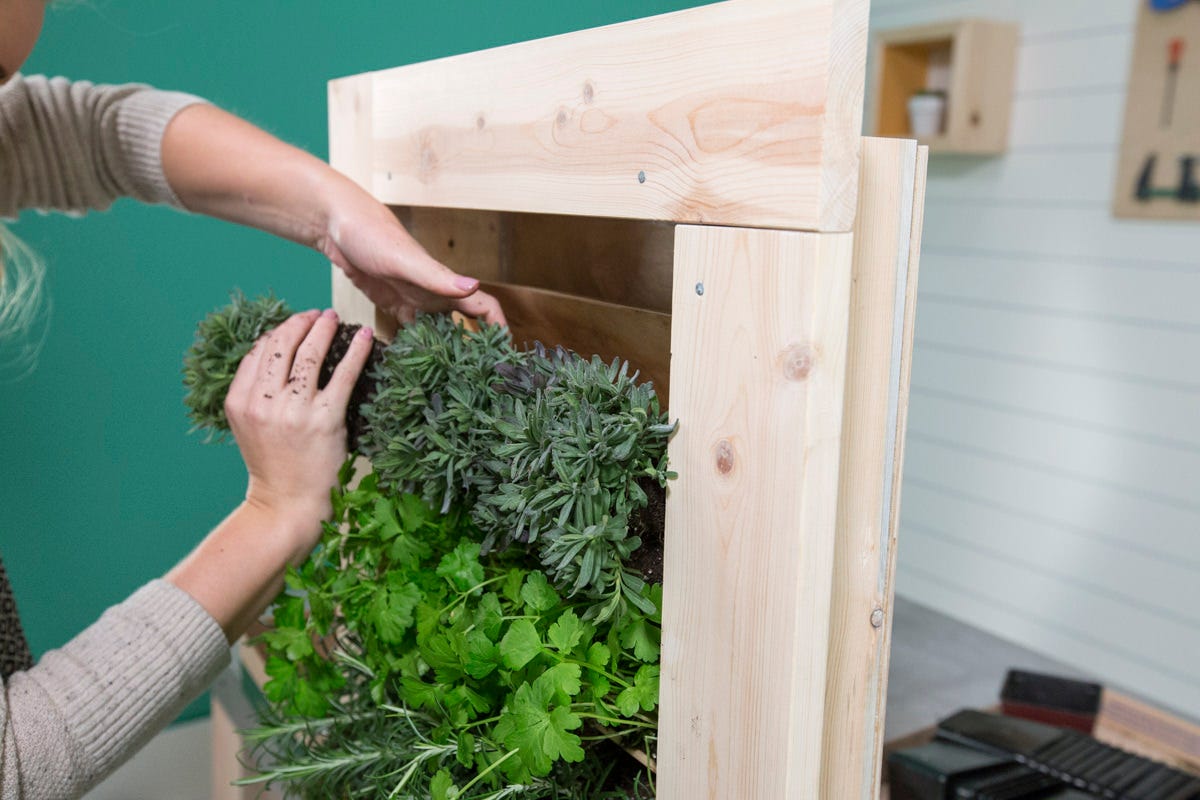
Step 15:Plant your Garden
Next, add the herbs row one row at a time. Take the plants out of their containers and fit them into their rows while the planter is standing upright. Make sure everything is firmly packed so that gravity doesn’t have a chance to make things fall out! Use extra dirt if necessary to get a tight fit. Water everything, and allow your plants to settle before hanging the planter on your wall.
Enjoy!