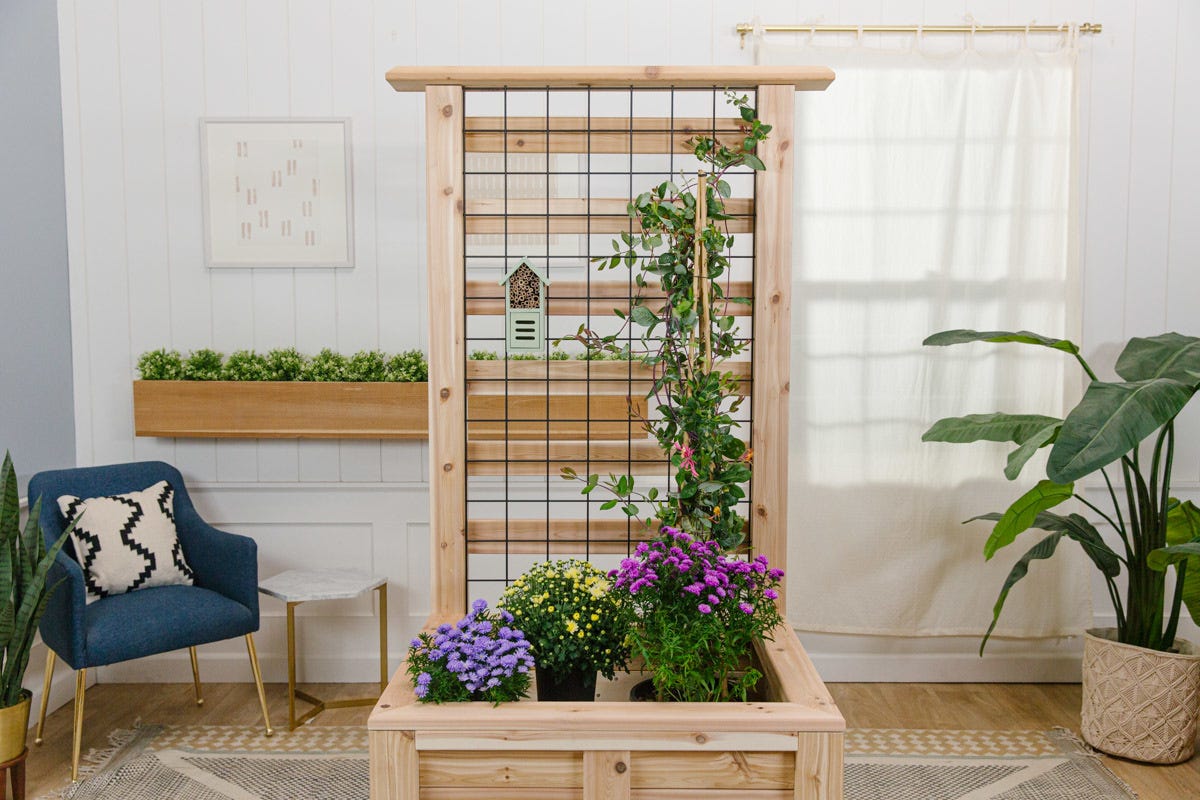

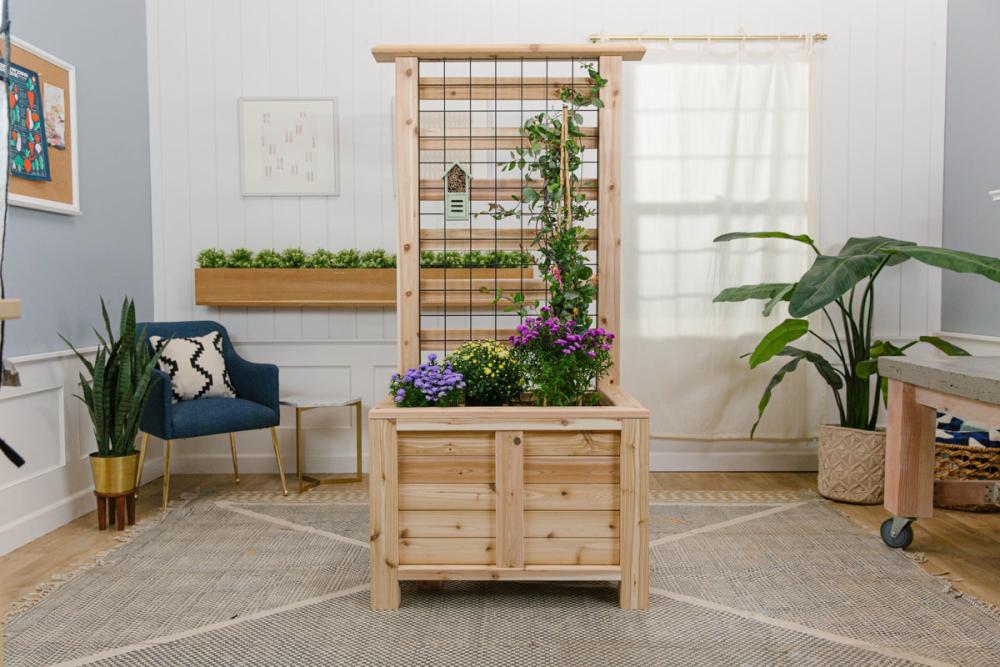
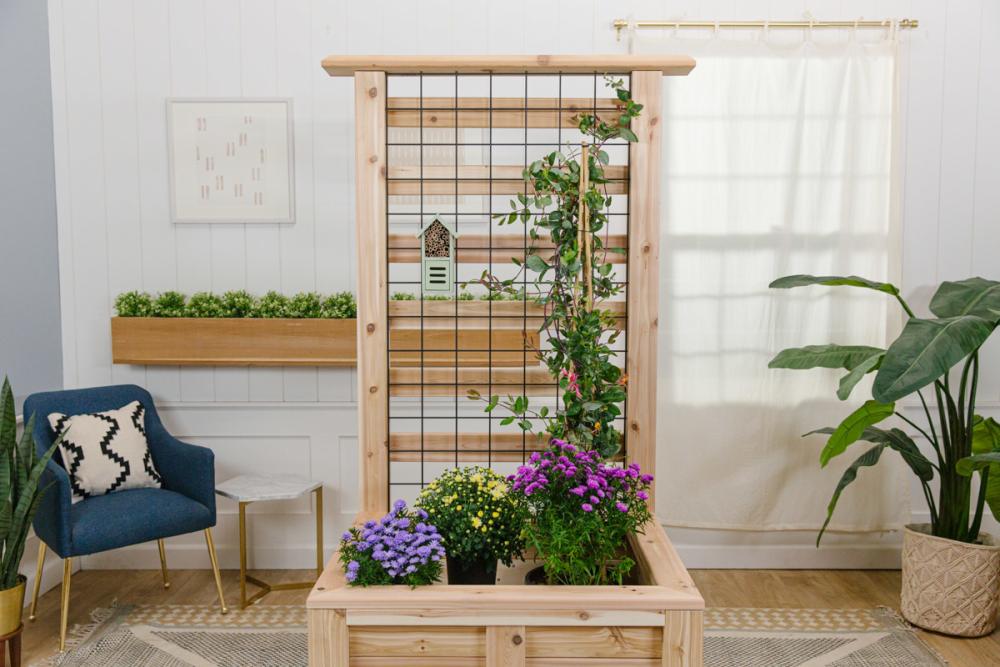
"Ben's versatile deck screen design utilizes greenery to add a little privacy to your back porch."
Materials
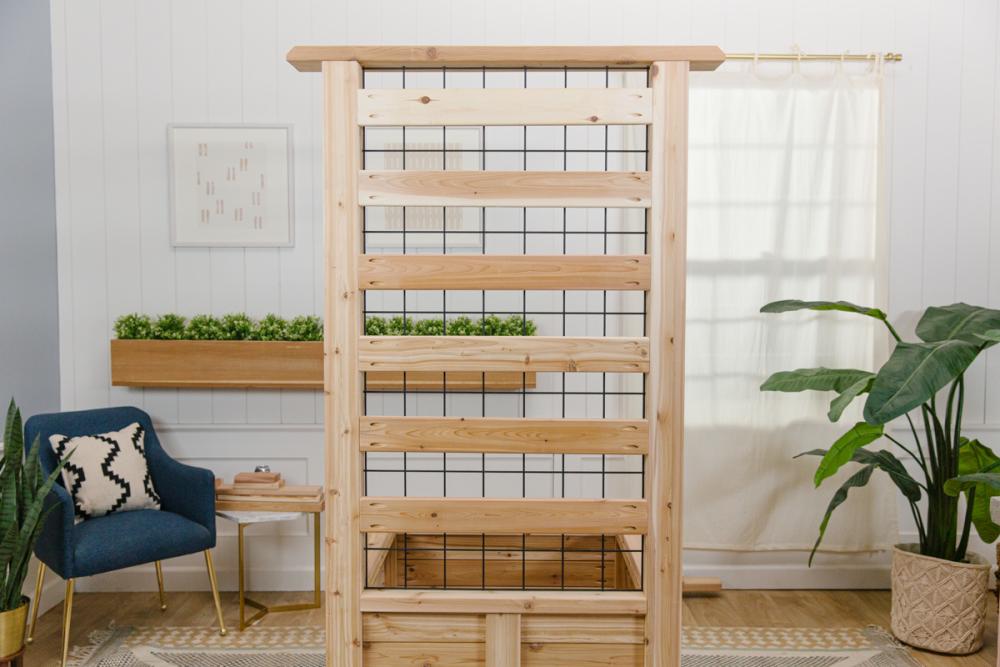
This week, our friend and Dunn Lumber employee Ben is back to show us how to build a deck privacy screen! He dreamt up this idea while tearing down a similar type of screen that was too tall and lacking in interesting accoutrements. His version delivers on the promise of added privacy with thoughtfully placed wooden slats, but adds a planter box as the base and trellis as the back, making it multi-use.
We love how this project turned out and took away a few great reminders while putting it together. First, when working with cedar, be careful when handling it as it can easily dent. Second, if you’re averse to using a Kreg jig, another joinery option that would work great here is a doweling jig, which makes for cleaner holes by using glue.
Lessons aside, this privacy screen is solid, stable, and makes for a great addition to any outdoor space—privacy needed or not!
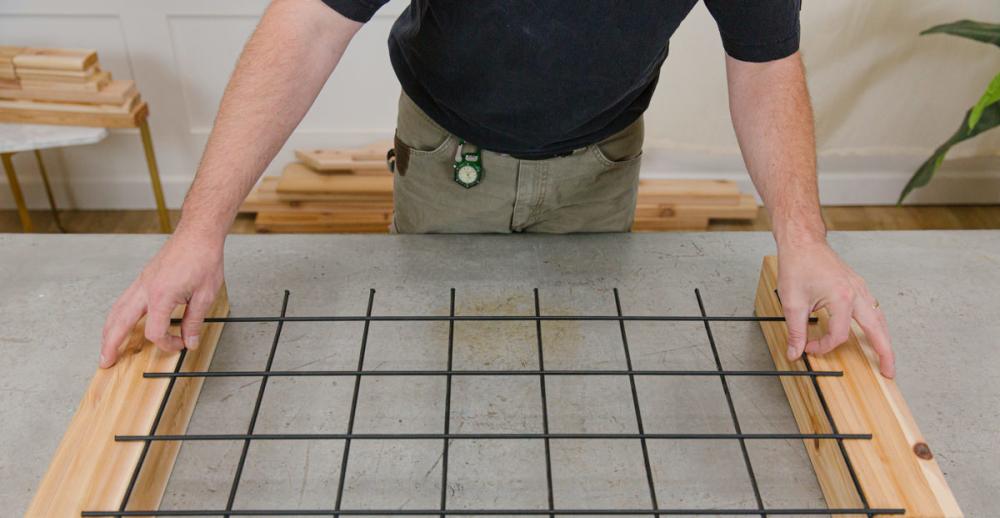
Step 1: Cut hog wire and wood
Start by cutting all the pieces you’ll need for the trellis frame and planter box:
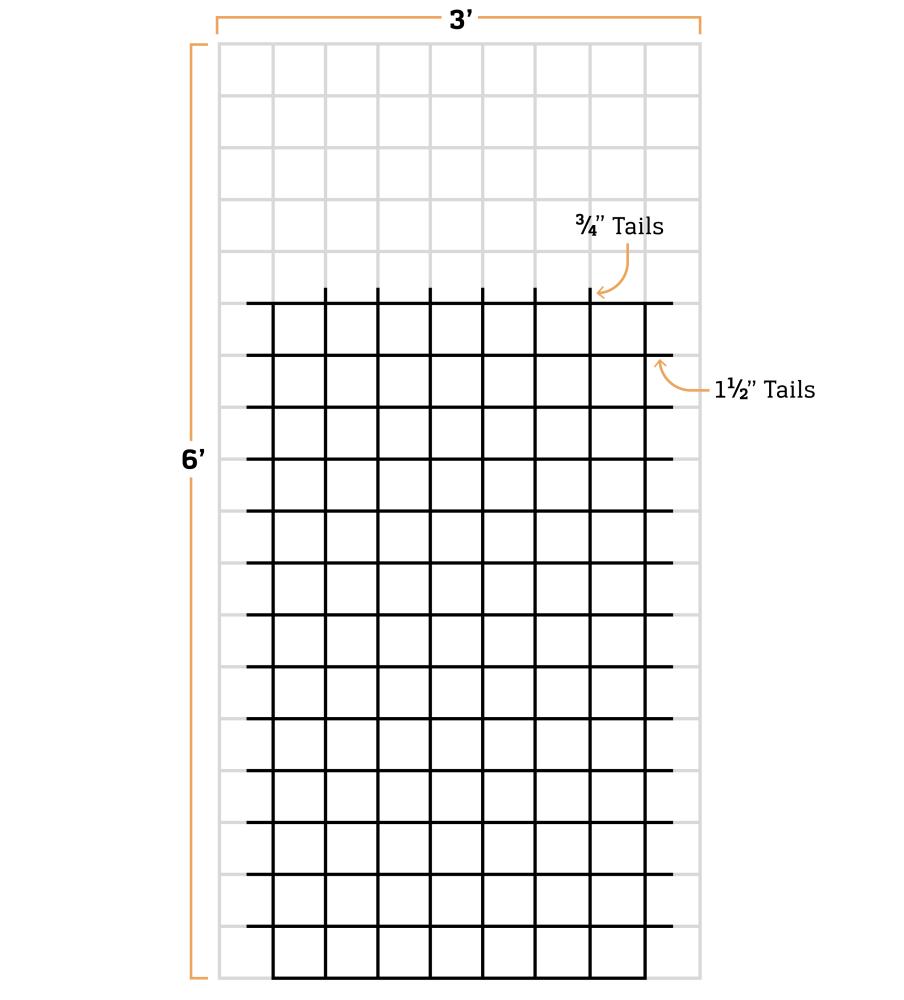
From 3’ x 6’ hog wire panel
- One (1) panel at 28” wide by 52 ¼” high, with additional 1 ½” tails on both long sides and ¾” tails on one short side (per the hog wire diagram)
- The original 3’ x 6’ hog wire panel is nine squares wide by 18 squares high. We cut it down to seven squares wide by 13 squares high, leaving additional 1 ½” tails on both long sides and ¾” tails on one short side that will be inserted into holes in the trellis frame.
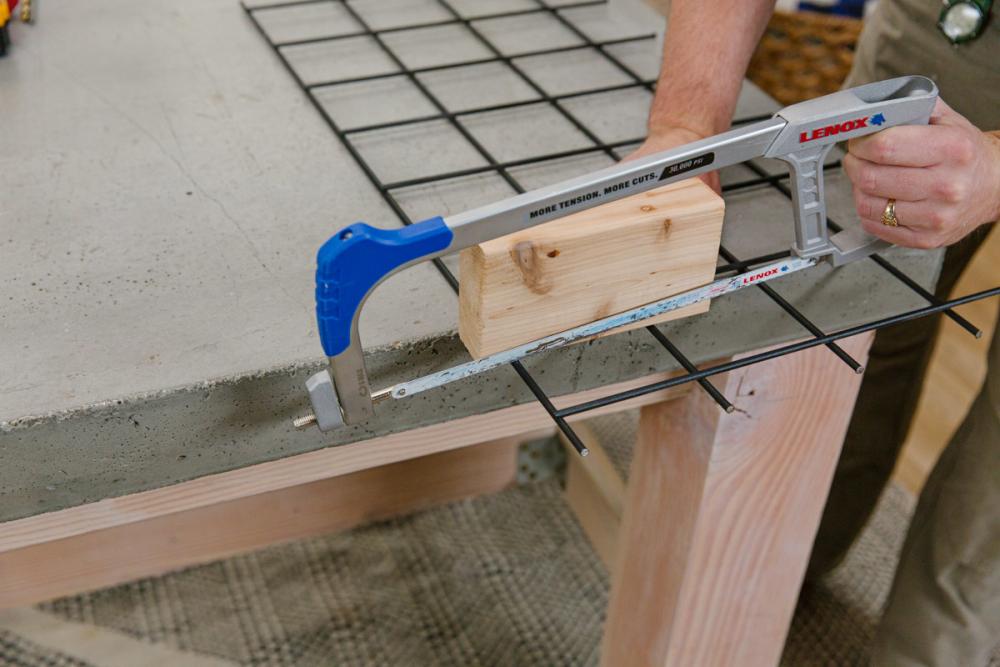
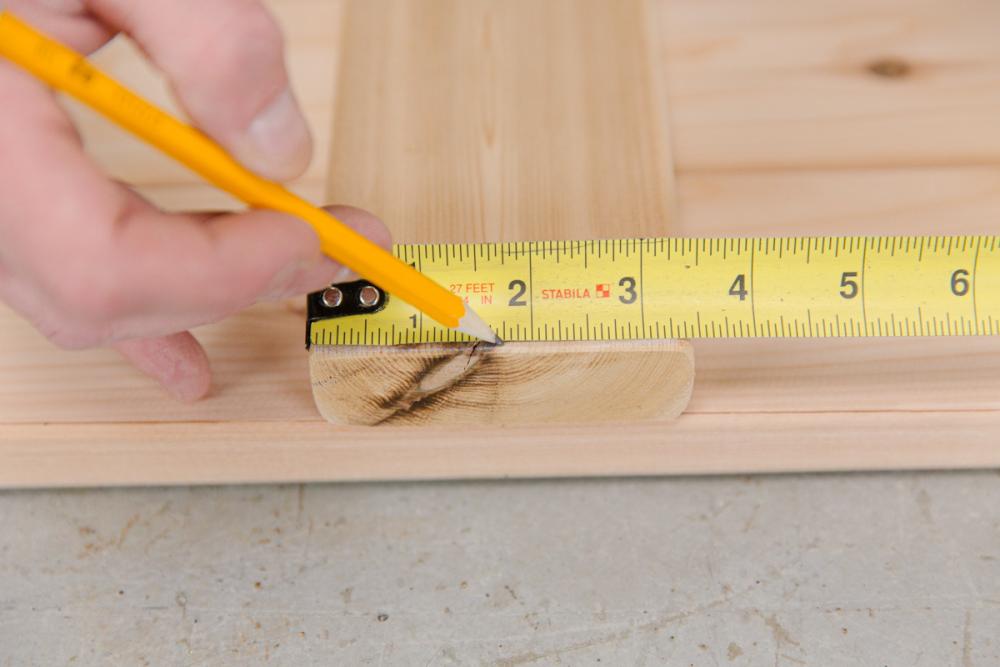
- A hacksaw works here, but bolt cutters or a grinder are more efficient if you have either available. Ben used a scrap piece of two-by-four lumber (1 ½” thick) as a template, which made it easy to cut the wire with 1 ½” exposed. We used a tape measure to mark for the ¾” tails.
- You’ll have rough ends here, so you may want to clean them up by sanding or filing them down. These ends won’t show, but you can paint them for rust protection if desired.
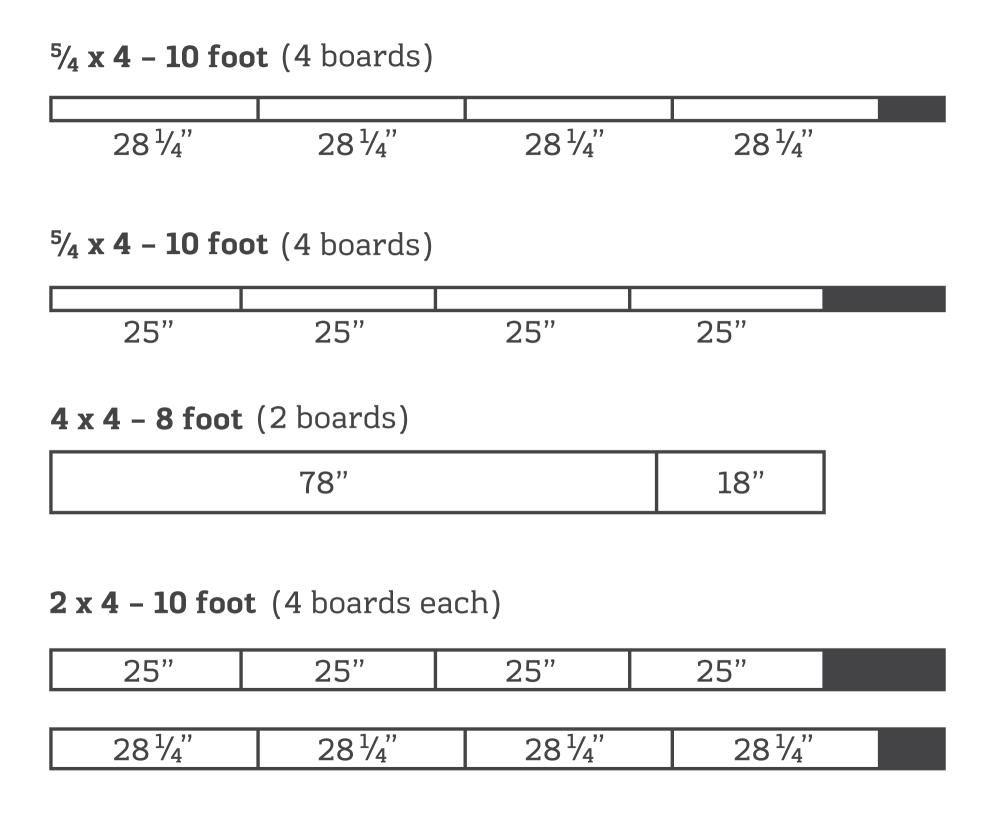
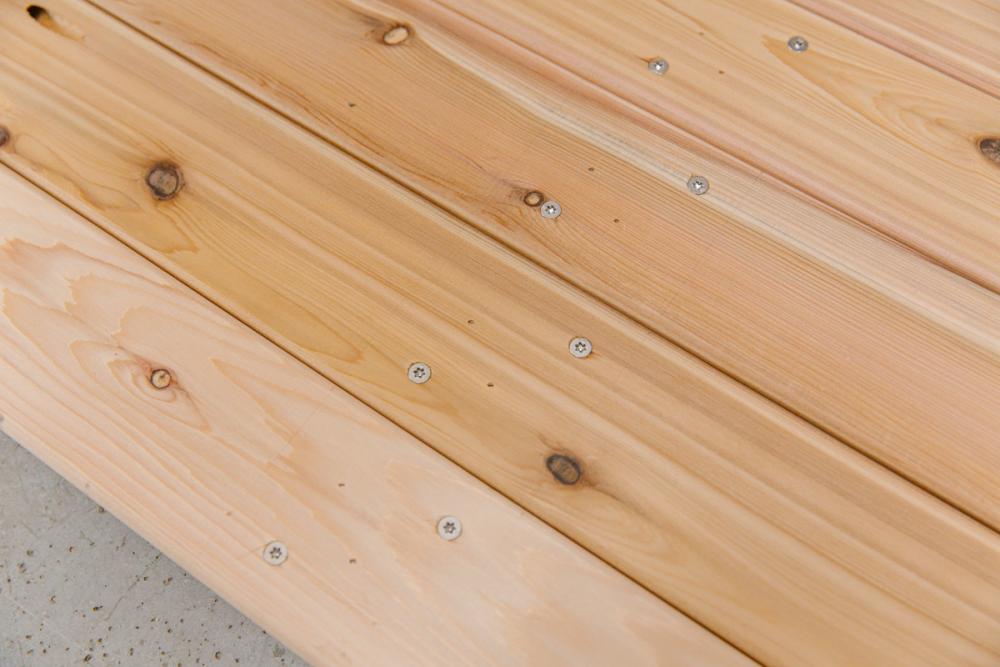
 From 5/4 x 4 - 10'
- Four (4) pieces at 28 ¼” (16 pieces total)
- Four (4) pieces at 25” (10 pieces total)
From 4 x 4 - 8'
- Two (2) pieces at 78”
- Two (2) pieces at 18”
From 2 x 4 - 10'
- Four (4) pieces at 25”
- Four (4) pieces at 28 ¼”
From 2 x 6 - 10'
- One (1) piece at 42”


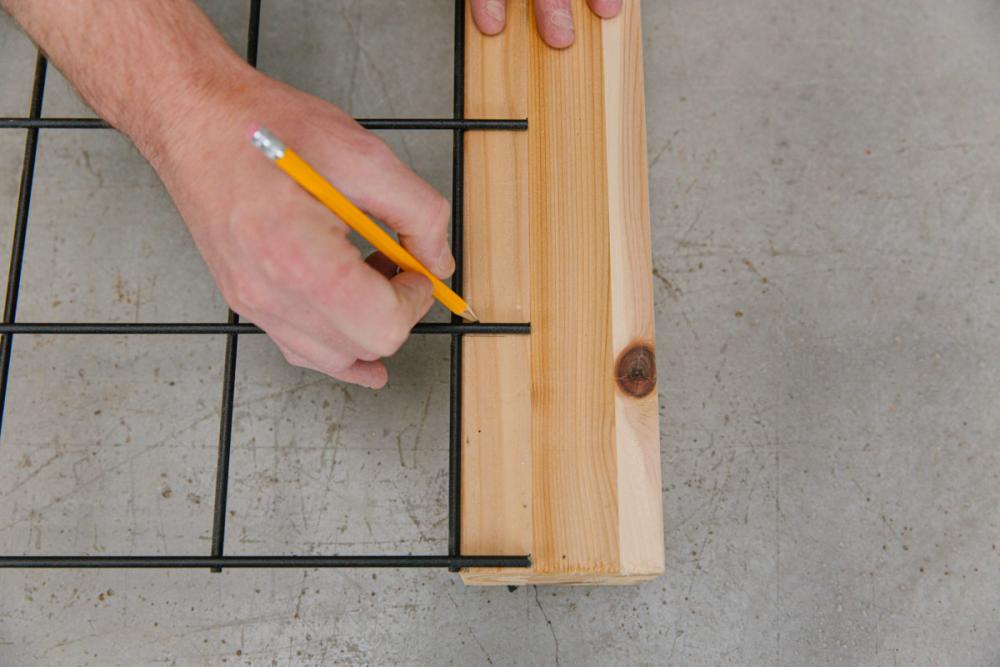
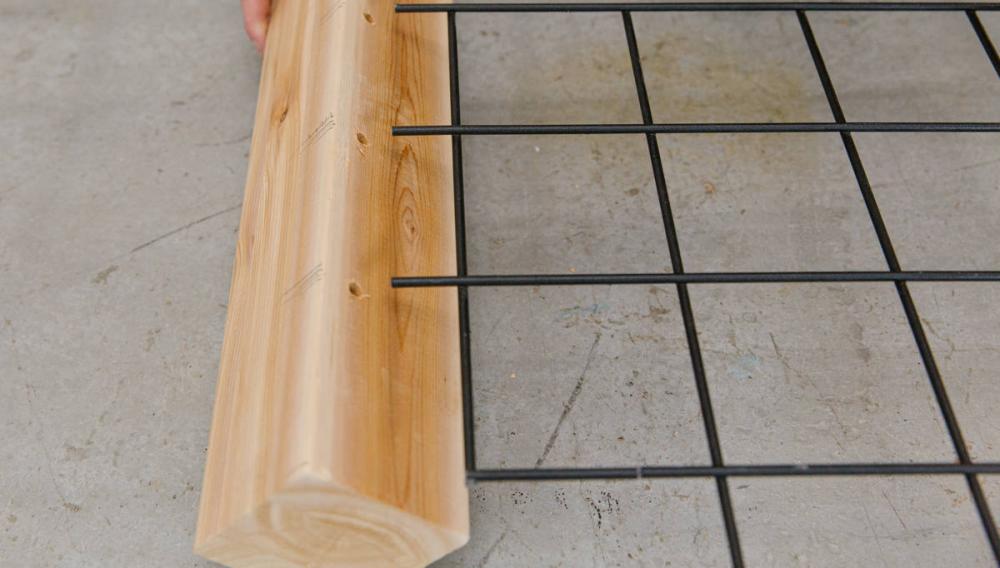
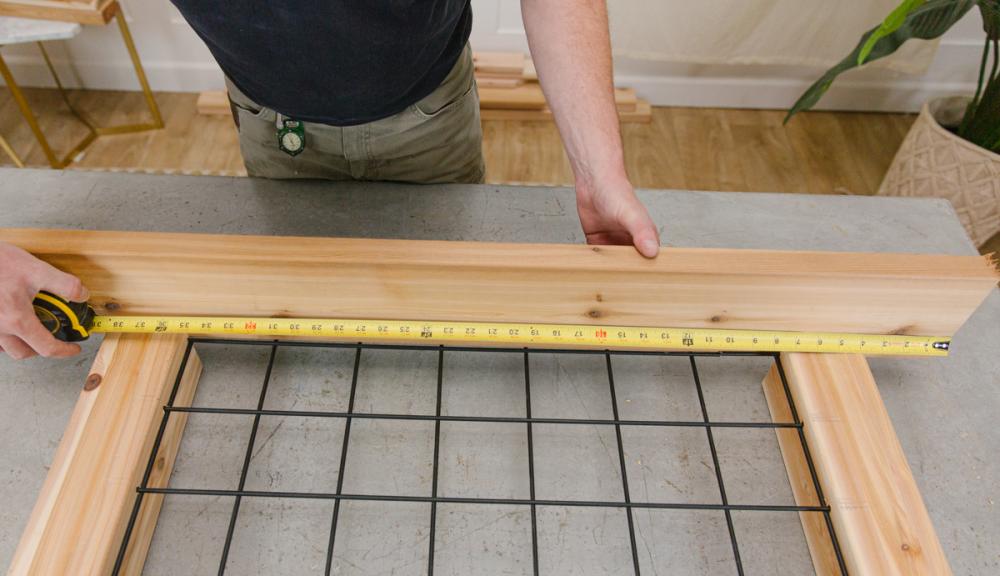
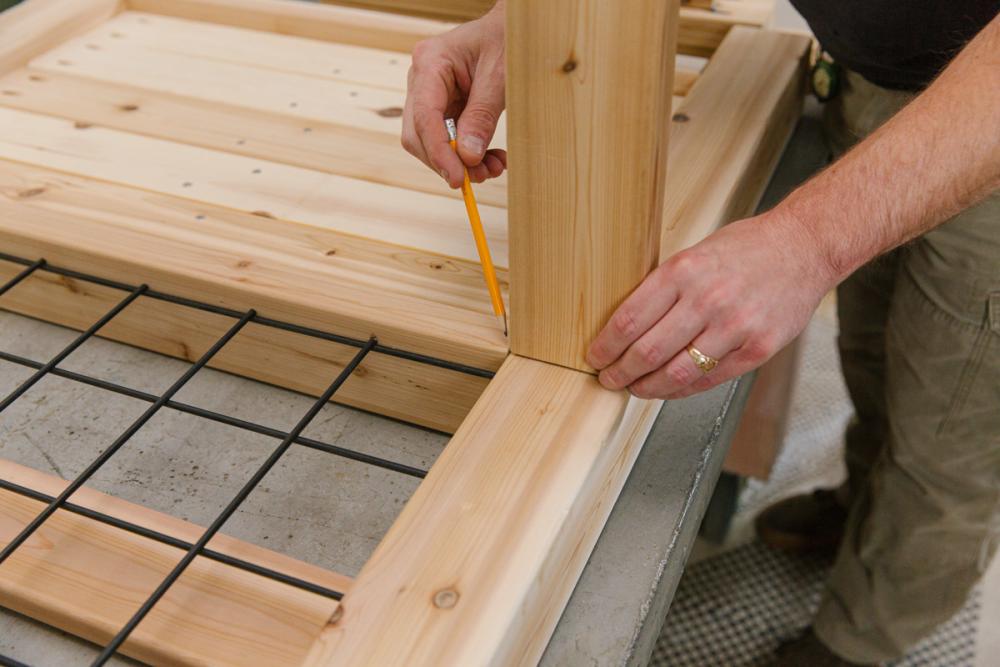
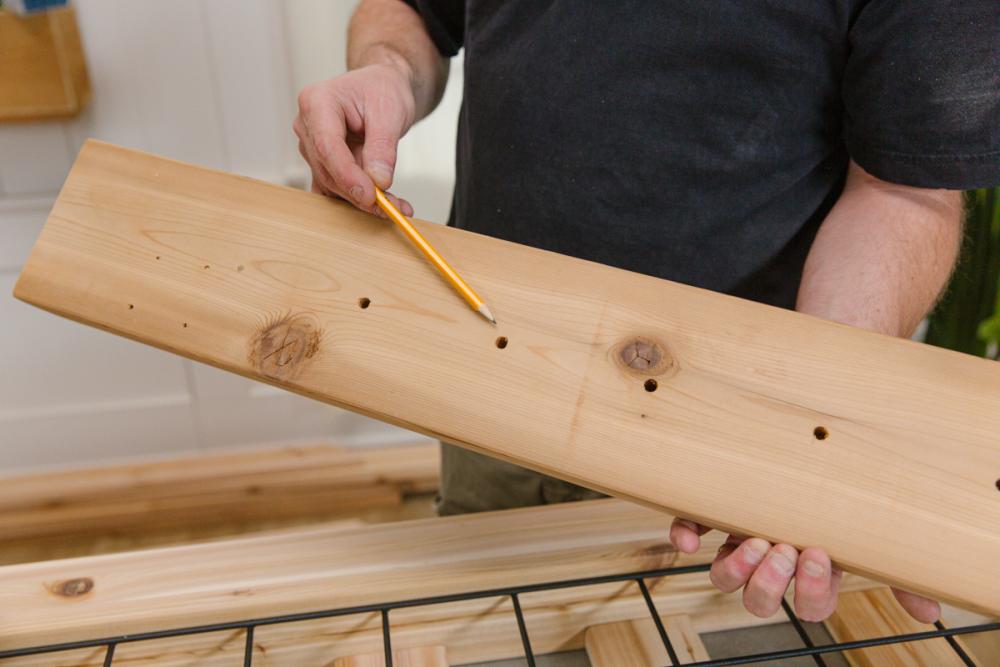
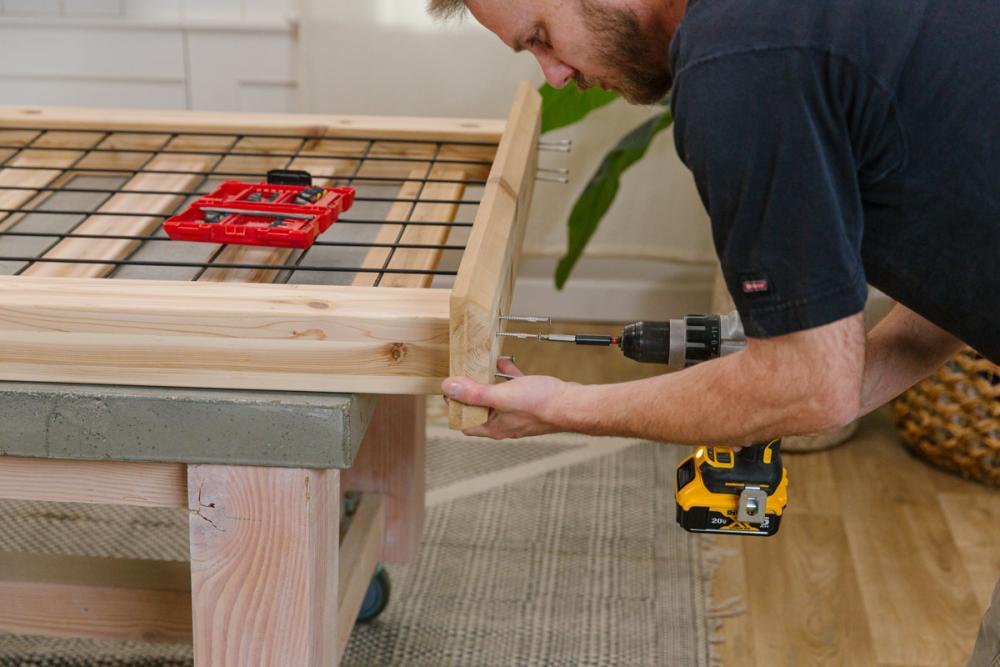
Step 2: Mark trellis frame, drill holes, and insert wire tails
The purpose of this step is to mark the spots on the inside (vertical) of the 78" four-by-four where you'll drill the holes for the tails of the hog wire.
Using the four-by-four as your outside trellis frame, lay the hog wire on top of the four-by-four with the long wire set inside (this will help ensure the two pieces of wood are parallel).
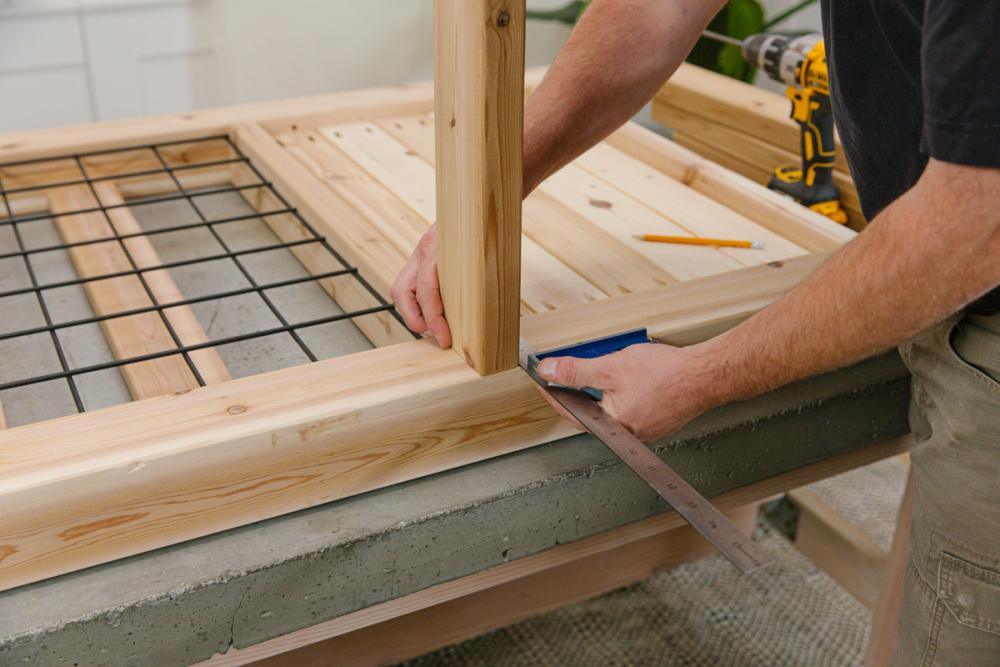
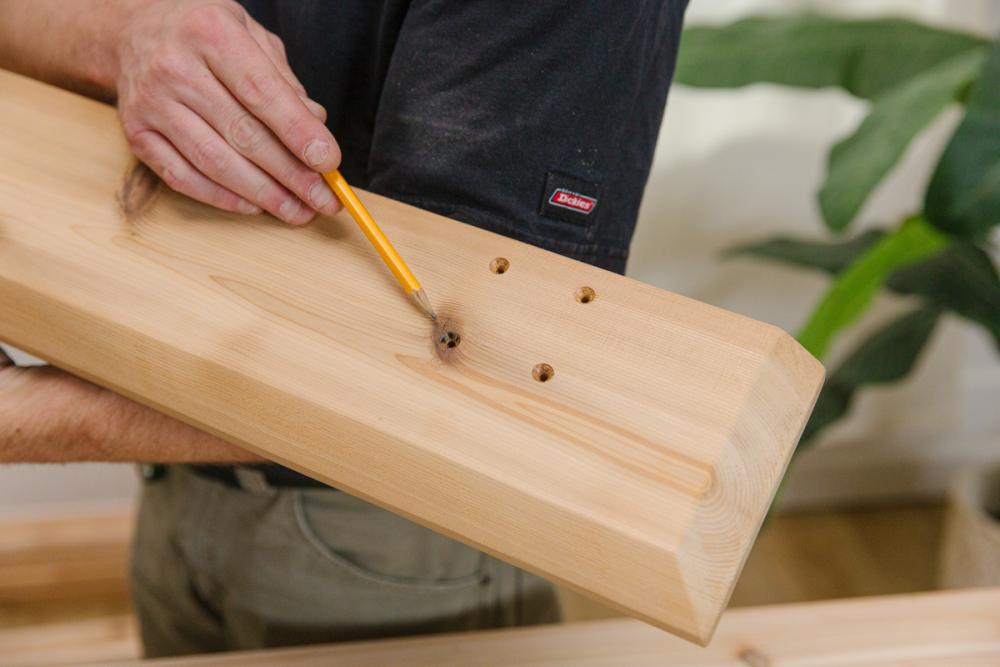
Make the marks on the top of the four-by-four. On the side (inside) of the four-by-four, measure ¾” from the edge to mark spots for holes. (Ben pre-drilled a pilot hole with a ⅛” drill bit and followed up with a 5/16” twist bit.) The outside row of wire squares should lay over the four-by-fours, allowing you to mark where each piece of metal contacts the posts. Mark both sides of where the wire sits on the four-by-four so that later, you'll know exactly where to drill holes.
Next, drill your holes to approximately 1 ½" deep and about ½” to ¾" from the front edge of the posts. This allows the rods to fit into the post and leave a gap for the privacy slats in later steps.

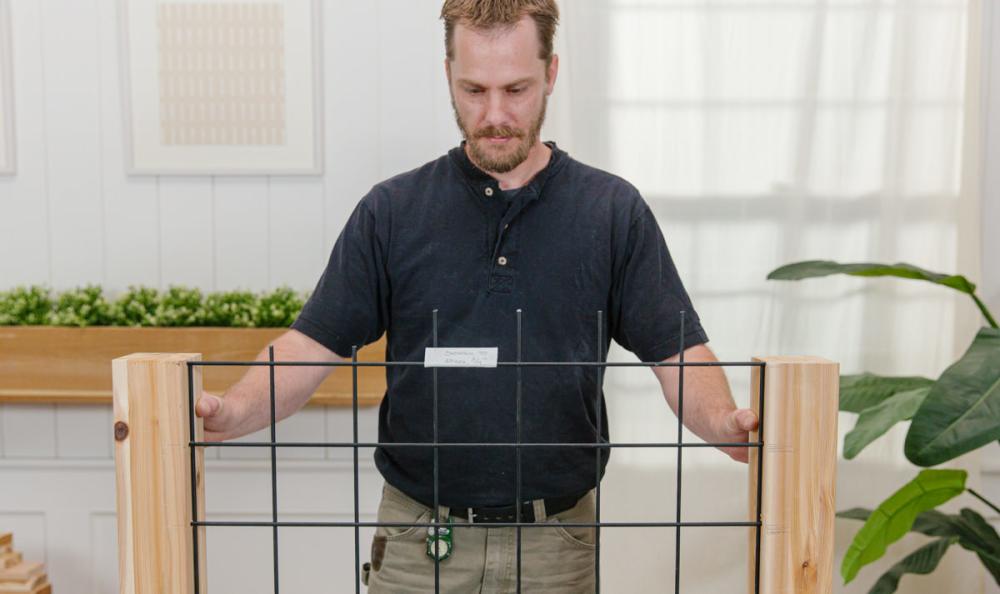
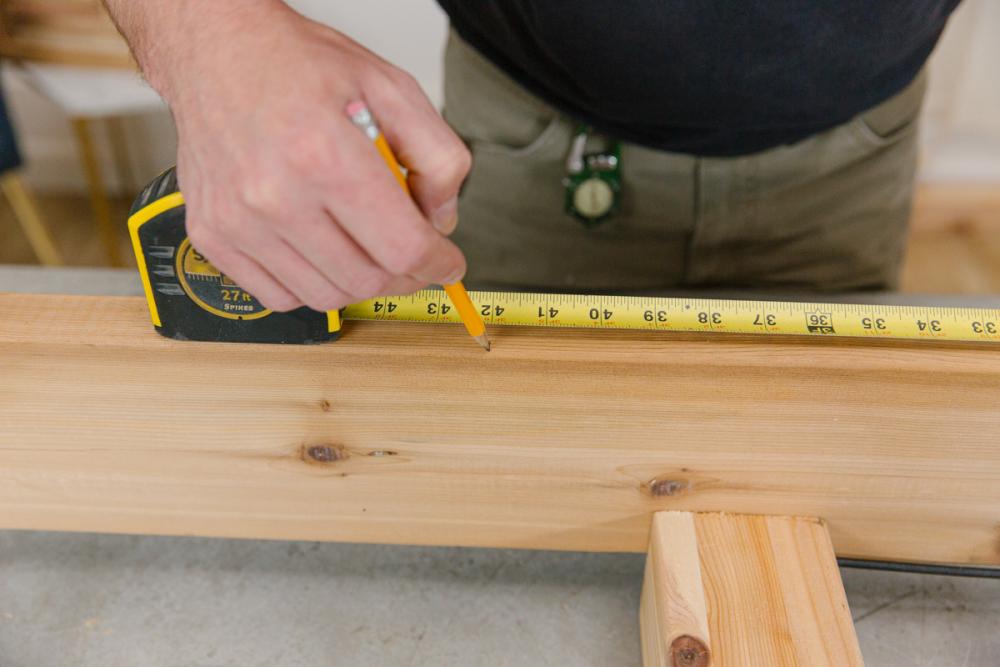
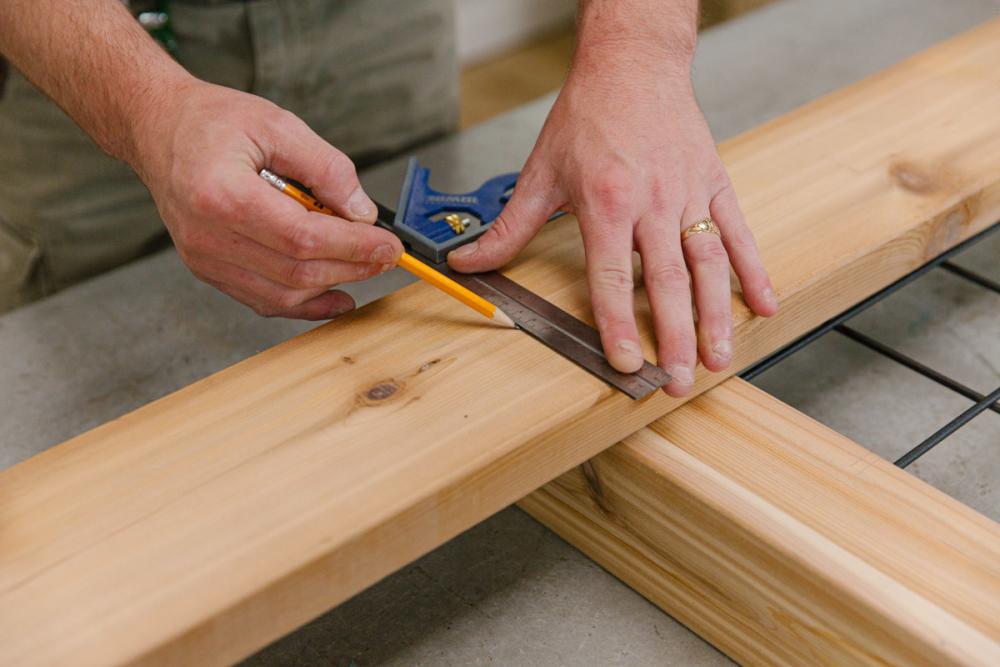
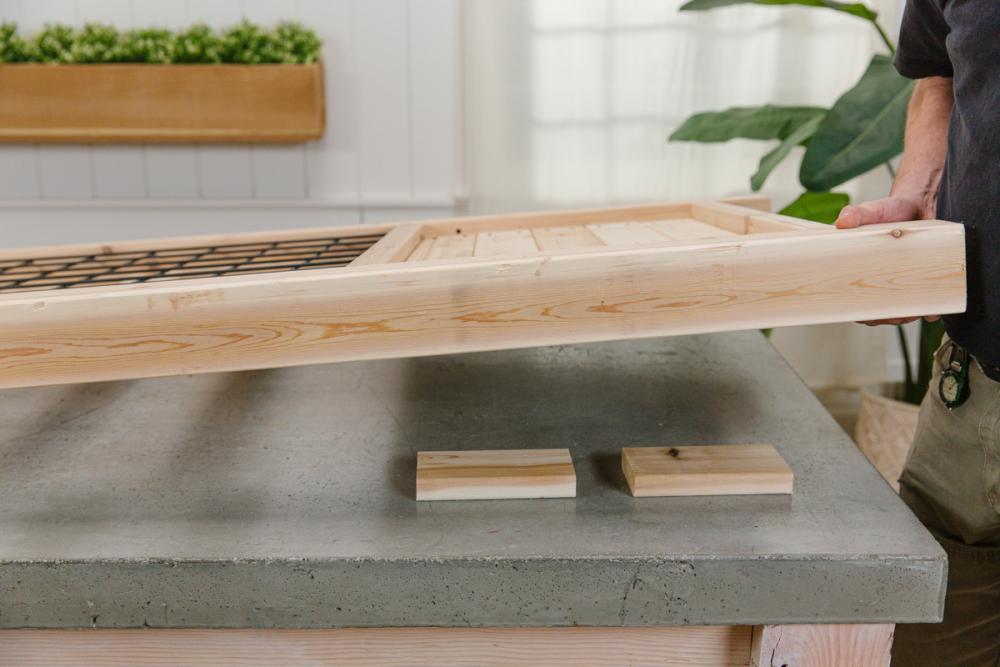
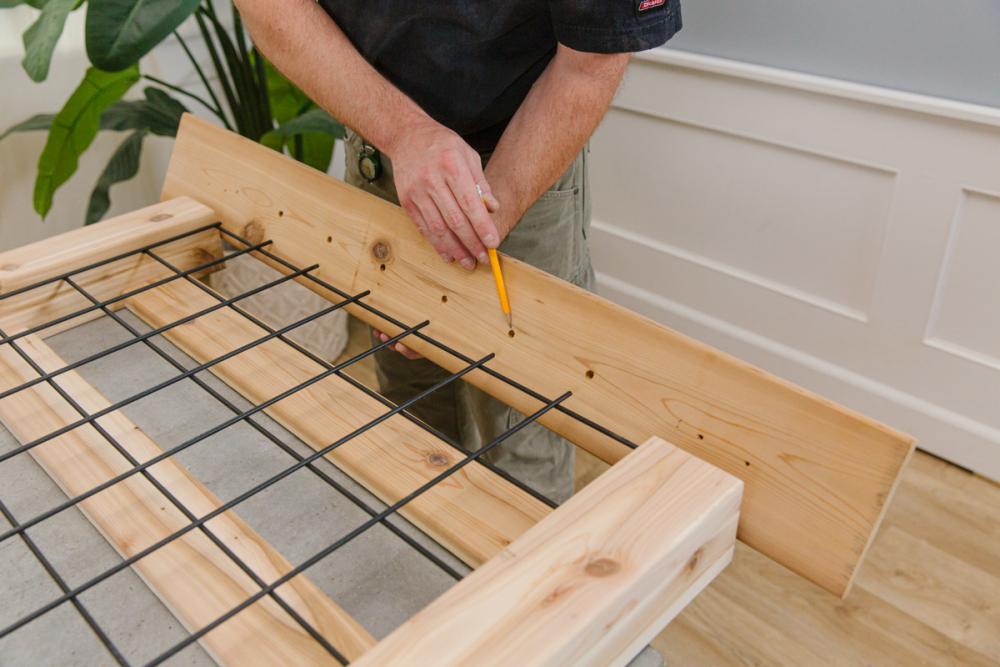
Step 3: Cut top cap and hog wire support
Mark the 42" top cap piece just as you marked the four-by-fours earlier, noting the spots to drill holes where you'll insert hog wire tails. Insert the hog wire ends into the posts and check to make sure everything's square. You'll screw this cap into place in Step 8.
Also, cut and fasten one (1) two-by-four on edge under the hog wire as support between the posts. Drill two (2) pocket holes into each end. Fasten the bottom with four (4) 2 ½” pocket hole screws and drive through the bottom and into the posts. This should complete your trellis portion leaving about 2' of post open to build a box around.


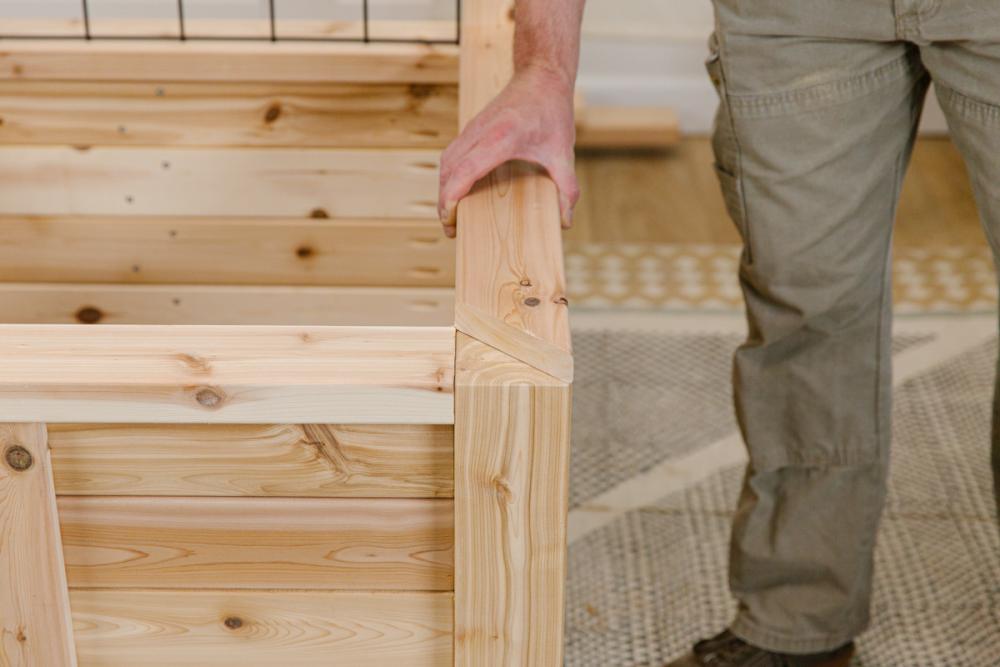
Note: Ben added an optional step here and cut the two-by-six (which will be laid flat) with a 45º bevel. This is purely for aesthetics and completely optional.
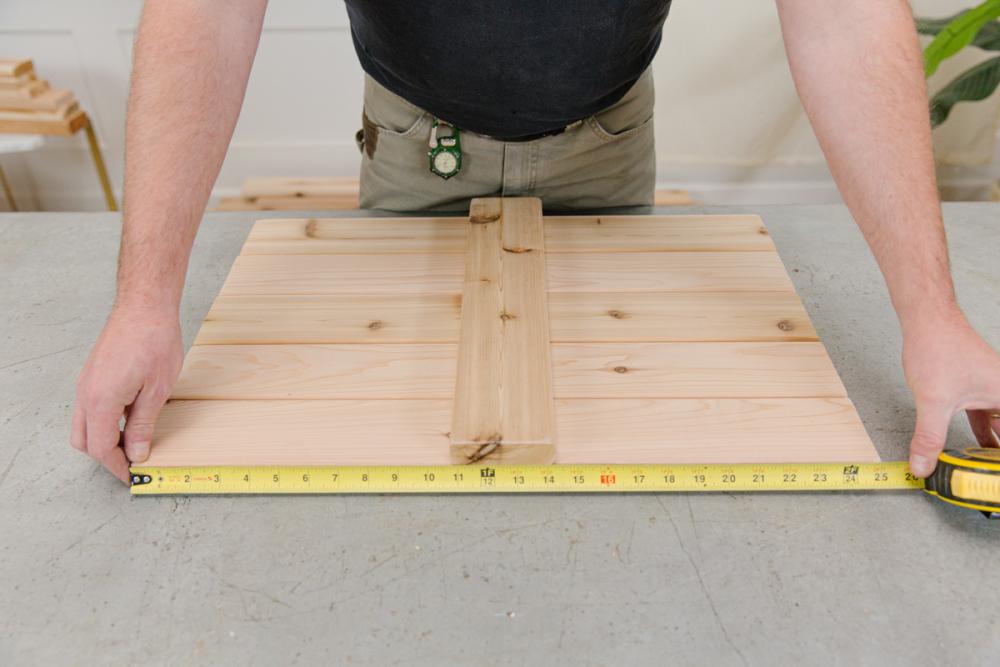
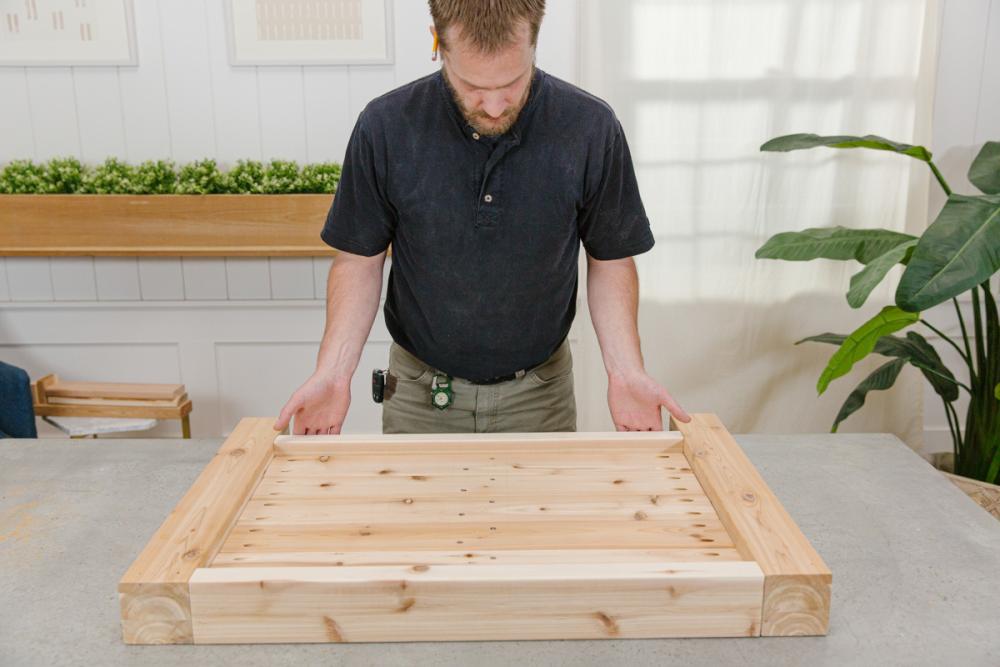
Step 4: Build sides for planter box
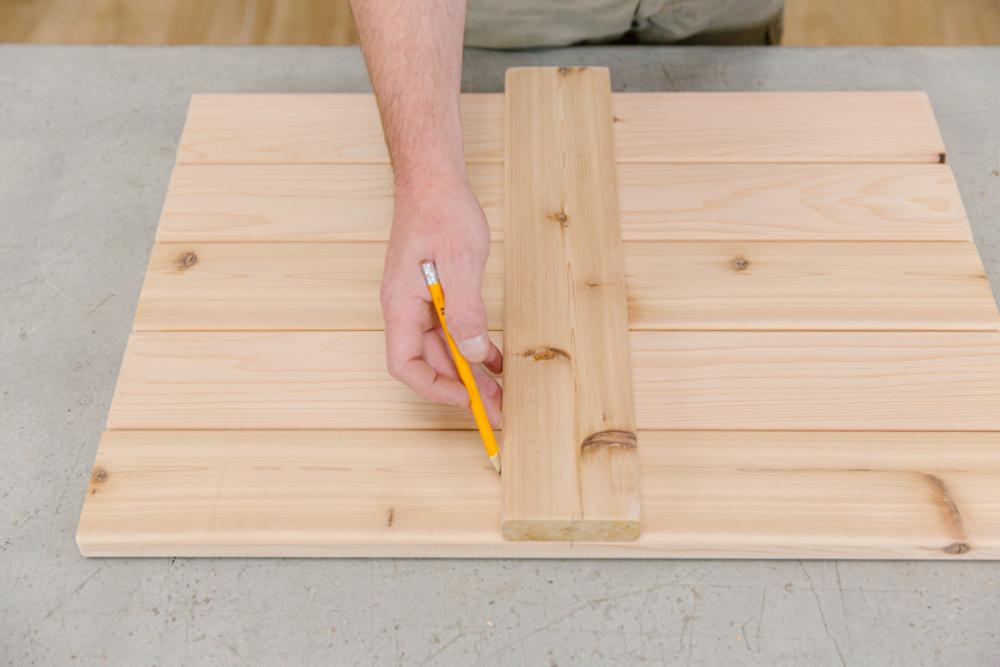
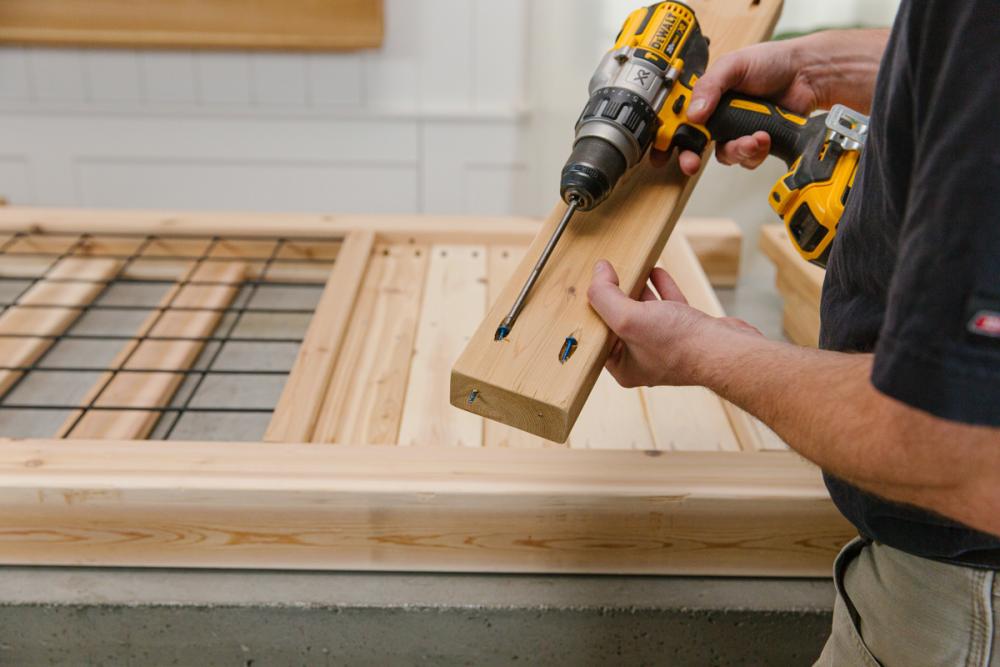
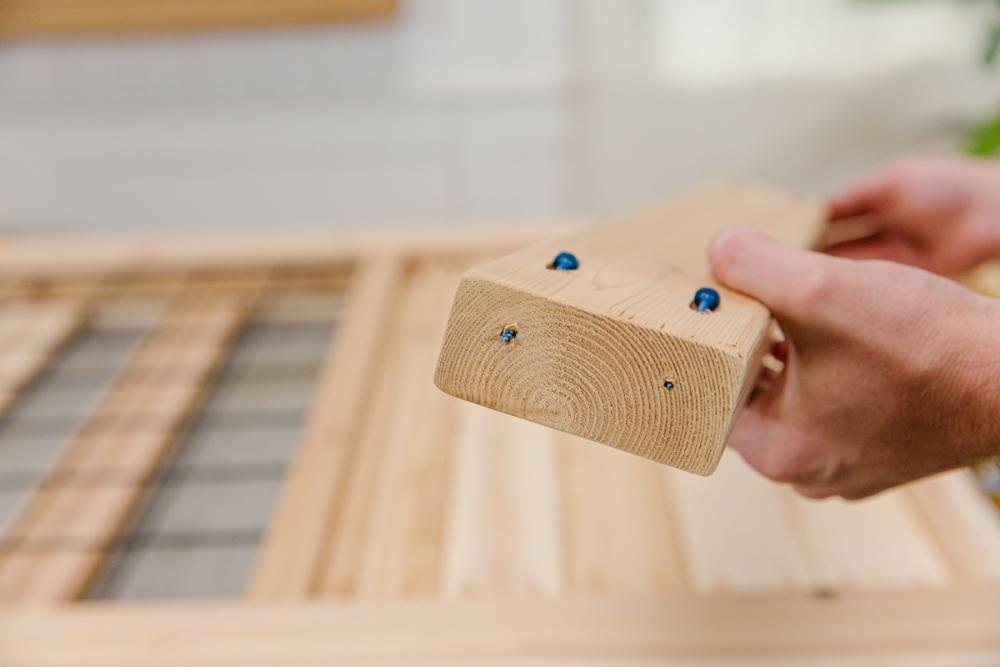
For the front and back panels, take your five (5) cut pieces of 5/4 x 4 x 28 ¼” and drill two (2) pocket holes into each end. Place the boards side-by-side on your work surface with the pocket holes facing up. Center a 17 ½” piece of 5/4 x 4 perpendicular to the 28 ¼” pieces and mark a faint line on each side.
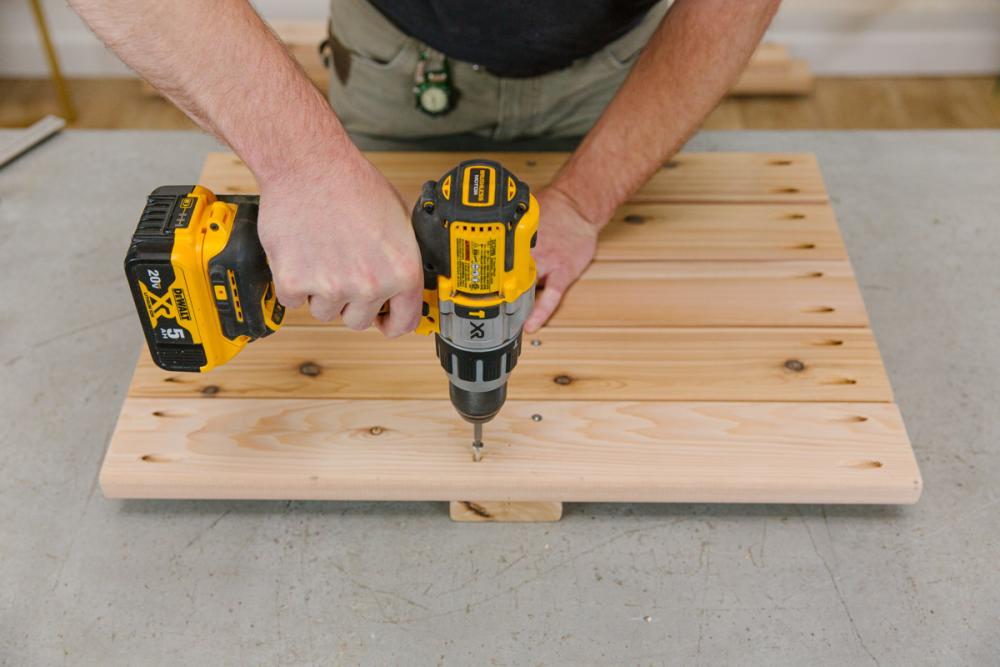
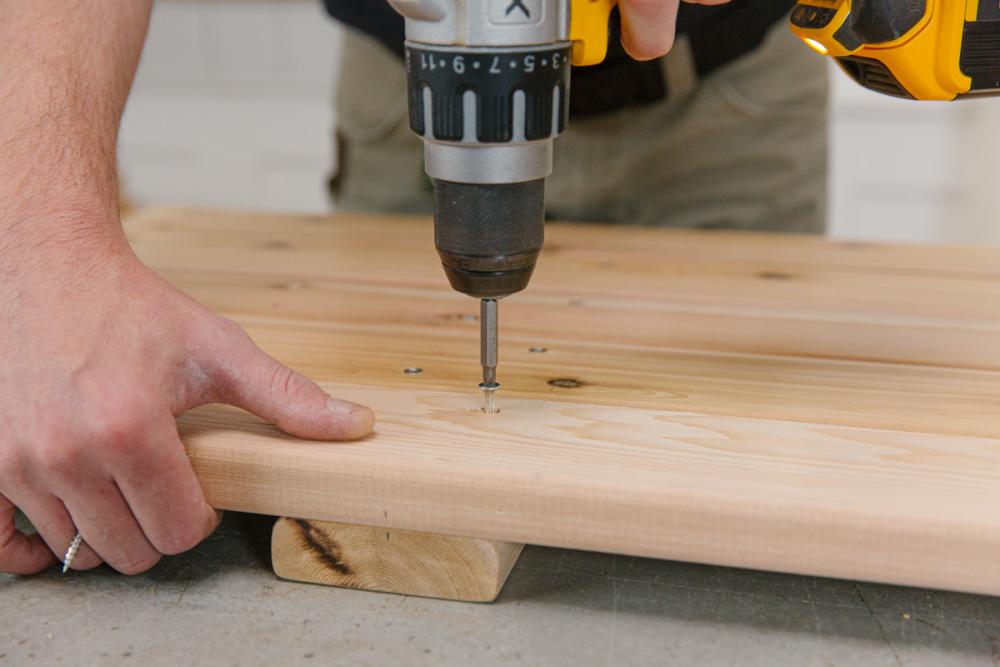
Now move the 17 ½” piece to the bottom (underneath the five other boards). Once you’re sure it’s centered again on the other side, fasten it in place by driving two (2) 1 ½” stainless wood screws through each of the five boards and into the center board (10 total screws). The faint lines will show you where you can place screws.
Repeat this step for the left and right panels using 25” boards (in place of the 28 ¼” boards).
Step 5: Assemble planter box sides
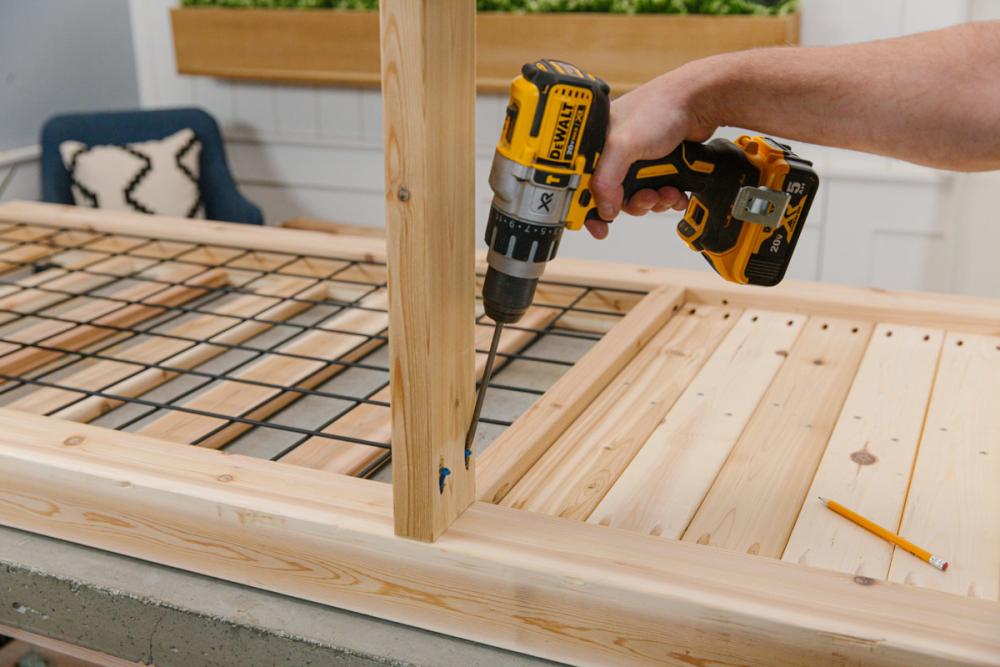
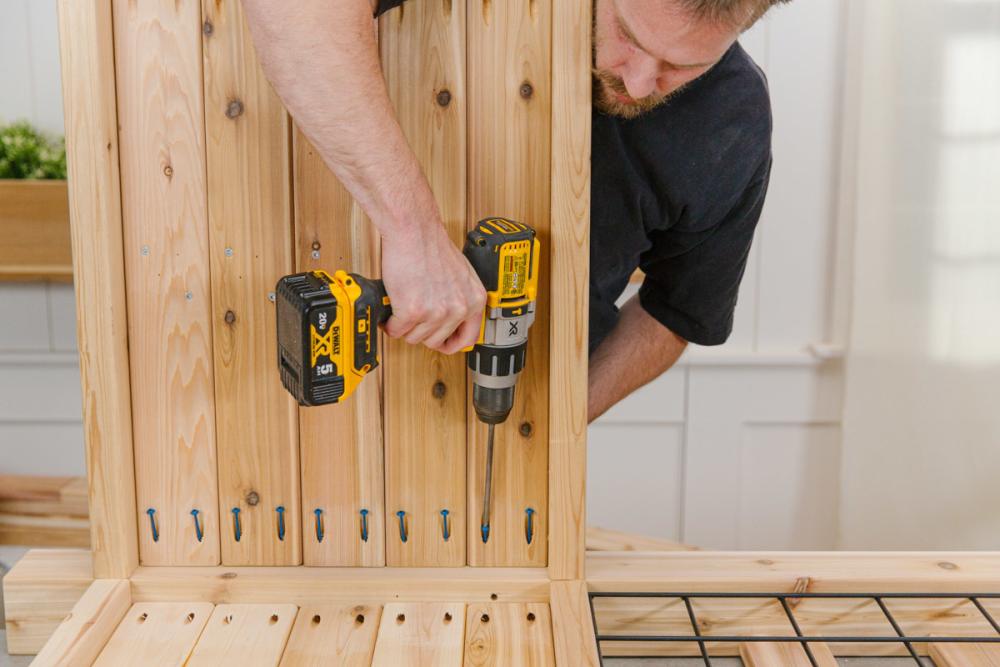
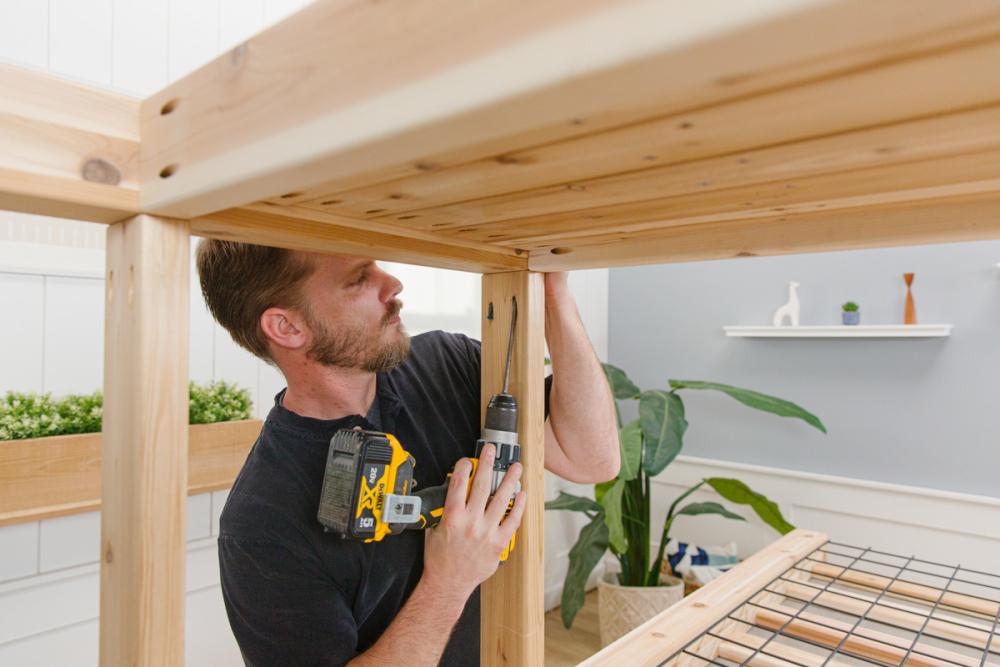
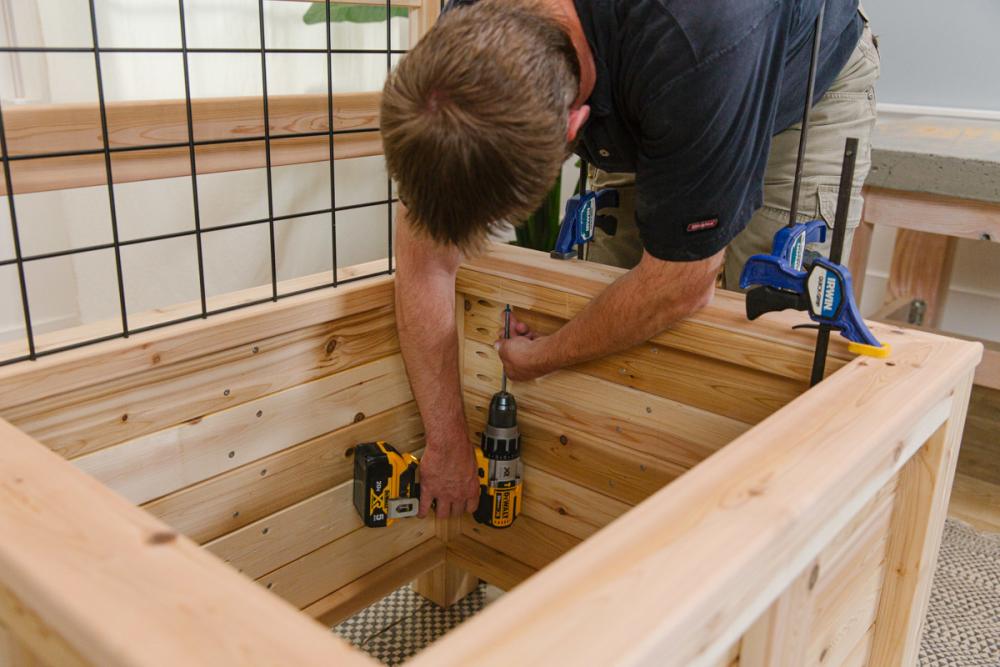
Our next step is filling in the bottom section under the hog wire, starting with the tall back. Use spacers underneath to “float” the panel (it should float in the center of the two-by-four). With the 28 ¼” back panel in place, attach the bottom rail and fasten it with four (4) 2” pocket hole screws; then fasten the ends of the panel into the four-by-fours with twenty (20) 2” pocket hole screws (10 per side).
With the trellis laying on the work surface, build and fasten the two sides and front. For the first side, hold a two-by-four at the same level as the back’s top rail (the one just below the hog wire). You can verify that it’s square by holding a miter square or combination square in place before joining the side top rail to the four-by-four post using two (2) 2 ½” pocket hole screws.
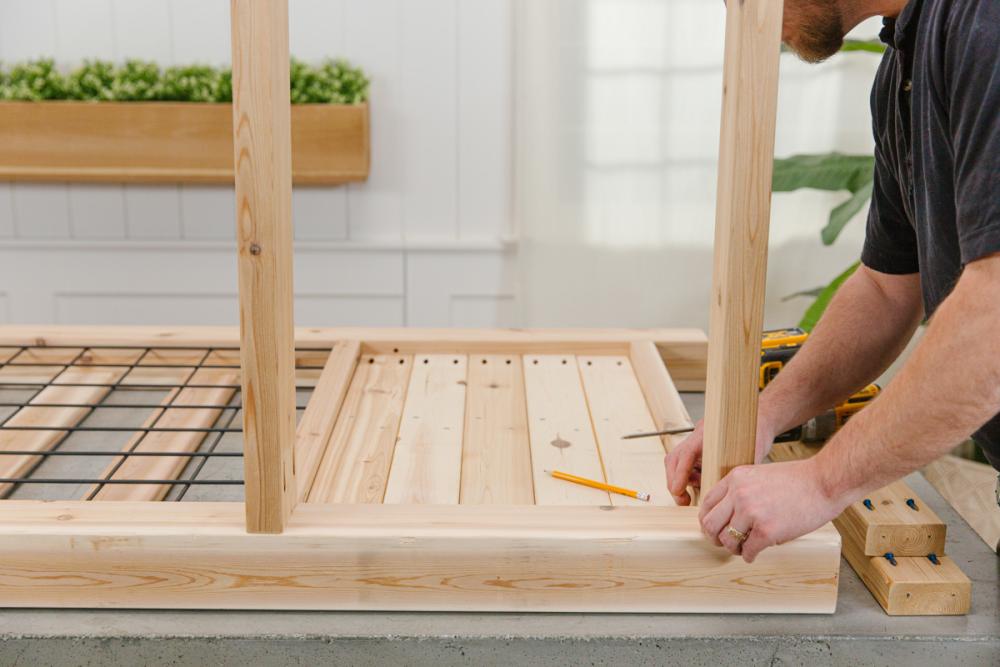
Now for the bottom rail: Line it up at the same level as the back’s bottom rail. Double-check your placement before fastening to make sure your side panel fits into place. Adjust the bottom rail’s position if necessary. Once you know it’s in the right place, sink two (2) 2 ½” pocket hole screws into place. (Be sure to fasten snugly, but don’t overdrive.) Now two rails are in place for the first side; repeat for the two rails on the other side.
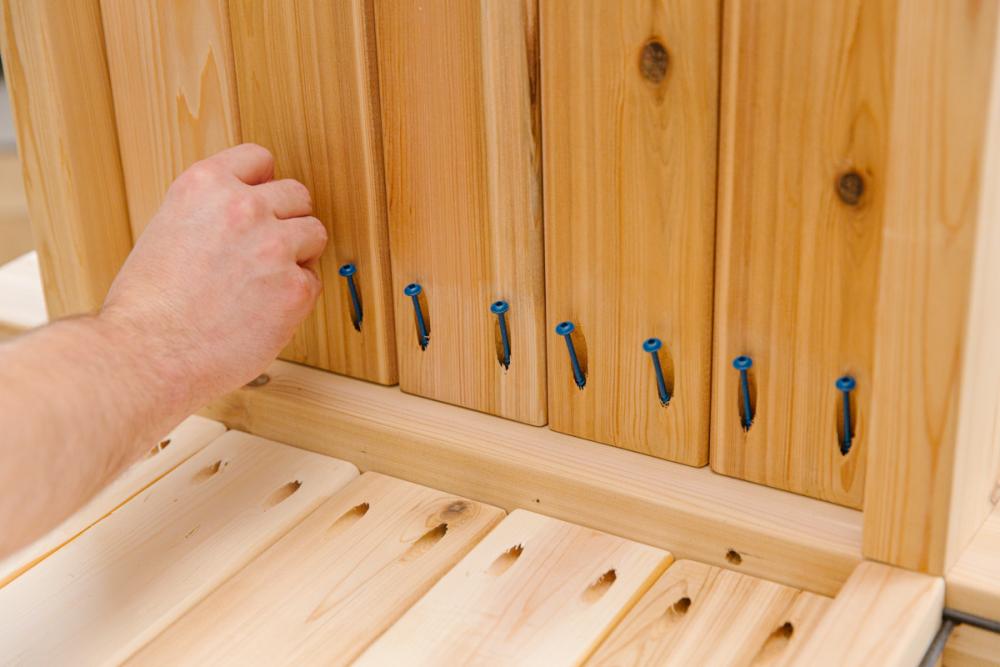
With the top and bottom rails in place, you can fasten the 25” side panels into place with a few 2” pocket hole screws. A scrap 1”-thick piece of wood can help ensure the panel is centered on the rails. Ben recommends only partially sinking the screws in case you need to remove panels for adjustments.
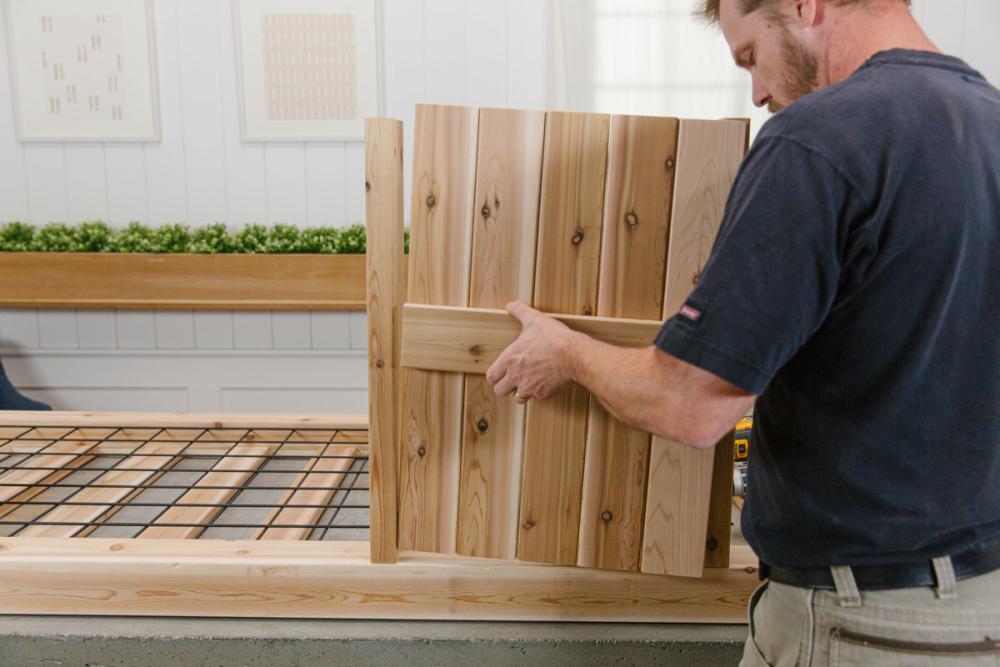

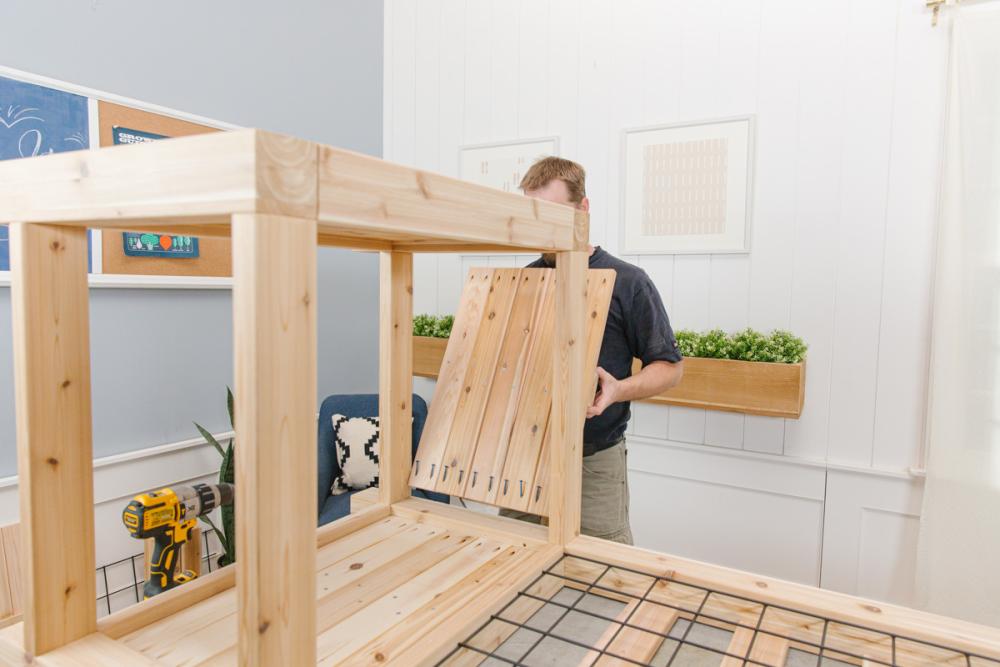
Step 6: Assemble front of planter box and fasten panels
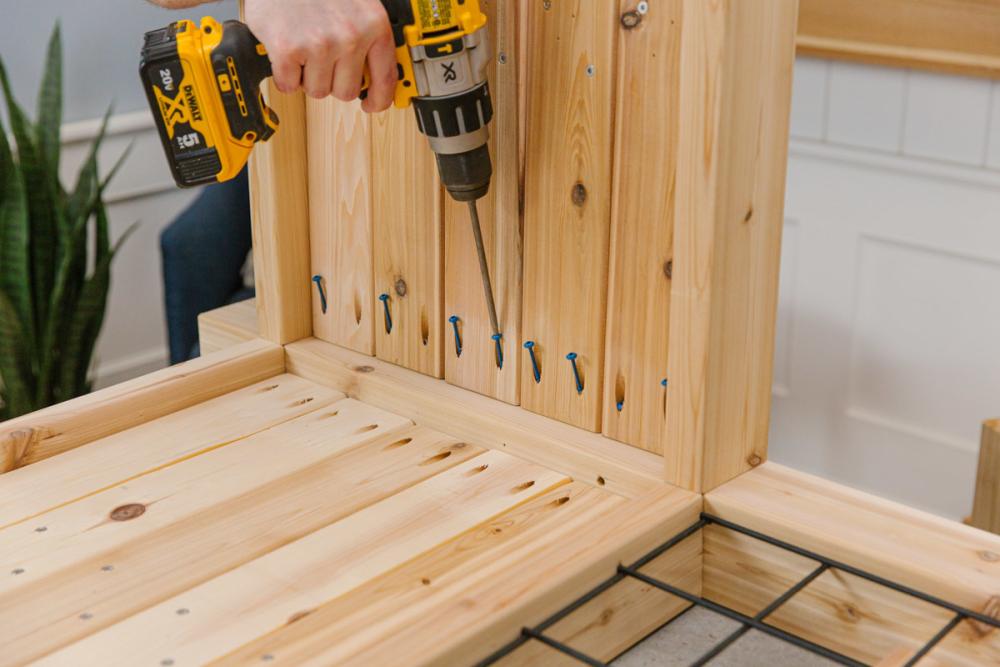
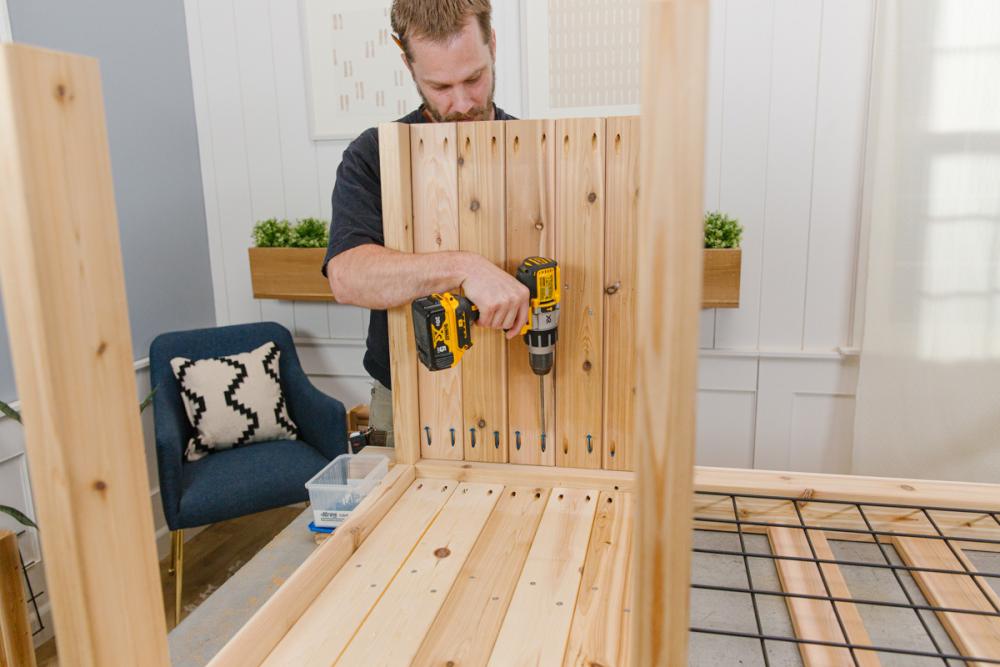
Next, assemble the front of the trellis by fastening the two 18” four-by-fours to the top and bottom rails and filling in with your front panel. Fasten the top rail to one of the four-by-four legs with 2 ½” pocket hole screws. Then, fasten the other end of the top rail to the other four-by-four leg. Insert the front panel (floating on spacers) to establish the placement of the bottom rail. Fasten the bottom rail and then fasten the panel to both sides with ten (10) 2” pocket hole screws per side.
Now that the front section is assembled, place it on top of the four side rails. Line up each side and adjust before fastening with 2 ½” pocket hole screws. (We removed the side panels for this part to ensure things were properly aligned.) You can now fasten all pocket hole screws in the panels.
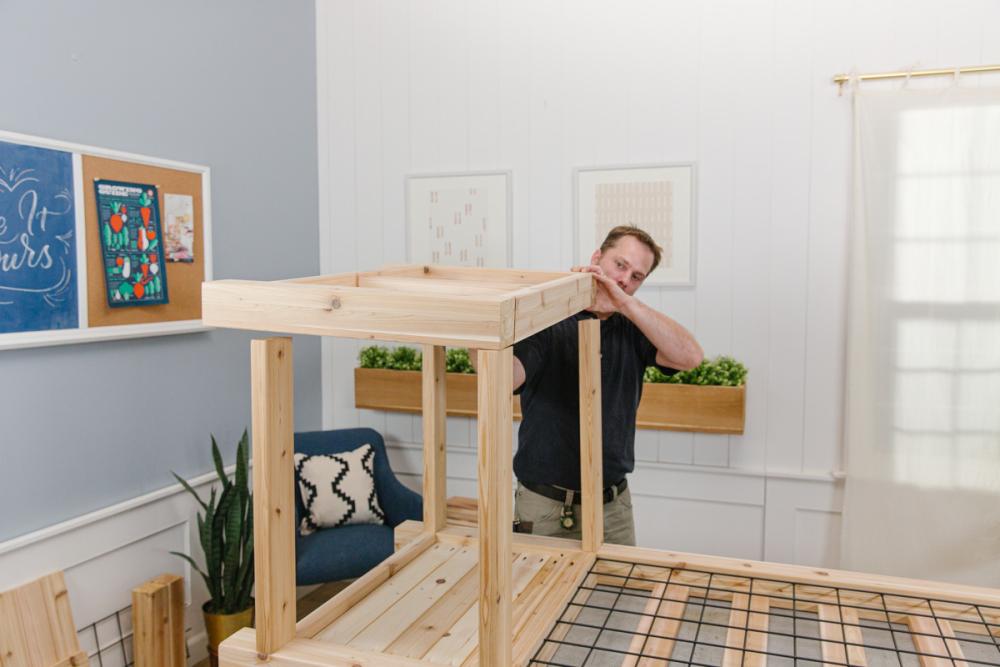
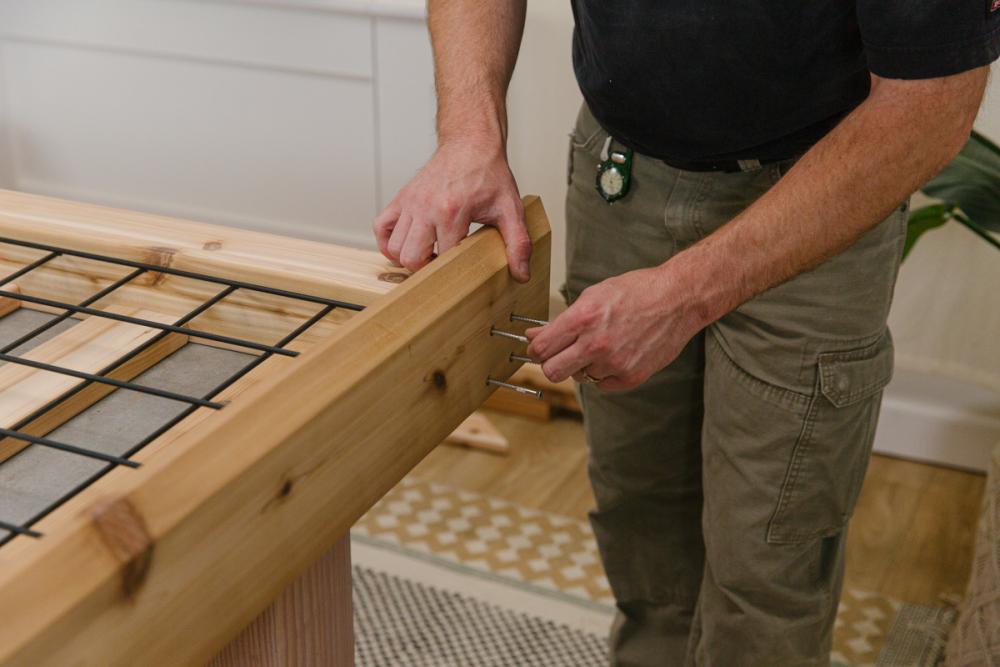
Step 7: Mount top cap
Line up the holes in the bottom of the cap with the tails on the top edge of the hog wire and set the top rail in place. Fasten four (4) 2 ½” stainless wood screws into the top of both four-by-fours, noting the top rail is flush on the back and overhangs to the front.
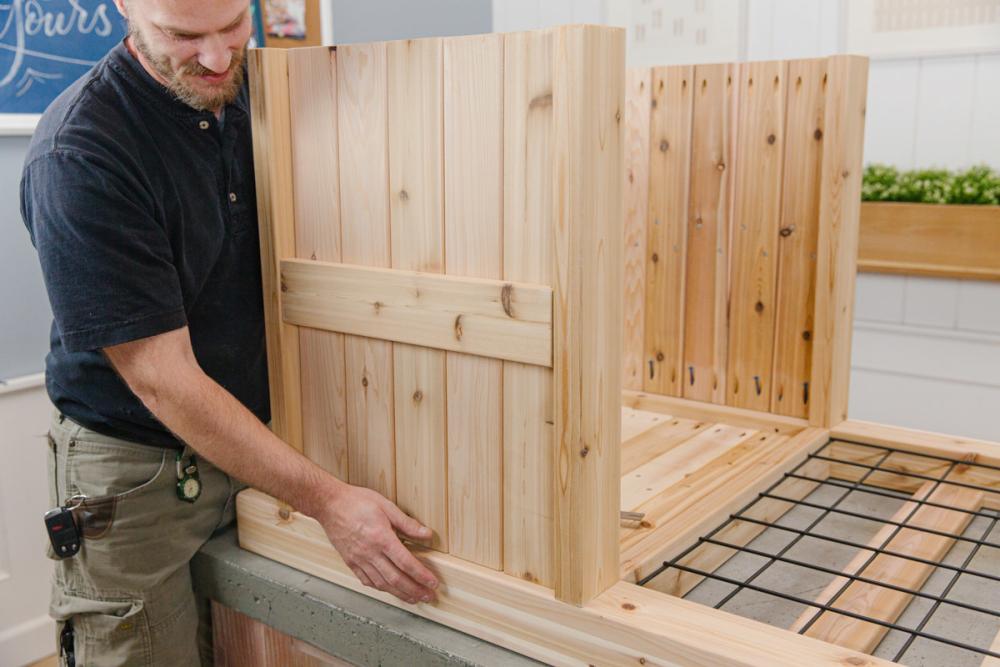
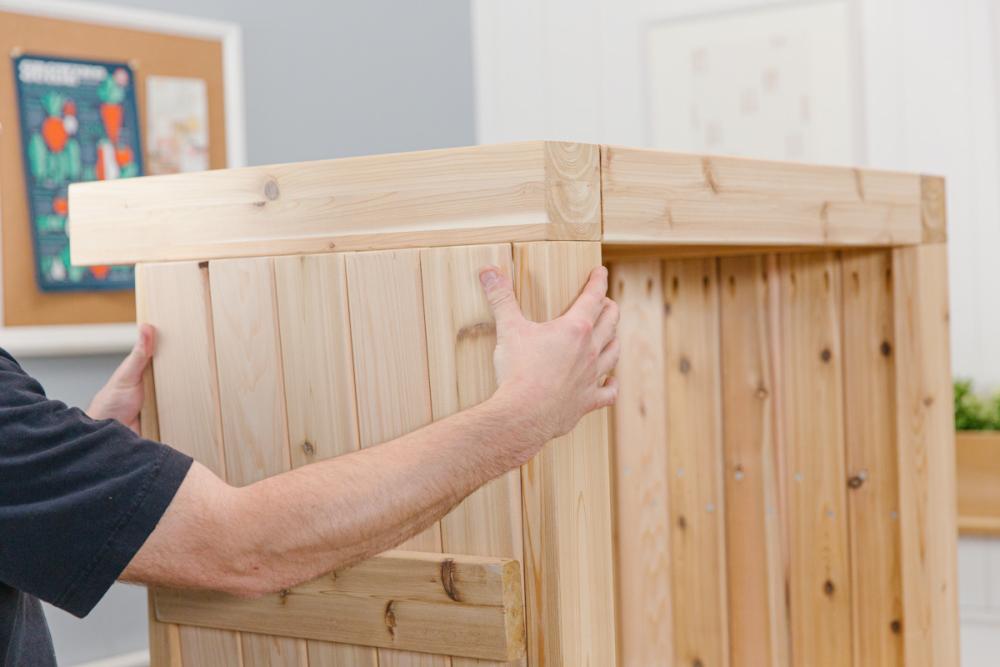
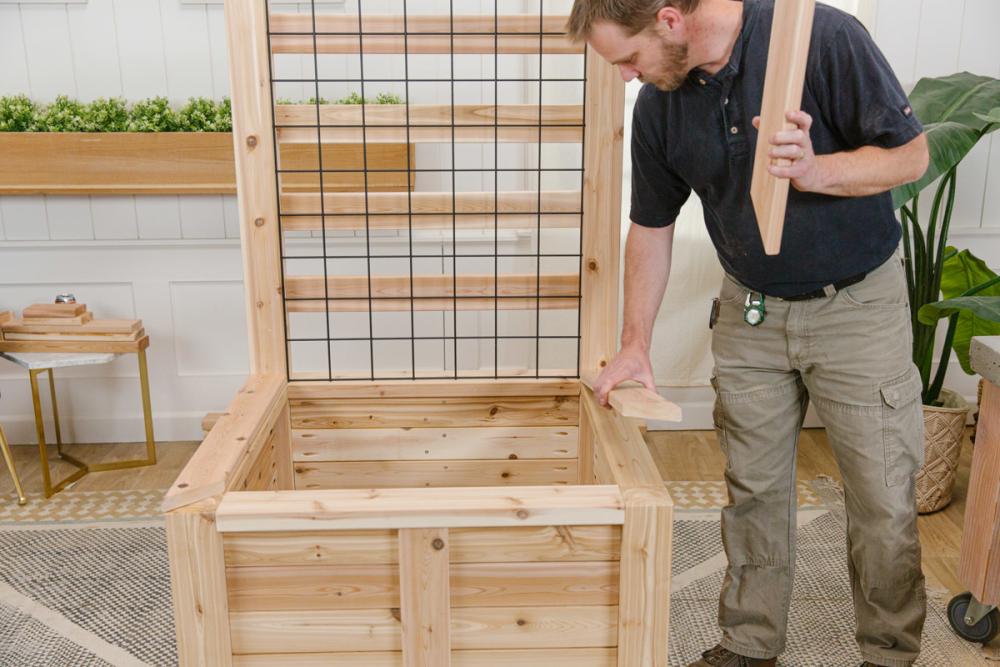
Step 8: Picture-frame front and sides
Place the trellis upright. Now you can use 5/4 x 4 decking boards to cover the frame starting at the front. If you want square cuts (so the ends pass the corners to meet and cover the side end grain), they should be about four courses tall.
Cut three pieces of 5/4 x 4 to cap the box. Our dimensions were 28 ½” for the sides (measured from the square cut back to the outside tip of the 45º at the front). Cut the front with opposing 45º angles that measure 35 ¼” along the outer (longer) side. Clamp your rail caps and fasten them by driving screws upward through the upper panel rail into the picture frame (we used four or five screws per side). Make sure you don’t use screws longer than 2 ¼”, or else the screw will come up through the picture frame (we used 2" screws).

Step 9: Add finishing touches
Privacy slats
This planter and trellis are plenty sturdy already. For added privacy (especially before a climbing vine has time to fill in the trellis), Ben opted to add six slats behind the hog wire. Cut the back privacy slats, drill pocket holes in the ends, and fasten them with 2 ½” pocket hole screws. Make sure the slats are flush to the rear of the posts with the pocket holes pointed to the rear, and leave a gap between them so the sun can reach the plants.
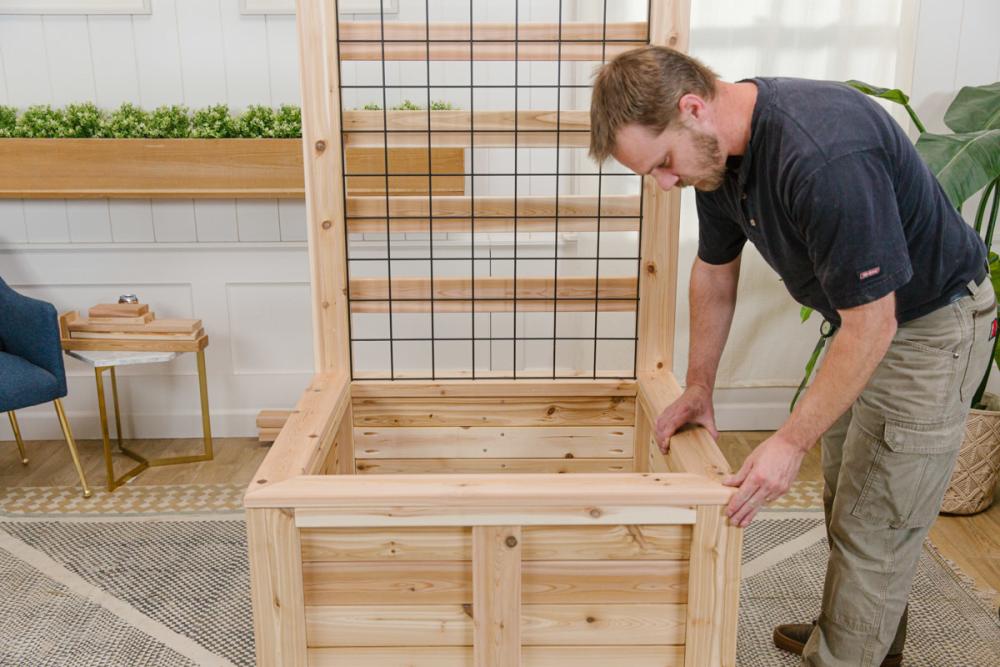
 Plant shelves
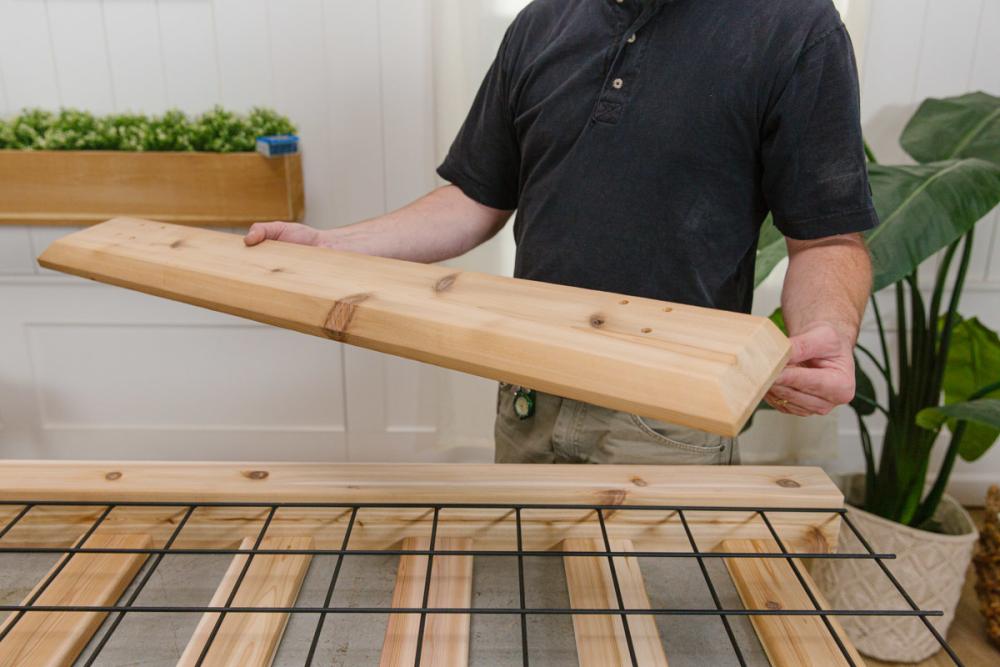
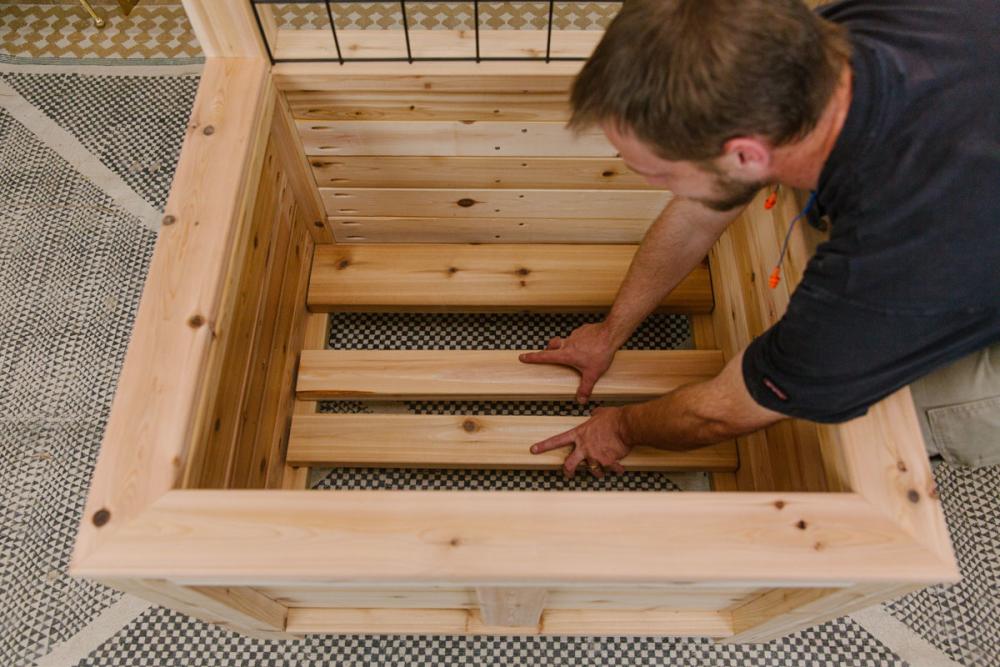
You’ll notice Ben didn’t design a bottom for this planter box—that’s because they generally require a liner (or else the dirt and water will bleed through the sides as well as the bottom). Instead of a bottom, he designed shelves for potted plants, which give you the flexibility to switch out some or all of the plants. To do this, cut four (4) boards that span between the two side bottom rails. These boards provide a platform to stack potted plants on and customize yourself. Using potted plants on shelves also makes the planter a lot easier to move.
Now with the planter base and trellis built, cut a few planks to close the bottom, leaving a ⅛” gap between the boards for water to drain. When you finish and raise your planter, we suggest placing weed fabric in the base to hold the soil.
 Stain or paint
You can leave your privacy screen unfinished, or apply an exterior-grade finish or paint. For help choosing a stain, check out our exterior stain guide.
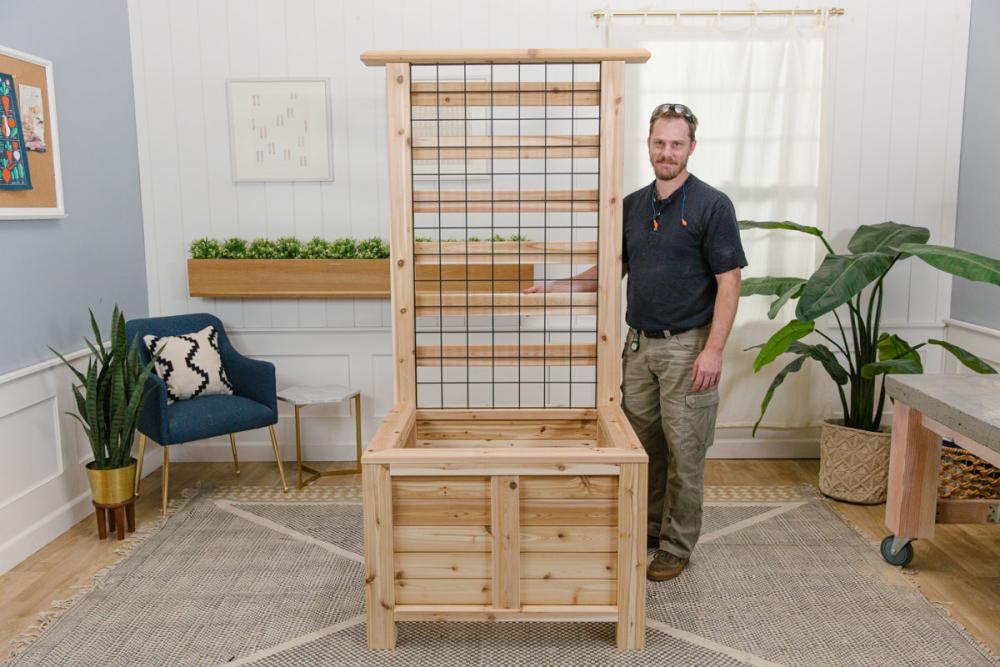
And there you have it! Your deck privacy screen is ready for its new home outside. For more outdoor DIY inspiration, check out our easy elevated planter box and get a leg-up on fall pruning with our pruning guide.